What are Sensitvity Labels?
Organizations have the need to tag their documents regarding sensitivity. This need is arising among ISO 27001. Sensitivity labels in Microsoft 365 enable organizations to tag documents regarding their sensitivity. In general the sensitivity of a document can be classified roughly in three categories: public, confidential, highly confidential. Each organization might have a different understanding when to use which sensitivity label.
How to assign Sensitivity Labels in SharePoint with PowerShell?
In this article, I will describe following four steps to assign sensitivity labels with PowerShell:
- Make sure that sensitivity Labels are enabled
- Create Azure AD App Registration with the permissions to assign sensitivity labels for SharePoint Sites
- Enable metered APIs and Service in Microsoft Graph.
- Run the script, which is provided in this article
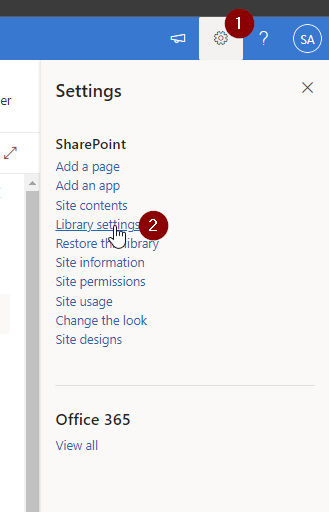
How to enable Sensitivtiy Labels for SharePoint? (Short Summary)
In order to enable sensitivity labels, you need to enable sensitivity labels in Microsofts Purview (Compliance Center) as a global administrator.
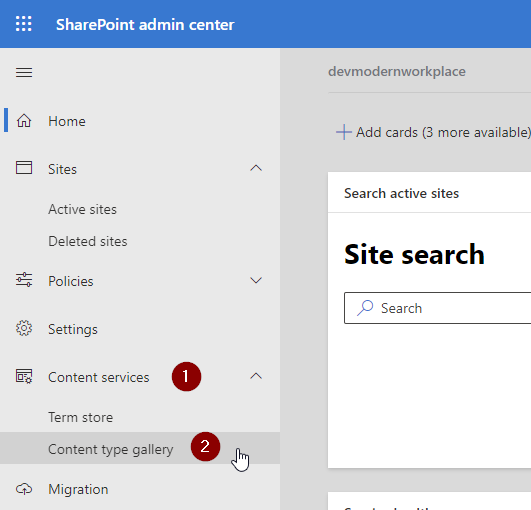
- Sign in to Purview Portal as a global administrator
- Click on Information protection -> Labels

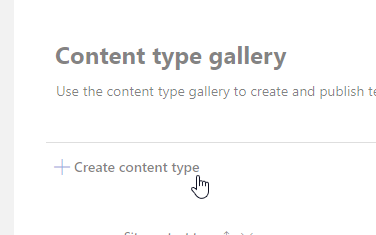
- Click on Turn on now

Now you can set Sensitivity Labels in SharePoint.

Details about about supported file types, limitations etc. can be obtained here: Enable sensitivity labels for Office files | Microsoft Learn
How to configure the Azure App Registration to set Sensitivity Labels in SharePoint
Make sure that you have configured following permissions for your Azure App Registration if you want to authenticate via client secret or certificate. This permissions allow you to update documents in all SharePoint Sites:
Sites.ReadWrite.All | Application | Read and write items in all site collections |
If you want to do it only on one Site, use Sites.Selected permission and add the permission as per following documentation:
If you want to get familiar on how to create an Azure App registration, check out following article, where I describe in detail, what an Azure App Registration is and how you can configure it in order to use MS Graph.
How to configure Azure App registration for MS Graph | SPO Scripts
I have configured the app with the Sites.ReadWrite.All permission and authenticate with a certificate.

Enable Metered Graph API services for MS Graph
The API to assigning sensitivity labels for SharePoint files involve additional cost for metered API services. In order to set up metered Graph API services, I have created an resource by following the article: Enable metered APIs and services in Microsoft Graph. The pricing is based on the ammount of API calls (currently $0.00185 (USD) per API call as per 09th October 2023). Metered APIs are currently only available in Microsoft Global environment.
You can create the resource for metered APIs by running following cmdlet in the Azure cloud shell:
az resource create --resource-group myRG --name myGraphAppBilling --resource-type Microsoft.GraphServices/accounts --properties "{`"appId`": `"myAppGUID`"}" --location Global --subscription mySubscriptionGUIDIn my case it looks like this:
az resource create --resource-group MeteredAPI --name myGraphAppBilling --resource-type Microsoft.GraphServices/accounts --properties "{`"appId`": `"90747925-550c-4658-850f-b19d26ed1a43`"}" --location Global --subscription "Azure subscription 1"Running it in Azure cloud shell, I received following output:
PS /home/mod> az resource create --resource-group MeteredAPI --name myGraphAppBilling --resource-type Microsoft.GraphServices/accounts --properties  "{`"appId`": `"90747925-550c-4658-850f-b19d26ed1a43`"}" --location Global --subscription "Azure subscription 1"
Resource provider 'Microsoft.GraphServices' used by this operation is not registered. We are registering for you.

Registration succeeded.
{
  "extendedLocation": null,
  "id": "/subscriptions/ff5e7ad9-f695-45b4-9a68-e0bb85c02731/resourceGroups/MeteredAPI/providers/Microsoft.GraphServices/accounts/myGraphAppBilling",
  "identity": null,
  "kind": null,
  "location": "Global",
  "managedBy": null,
  "name": "myGraphAppBilling",
  "plan": null,
  "properties": {
    "appId": "90747925-550c-4658-850f-b19d26ed1a43",
    "billingPlanId": "e81f3875-03e9-47ee-b1db-5da2697468bb",
    "provisioningState": "Succeeded"
  },
  "resourceGroup": "MeteredAPI",
  "sku": null,
  "systemData": {
    "createdAt": "2023-09-23T20:04:50.6961011Z",
    "createdByType": "User",
    "lastModifiedAt": "2023-09-23T20:04:50.6961011Z",
    "lastModifiedByType": "User"
  },
  "tags": null,
  "type": "microsoft.graphservices/accounts"
}
PS /home/mod>
If you try it without the registration, you will receive following error message
Set-MgDriveItemSensitivityLabel_AssignExpanded: Payment Required. Ensure that your application is able to call this premium API.For details see https://aka.ms/graph-metered-overview

Status: 402 (PaymentRequired)
ErrorCode: paymentRequired
Date: 2023-09-23T19:27:33

Headers:
Cache-Control                 : no-store, no-cache
Transfer-Encoding             : chunked
Vary                          : Accept-Encoding
Strict-Transport-Security     : max-age=31536000
request-id                    : bb607711-f87b-4974-87a4-632a70d5985a
client-request-id             : 152c36fa-971c-47c1-aa00-6342fe6d9c3b
x-ms-ags-diagnostic           : {"ServerInfo":{"DataCenter":"Germany West Central","Slice":"E","Ring":"5","ScaleUnit":"000","RoleInstance":"FR1PEPF00000B9E"}}
Date                          : Sat, 23 Sep 2023 19:27:33 GMT
How to assign a Sensitivity Label for a SharePoint File with PowerShell
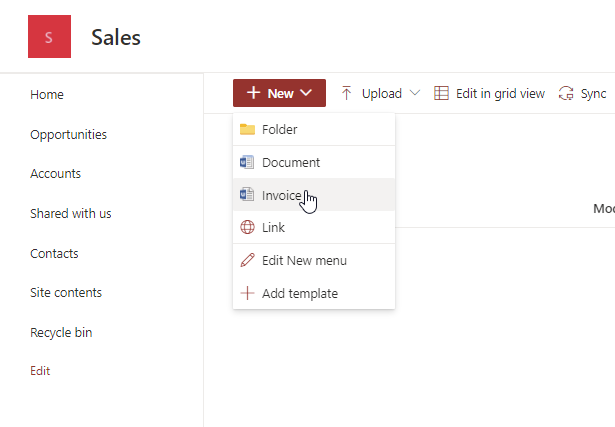
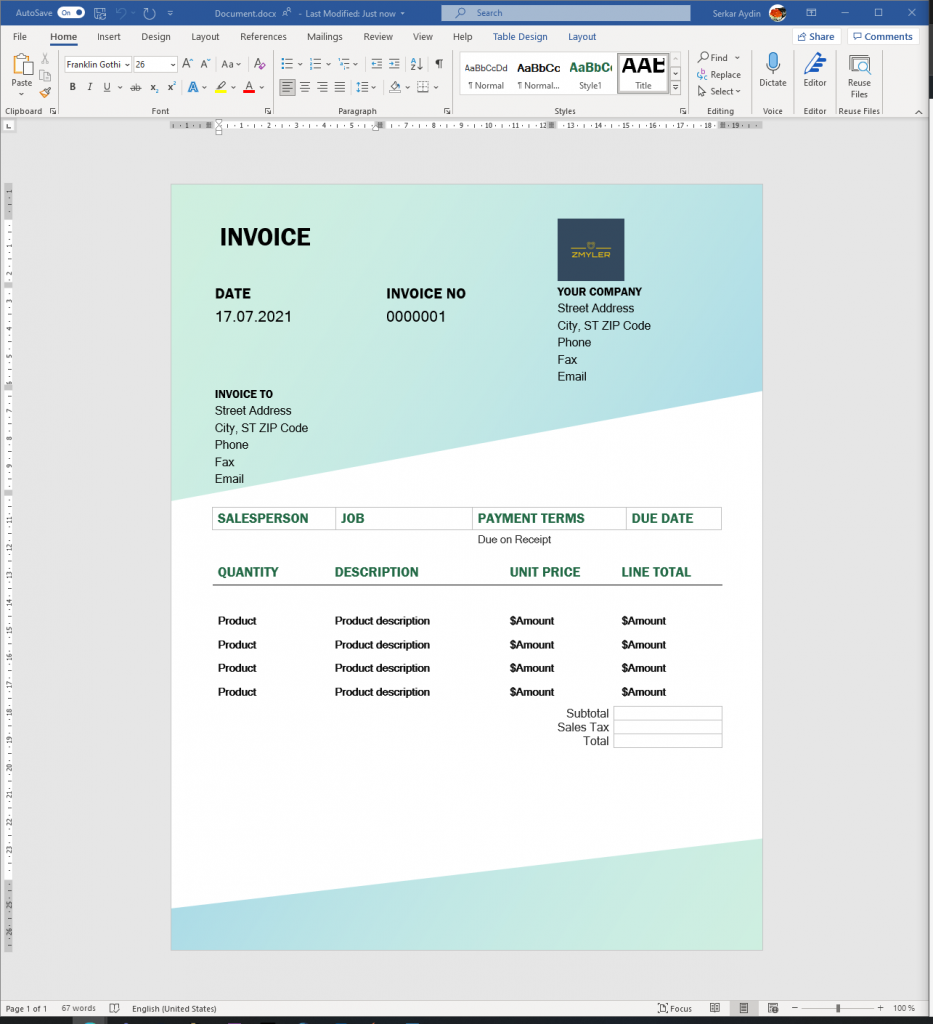
Let’s assume, we want to change the sensitivity label for this file to confidential:

If you want to assign a sensitivity label for one file, you first need to identify the DriveItem ID and Drive ID for the SharePoint file, where you want to set the sensitivity label. You can get the DriveItem ID by executing the script in following article:
In order to assign a sensitivity label, I wrote following function:
function Assign-SensitivityLabel
{
    [CmdletBinding()]
    param (
        [Parameter(Mandatory = $true)]
        $DriveId,

        [Parameter(Mandatory = $true)]
        $DriveItemId,

        [Parameter(Mandatory = $false)]
        $AssignmentMethod = "privileged", # The assignment method of the label on the document. Can be obtained here: https://learn.microsoft.com/en-us/dotnet/api/microsoft.informationprotection.assignmentmethod?view=mipsdk-dotnet-1.10

        [Parameter(Mandatory = $false)]
        $JustificationText = "No justification provIded", # Justification why this sensitivity label is applied.

        [Parameter(Mandatory = $true)]
        $SensitivityLabelId # Id of the sensitivitylabel. Can be obtained here: https://compliance.microsoft.com/informationprotection/labels
    )

    $Body = @{
        Any                = $null
        AssignmentMethod   = $AssignmentMethod
        JustificationText  = $JustificationText
        SensitivityLabelId = $SensitivityLabelId #Trusted People https://compliance.microsoft.com/informationprotection/labels
    }
    $Uri = "https://graph.microsoft.com/v1.0/drives/$($DriveId)/items/$($DriveItemId)/assignSensitivityLabel"

    try
    {

        $Response = Invoke-MgGraphRequest -Method "POST" -Uri $Uri  -Body $Body -OutputType PSObject
        Return $Response
    }
    catch
    {
        $Error[0].Exception
    }
}
I recommend to export the certificate password as an encrypted file, which will be used in the upcomming scripts. A hardcoded password in a script is not recommended.
Get-credential("CertificateName") | Export-Clixml -Path "C:\Users\Serka\OneDrive\Desktop\PS\SPSitesReadAll.key"With the execution of the script below, the sensitivity of the Subfoldderdocument.docx becomes a confidential. If you want to use the script, replace the parameters to fit your scenario.
Param (
    $AppId = "90747925-550c-4658-850f-b19d26ed1a43", # Replace with the App Id of your App registration
    $Tenant = "1f795e95-c06b-4109-924e-3569fddf499f", # Replace with the Tenant prefix
    $CertificatePath = "C:\Users\Serka\OneDrive\Desktop\PS\SPSitesReadAll.pfx", # Replace with the path to your certificate,
    $CertificatePasswordPath = "C:\Users\Serka\OneDrive\Desktop\PS\SPSitesReadAll.key", # Replace with the password of your certificate,
    $SensitivityLabelId = "defa4170-0d19-0005-0005-bc88714345d2",  # Id of the sensitivitylabel. Can be obtained here: https://compliance.microsoft.com/informationprotection/labels
    $Justificationtext = "Labelled by Serkar", #Here you can justify your labelling
    $AssignmentMethod = "Auto", # The assignment method of the label on the document. Can be obtained here: https://learn.microsoft.com/en-us/dotnet/api/microsoft.informationprotection.assignmentmethod?view=mipsdk-dotnet-1.10,
    $DriveId = "b!kJV0CniHeUeAiju7m8Gl4ZmfCOoRAXJNrYB9wjbkfZ-Vmuw3EELGQ7bZlNIfSaf4", #ID of the drive, which is typically the SharePoint Library
    $DriveitemId = "01NLC4VWO4XBKMOKUMUVH3Z6GINE5TGTRT" #ID of the SharePoint file, for which the Sensitivitylabel shall be adjusted
)


function Assign-SensitivityLabel
{
    [CmdletBinding()]
    param (
        [Parameter(Mandatory = $true)]
        $DriveId,

        [Parameter(Mandatory = $true)]
        $DriveItemId,

        [Parameter(Mandatory = $false)]
        $AssignmentMethod = "privileged", # The assignment method of the label on the document. Can be obtained here: https://learn.microsoft.com/en-us/dotnet/api/microsoft.informationprotection.assignmentmethod?view=mipsdk-dotnet-1.10

        [Parameter(Mandatory = $false)]
        $JustificationText = "No justification provIded", # Justification why this sensitivity label is applied.

        [Parameter(Mandatory = $true)]
        $SensitivityLabelId # Id of the sensitivitylabel. Can be obtained here: https://compliance.microsoft.com/informationprotection/labels
    )

    $Body = @{
        Any                = $null
        AssignmentMethod   = $AssignmentMethod
        JustificationText  = $JustificationText
        SensitivityLabelId = $SensitivityLabelId #Trusted People https://compliance.microsoft.com/informationprotection/labels
    }
    $Uri = "https://graph.microsoft.com/v1.0/drives/$($DriveId)/items/$($DriveItemId)/assignSensitivityLabel"

    try
    {

        $Response = Invoke-MgGraphRequest -Method "POST" -Uri $Uri  -Body $Body -OutputType PSObject
        Return $Response
    }
    catch
    {
        $Error[0].Exception
    }
}


# Load required Modules
Import-Module Microsoft.Graph.Authentication, Microsoft.Graph.Files

# Load the certificate from file
$CertificatePassword = (Import-Clixml -Path $CertificatePasswordPath).getnetworkcredential().Password
$Certificate = New-Object System.Security.Cryptography.X509Certificates.X509Certificate2($CertificatePath, $CertificatePassword)

# Authenticate
Connect-MgGraph -ClientId $AppId -TenantId $Tenant -CertificateThumbprint $Certificate.Thumbprint -NoWelcome

#region prepare export

# Get drive
$Drive = Get-MgSite -SiteId $SiteId -Property Drives -ExpandProperty Drives | Select-Object Drives -ExpandProperty Drives | Where-Object { $_.Name -eq $LibraryName }

# Get drive item
$DriveItems = Invoke-MgGraphRequest -Uri "v1.0/drives/$($Drive.Id)/root/children"

$ItemExportRaw = New-Object System.Collections.Generic.List[object]

foreach ($DriveItem in $DriveItems.Value)
{
    #Get All drivitems below root
    $ItemExportRaw.Add( $(List-MgDriveItem -Drive $Drive -DriveItem $DriveItem))
}

$ItemExport = New-Object System.Collections.Generic.List[object]


$ItemExportRaw |ForEach-Object {

        $_ | ForEach-Object {$ItemExport.add($_)}
}
#endregion

#region assign sensitivity label

$SensitivyLabelParams  =$null
$SensitivyLabelParams = @{
    DriveId            = $DriveId
    DriveitemId        = $DriveitemId
    AssignmentMethod   = $AssignmentMethod
    Justificationtext  = $Justificationtext
    SensitivityLabelId = $SensitivityLabelId
}

Write-Output "Assigining sensitivity label to $($Item.DriveItemName)"
Assign-SensitivityLabel @SensitivyLabelParams


#endregon
I oberserved that it took a few moments until the sensitivity label was updated in SharePoint as it happens asychronously.

How to assign Sensitivity Labels for a SharePoint Library with PowerShell
In order to assign sensitivity labels a whole SharePoint library with PowerShell, you need to obtain first the DriveItemIDs for each SharePoint file and then proceed with assigning the sensitivity labels.
To showcase the functionality, I have prepared following SharePoint Library with various sensitivity labels. My aim is to assign the confidential sensitivity label for each file. This script recurses subfolders, so that child items of folders are assigned with the sensitivity label of choice.

Param (
    $AppId = "90747925-550c-4658-850f-b19d26ed1a43", # Replace with the App Id of your App registration
    $Tenant = "1f795e95-c06b-4109-924e-3569fddf499f", # Replace with the Tenant prefix
    $SiteId = "0a749590-8778-4779-808a-3bbb9bc1a5e1", # Replace it with the SiteId of your SharePoint Site https://m365x04995906.sharepoint.com/sites/Remoteliving/_api/site/Id
    $LibraryName = "Documents", # Replace with the list name,
    $CertificatePath = "C:\Users\Serka\OneDrive\Desktop\PS\SPSitesReadAll.pfx", # Replace with the path to your certificate,
    $CertificatePasswordPath = "C:\Users\Serka\OneDrive\Desktop\PS\SPSitesReadAll.key", # Replace with the password of your certificate,
    $SensitivityLabelId = "defa4170-0d19-0005-0005-bc88714345d2",  # Id of the sensitivitylabel. Can be obtained here: https://compliance.microsoft.com/informationprotection/labels
    $Justificationtext = "Labelled by Serkar", #Here you can justify your labelling
    $AssignmentMethod = "Auto" # The assignment method of the label on the document. Can be obtained here: https://learn.microsoft.com/en-us/dotnet/api/microsoft.informationprotection.assignmentmethod?view=mipsdk-dotnet-1.10

)

function List-MgDriveItem
{
    [CmdletBinding()]
    param (
        [Parameter()]
        $Drive,
        [Parameter()]
        $DriveItem
    )

    Try
    {
        if ($DriveItem.folder)
        {
            # Recurse in the folder to get the childitems of the folder
            $ChildItems = (Get-MgDriveItem -DriveId $Drive.Id -DriveItemId $DriveItem.Id  -ExpandProperty Children ).Children

            if ($ChildItems.Count -gt 0)
            {
                <# Action to perform if the condition is true #>
                $ChildItems | ForEach-Object {
                    List-MgDriveItem -Drive $Drive -DriveItem (Get-MgDriveItem -DriveId $Drive.Id -DriveItemId $($_.Id) )
                }
            }

        }

            $Result = New-Object psobject -Property @{
            DriveItemName = $DriveItem.name;
            DriveitemId   = $DriveItem.Id;
            DriveId       = $Drive.Id;
            DriveItemURL  = $DriveItem.webUrl
        }
        return $Result
    }
    catch
    {
        Return $Error[0]
    }

}
function Assign-SensitivityLabel
{
    [CmdletBinding()]
    param (
        [Parameter(Mandatory = $true)]
        $DriveId,

        [Parameter(Mandatory = $true)]
        $DriveItemId,

        [Parameter(Mandatory = $false)]
        $AssignmentMethod = "privileged", # The assignment method of the label on the document. Can be obtained here: https://learn.microsoft.com/en-us/dotnet/api/microsoft.informationprotection.assignmentmethod?view=mipsdk-dotnet-1.10

        [Parameter(Mandatory = $false)]
        $JustificationText = "No justification provIded", # Justification why this sensitivity label is applied.

        [Parameter(Mandatory = $true)]
        $SensitivityLabelId # Id of the sensitivitylabel. Can be obtained here: https://compliance.microsoft.com/informationprotection/labels
    )

    $Body = @{
        Any                = $null
        AssignmentMethod   = $AssignmentMethod
        JustificationText  = $JustificationText
        SensitivityLabelId = $SensitivityLabelId #Trusted People https://compliance.microsoft.com/informationprotection/labels
    }
    $Uri = "https://graph.microsoft.com/v1.0/drives/$($DriveId)/items/$($DriveItemId)/assignSensitivityLabel"

    try
    {

        $Response = Invoke-MgGraphRequest -Method "POST" -Uri $Uri  -Body $Body -OutputType PSObject
        Return $Response
    }
    catch
    {
        $Error[0].Exception
    }
}


# Load required Modules
Import-Module Microsoft.Graph.Authentication, Microsoft.Graph.Files

# Load the certificate from file
$CertificatePassword = (Import-Clixml -Path $CertificatePasswordPath).getnetworkcredential().Password
$Certificate = New-Object System.Security.Cryptography.X509Certificates.X509Certificate2($CertificatePath, $CertificatePassword)

# Authenticate
Connect-MgGraph -ClientId $AppId -TenantId $Tenant -CertificateThumbprint $Certificate.Thumbprint -NoWelcome

#region prepare export

# Get drive
$Drive = Get-MgSite -SiteId $SiteId -Property Drives -ExpandProperty Drives | Select-Object Drives -ExpandProperty Drives | Where-Object { $_.Name -eq $LibraryName }

# Get drive item
$DriveItems = Invoke-MgGraphRequest -Uri "v1.0/drives/$($Drive.Id)/root/children"

$ItemExportRaw = New-Object System.Collections.Generic.List[object]

foreach ($DriveItem in $DriveItems.Value)
{
    #Get All drivitems below root
    $ItemExportRaw.Add( $(List-MgDriveItem -Drive $Drive -DriveItem $DriveItem))
}

$ItemExport = New-Object System.Collections.Generic.List[object]


$ItemExportRaw |ForEach-Object {

        $_ | ForEach-Object {$ItemExport.add($_)}
}

#endregion

#region assign sensitivity label

foreach ($Item in $ItemExport)
{
    <# $Item is the current item #>

    $SensitivyLabelParams  =$null
    $SensitivyLabelParams = @{
        DriveId            = $Item.DriveId
        DriveitemId        = $Item.DriveitemId
        AssignmentMethod   = $AssignmentMethod
        Justificationtext  = $Justificationtext
        SensitivityLabelId = $SensitivityLabelId
    }

    Write-Output "Assigining sensitivity label to $($Item.DriveItemName)"
    Assign-SensitivityLabel @SensitivyLabelParams
}

#endregon
The output of the script shows, that not every file type is supported for assigining sensitivity labels to it. Currently only Word, Excel and PowerPoint file types support sensitivity label per default.

Further Reference
If you are new to Graph API, consider reading following article, which will help you to configure the Azure Application correctly:
How to configure Azure App registration for MS Graph | SPO Scripts