Category: PowerShell

  • Run PowerShell script | a clear tutorial made for beginners

    PowerShell is the language, when it comes to automation of tasks and configuration in the Microsoft cosmos. Meanwhile, you can use it cross-platform, e.g., on Linux systems. This article intends to show you in few steps how to run a PowerShell script.

    There are many possibilities to run a PowerShell script. I want to show you the ways I know. If I forgot something, write me a mail: Serkar@workplace-automation.com.

    Scenario

    In the first step, I want to describe you, which script I run. For this purpose, I am starting the PowerShell ISE by clicking on the start menu button and typing ISE. PowerShell ISE is the preinstalled tool, where you can script your PowerShell scripts.

    Click on windows start button

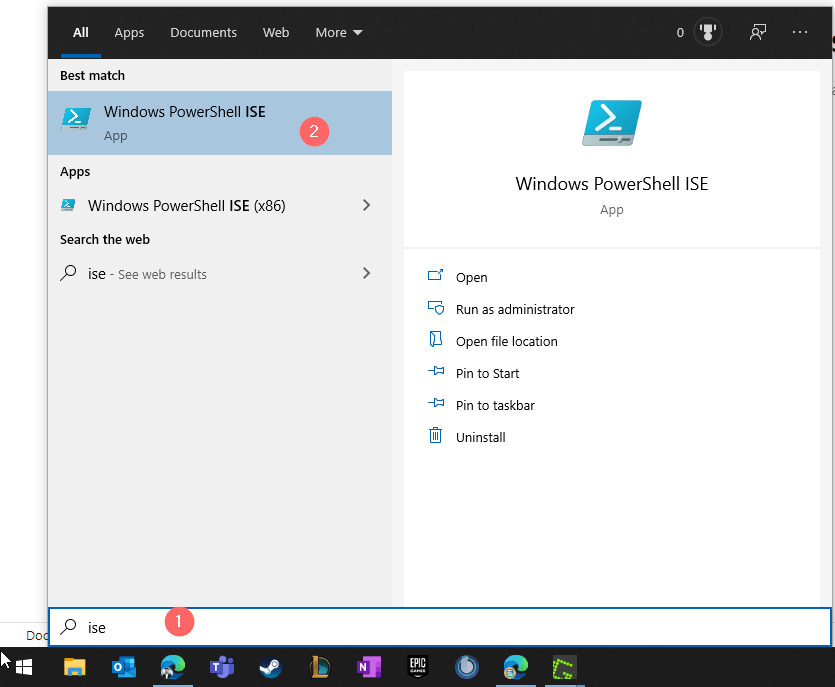
    After clicking on Windows PowerShell ISE, a window pops up.

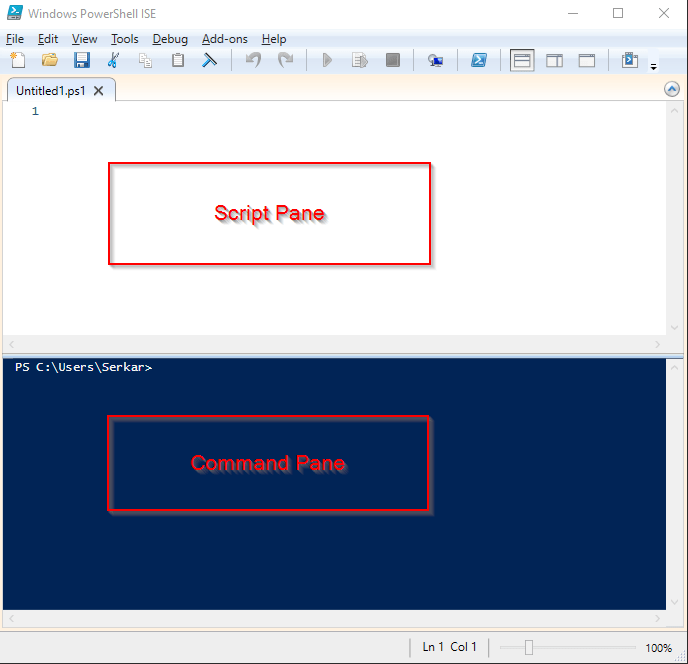
    The PowerShell ISE is structured in two panes — the script and command pane. In the script pane you can develop your PowerShell script and if you run this developed script, its output will be displayed in the command pane. You can also use the command pane to run cmdlets interactively.

    PowerShell ISE structure

    For my scenario, I am writing a code, where I prompt the user how the weather is. If you are seeking to learn something, I would recommend you to join me.
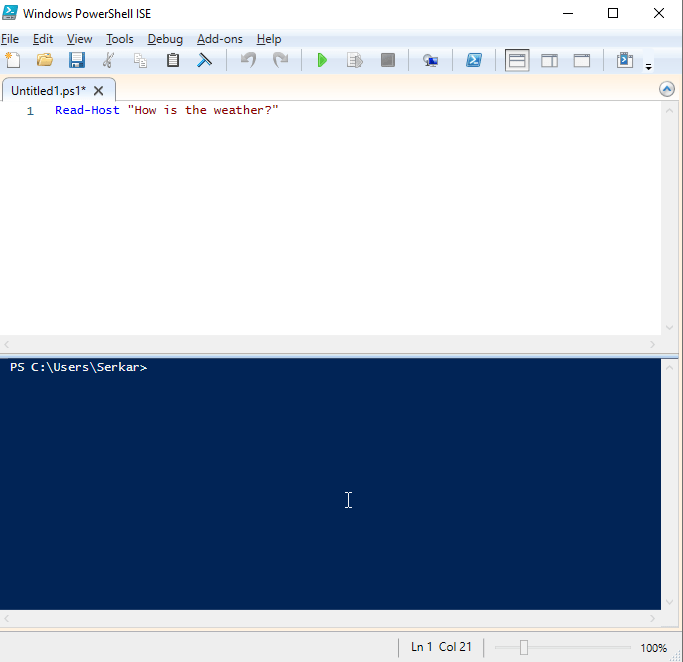
    PowerShell ISE with PowerShell Script

    Source code:

    Read-Host "How is the weather?"

    Save this script to your desktop, so you can find it later.

    Save as in PowerShell ISE

    Run PowerShell script from ISE

    When you want to run a PowerShell script directly from ISE, you have two possibilities:

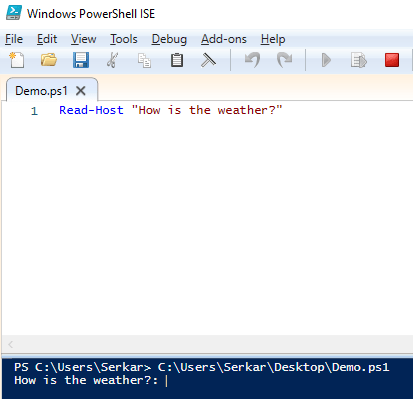
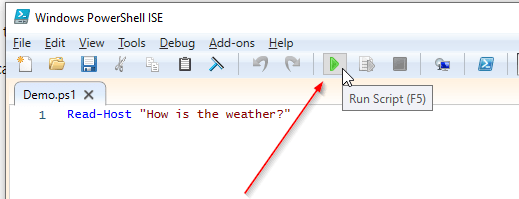
    You can run a PowerShell script by clicking on the F5 button. As you can see, the prompt came up in the command pane.

    Result of the PowerShell script run

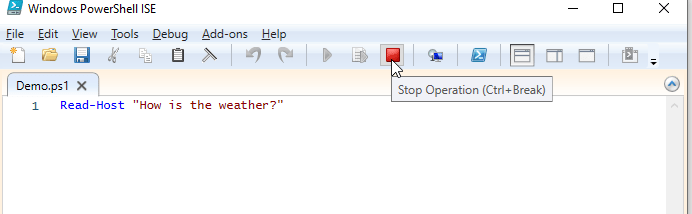
    I am stopping the script with the stop button

    Stop the PowerShell script

    You can also run the script, by clicking on the play button.

    Run PowerShell script with play button

    Run PowerShell script from explorer

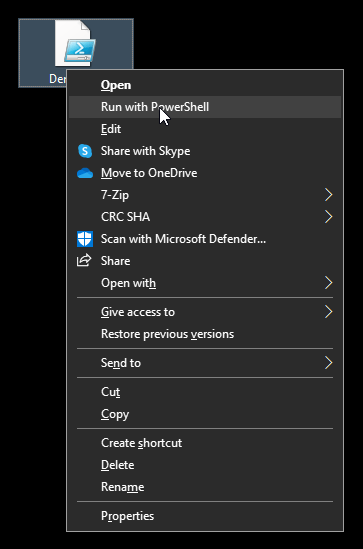
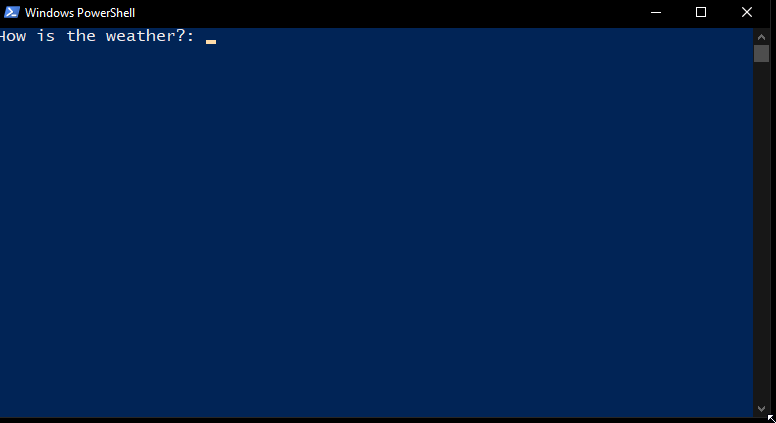
    If we want to know how to run PowerShell script from explorer, we have to browse to our previously written PowerShell script, right-click the file and click on Run with PowerShell. A PowerShell window will pop up which runs the PowerShell script.

    Screenshot of run with PowerShell

    Output of the PowerShell script in Windows PowerShell

    Run PowerShell Script from PowerShell

    You also have the possibility to run PowerShell scripts directly from PowerShell. To do this, open Windows PowerShell.

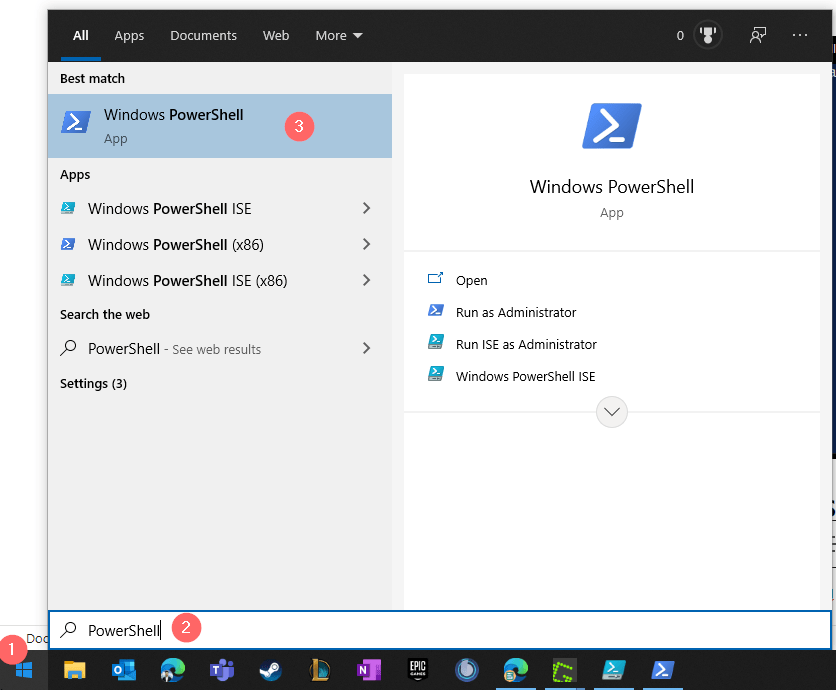
    Again, I am clicking on the Windows start button and type in PowerShell. The search result will show me Windows PowerShell, which I want to start.

    Now I am getting the path of my file by using the keyboard combination of shift and mouse right click to copy the path.

    Copy as path option of windows explorer

    I am switching back to Windows PowerShell and press right click of the mouse to paste in my clipboard.

    pasted path of the powershell script

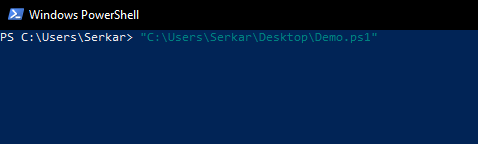
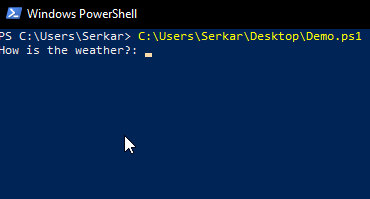
    Run PowerShell script – the standard way

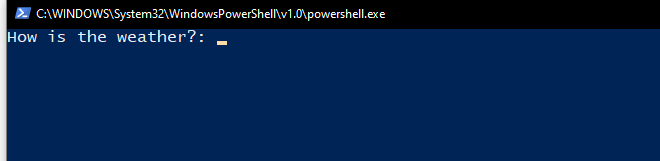
    I am removing the quotes and press enter. As you see, the PowerShell script was started:

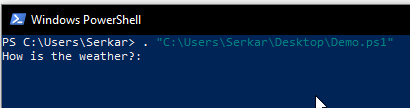
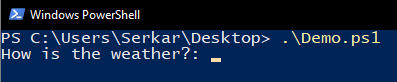
    Run PowerShell script – the dot sourcing

    You can also start your PowerShell script by adding a dot before the quoted path. This is called dot sourcing and it runs the contents of the script in your current context.

    Run PowerShell Script from Command Prompt

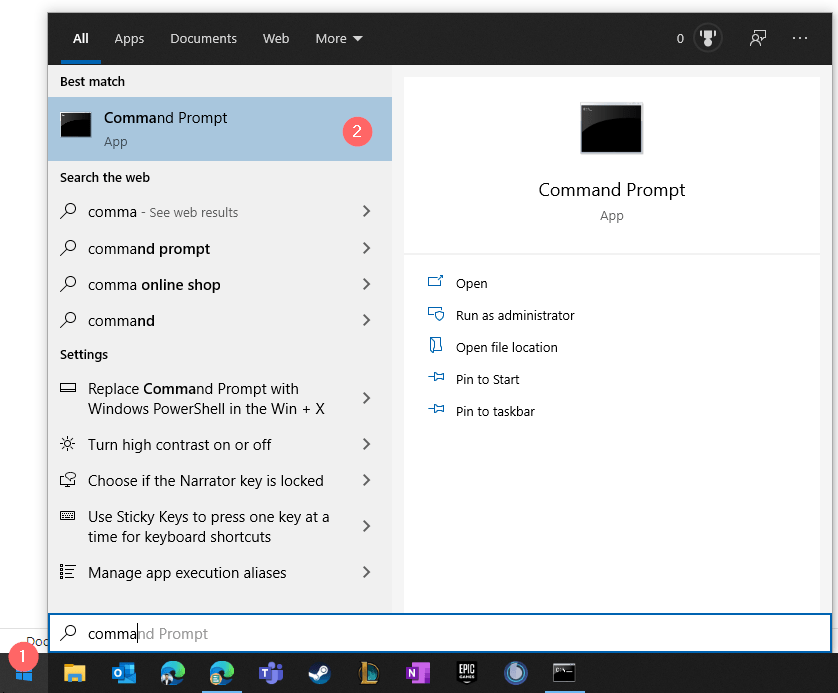
    You may know Command Prompt — the predecessor of PowerShell. You can also run PowerShell scripts in the Command Prompt. To run PowerShell scripts in Command Prompt, start Command Prompt, by pressing the windows button and typing command prompt. Click on the app and a black box should open.

    Screenshot of Windows Menu with Command Prompt in it

    Now you can start your script like this:

    Start PowerShell.exe “pathtoyourscript”

    You will notice, that PowerShell will open in a separate window and run your specified script:

    Screenshot of PowerShell session started from Command Prompt

    Run PowerShell script from a folder

    Run PowerShell script from a session, opened in script location

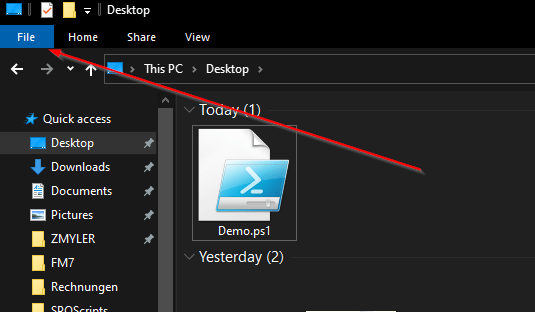
    You can also run a PowerShell script if you open a folder in Windows Explorer and start a PowerShell session there:

    So navigate to your folder and click on file

    Windows explorer with a bar towards file

    Now click on Open Windows PowerShell

    Open Windows PowerShell option from the file context menu

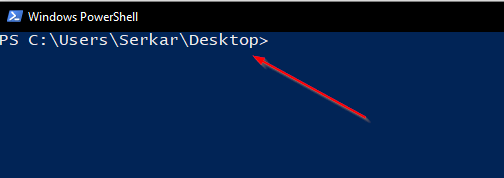
    You might notice, that the position is showing now the path, where the session has been started.

    Changed Path in Windows PowerShell

    If you enter a dot now, you can press the tabulator button and tab through each file in your path until you find your PowerShell script. My desktop is a bit messy, but after a while I could find the demo. By pressing on enter, the PowerShell script runs.

    PowerShell script started from localized PowerShell session

    Troubleshooting

    You might experience, that you cannot start a PowerShell script, because PowerShell states, that your script, which you try to run isn’t digitally signed. In this case, the execution policy of PowerShell blocks you from running scripts. Its purpose is to protect your computer from malicious scripts.

    In this case, read the script first and if you can confirm, that it is not harmful, you can unblock the script by following cmdlet:

    Unblock-File -Path "C:\Users\Serkar\Desktop\Demo.ps1"

    For more, please read the documentation of Microsoft:

    Set-ExecutionPolicy (Microsoft.PowerShell.Security) – PowerShell | Microsoft Docs

    Conclusio

    I hope that you have learned how to run a PowerShell script. Give it a try and try to run PowerShell scripts from by using various methods.

    Further Reading

    You may also want to get to know in detail what is PowerShell. I can recommend the docs of Microsoft, which give you a good understanding of PowerShell: What is PowerShell? – PowerShell | Microsoft Docs

  • Multi value arrays in PowerShell: How to create them really easy

    Hello together, in my latest activity as an consutlant I encountered following issue: I got a objects with two meta data. In my example it was a milestone with an link to the milestone activity. Since it were more than 30 items, I didn’t want to work with PSObjects. I was searching for a solution to create multi value arrays in PowerShell with little code as possible. If I would work with PSObjects, it would blow up my code. In this article, I will show you how you can create “normal” arrays and also how you can enhance this arrays, to multi value arrays in PowerShell.

    Create Standard PowerShell Arrays in PowerShell

    A standard array is set up like this:

    $array = @("Value1","Value2")

    You can also write it like this:

    $Array = @( 
        "Value1"
        "Value2"
    )

    So you can get the single values, by putting in the index number of it in square brackets – like $Array[0] for the first value and $Array[1] for the second value. With [-1] you can get the last value of the array.

    PowerShell standard arrays

    Add Value to Standard PowerShell Arrays

    You can add new lines in the array like this:

    $Array.Add("Value3")

    Remove Value from Standard PowerShell Arrays

    You can remove the lines of an array like this:

    $Array.Remove("Value2")
    Removed array

    Create multi value arrays in PowerShell

    DisplaynameLink
    Microsofthttps://microsoft.com
    SPOScriptshttps://workplace-automation.com/
    Azure Portalhttps://portal.azure.com
    ZMYLERhttps://zmyler.com

    For creating a multi value arrays in PowerShell, we have to inject a hashtable to each array line.

    A hashtable looks like this:

    @{KEY="VALUE"; KEY2 = "VALUE2"; KEYn = "VALUEn"}

    So your multi value arrays will look like this:

    $Array = @( 
        @{ Key1=("Value1"); Key2=("Value2")}
        @{ Key1=("Value3") ;Key2=("Value4")}
    )

    For my example it looks like this:

    $Array = @( 
        @{ Displayname=("Microsoft"); Link=("https://microsoft.com")}
        @{ Displayname=("Google"); Link=("https://google.com")}
        @{ Displayname=("Azure Portal"); Link=("https://portal.azure.com")}
        @{ Displayname=("ZMYLER"); Link=("https://zmyler.com")}
    )

    As you can see, you can also get the single values of each line in array:

    Single value of array

    Add Value to mutli value Arrays in PowerShell

    You can add a value to a multi value array in PowerShell like this:

    $Array.Add( @{ Displayname=("Ad-equum"); Link=("https://www.ad-equum.de/")} )
    Add value to mutli value arrays in PowerShell

    Remove Value from multi value arrays in PowerShell

    Removing a value from a multi value arrays in PowerShell is more complicated. You have to redefine the array, by filtering out the value, which you don’t want in your array:

    $Array = $Array | Where-Object {$_.displayname -ne "Ad-equum"}

    Conclusio

    If you want to create a multi value arrays in PowerShell, the only thing you have to do is to inject a hashtable to each line. I hope, that I have saved you a ton of work 🙂

    Further Reading

    Here is the official reference of Microsoft to arrays: Everything you wanted to know about arrays – PowerShell | Microsoft Docs

    If you are interested in hasthables, check Microsofts docs: Everything you wanted to know about hashtables – PowerShell | Microsoft Docs

  • How to filter for PowerShell objects easily

    If you are working interactively with PowerShell, It might be unhandy to define all the filtering options with Where-Object. I will show you how to filter for PowerShell objects the traditional way and doing it with Out-Gridview.

    Filter for PowerShell objects – the traditional way with Where-Object

    If we are looking forward to filter in PowerShell, we normaly make use of Where-Object this. In my example I am looking forward for all proccesses, which contain the name msedge and the value for Handles is greater than 292. My query would look like this:

    #traditional way
    Get-Process  | Where-Object {$_.processname -contains "msedge" -and $_.Handles -gt 292}
    Output of all processes in PowerShell
    Get-Process the traditional way with Where-Object

    Filter for PowerShell objects – Out-Gridview

    I want to show you how to filter for Powershell objects easily by using following cmdlet:

    Out-GridView -PassThru

    Example:

    Get-Process | Out-GridView -PassThru

    Doing that results in a grid popping up.

    output of processes as a grid in PowerShell

    Now you have multiple options.

    You can make use of the filter of the out of the box filtering options. Let’s say I just want to find the msedge processes.

    So I am adding the Processname as a filter criteria:

    filtering options in the grid in PowerShell

    Adding ProcessName eligibles setting filtering following operators:

    contains
    does not contains
    beginns with
    is equal to
    is not equal to
    ends with
    is empty
    is not empty

    Entering msedge to the contains field, shows only process entries, which contain msedge

    filtered results in PowerShell grid
    filtering for processes which contain msedge in the name

    Now you can add additional filters.

    Additional filters in PowerShell
    I do add NPM(K) for the value 19
    Filter for npmk equals 19

    We can even now sort all the stuff by clicking on the column, which we want to sort for.

    Sort for CPU in GUI
    Sorting for highest CPU usage

    Export objects to Excel

    If you mark everything with CTRL + A, you can copy all the stuff and put it e.g. straigth to Excel

    Exporting objects to Excel
    Easy way to export to excel

    If you want to process further with powershell, you can mark the entities needed and click on OK. I selected the first and the thridh entity.

    Picture selecting only two entities
    selecting only two entities

    As you see, PowerShell returns my selection

    PowerShell return

    Conclusio

    As you can see you can save time and coding lines, when use are working inteactively on PowerShell by filter forPowerShell objects with Out-Gridview.

    You might find intersting

    Filtering items with CAML. For further learnings check out the post: Filtering for SharePoint items with CAML Queries | SPO Scripts

    Official documentation of Microsoft for the cmdlet Out-Gridview: Out-GridView (Microsoft.PowerShell.Utility) – PowerShell | Microsoft Docs

  • Use credentials in PowerShell

    Use credentials in PowerShell

    Credentials are necessary, if you want to access systems or APIs. Credentials can be used interactively and within a script. If you want to use credentials in PowerShell to automate processes, you might have to export your credentials and import them within your automation solution.

    In this article I will show you a few ways to make use of credentials, how to export and import credential objects and security considerations.

    Functionality

    You export the credentials with PowerShell the context the user whith which you are running the cmdlets, also the machine will be considered. So if you copy the credential file to another machine, it won’t work with the same user and you have to re-export the credential file.

    Security considerations

    Every initialization of credentials (interactive or automated) will lead to a prompt like this. When you export credentials with PowerShell consider following advice:

    Be sure, that you do this close to your authentication and do not enter your credentials on client/ servers, which are not trusted.

    Credential Prompt

    Why?

    You might think this is safe. If we try to read the password, it looks like this:

    Credential Secure String

    But there is still a way to read the password:

    Credential Clear String

    The risk will be there, when you enter your credentials to a shell, which you are not owner of.

    • Recommendation
      1. If you have to enter it in a Shell, which you do not controll, ensure, that the credential object will be initialized like this $Credential = $null
      2. If possible, try to run your scripts within windows authentication. In PNP.PowerShell it looks like this:
    Connect-PNPOnline -Url $Url -UseCurrentCredentials

    Using credentials interactively

    This will lead to a prompt.

    Credential Prompt
    $UserName = "John.Doe@Contoso.com"
    $Credential = Get-Credential ($UPN)

    You can than make use of the credentials like this:

    Connect-PnPOnline -Url "https://devmodernworkplace.sharepoint.com/sites/sales" -Credentials $Credential

    Using credentials non-interactively

    For this use case I wrote two ready-to-use functions.

    Function Export-CredentialFile 
    {
        param(
        [Parameter(Mandatory=$true,Position=0)]
        $Username,
        [Parameter(Mandatory=$true,Position=1)] 
        $Path
        )
        
        
        While ($Path -eq "")
        {
            $Path = Read-Host "The path does not exist. Where should the credentials be exported to?"
        }
    
        $ParentPath = Split-Path $Path
        If ((Test-Path $ParentPath) -eq $false)
        {
            New-Item -ItemType Directory -Path $ParentPath
        }
    
        $Credential = Get-Credential($Username)
        $Credential | Export-Clixml -Path $Path
        Return $Credential
    }
    
    Function Import-CredentialFile ($Path)
    {
        if (! (Test-Path $Path))
        {
            Write-Host "Could not find the credential object at $Path. Please export your credentials first"
            Export-CredentialFile
        }
        Import-Clixml -Path $Path
    }
    

    You can call the functions like this:

    $Path = "C:\keys\serkar.key"
    $UserName = "Serkar@devmodernworkplace.onmicrosoft.com"
    
    Export-CredentialFile -Username $UserName -Path $Path
    $Credential = Import-CredentialFile -Path $Path

    And afterwards you can connect to SharePoint. If you feel unsure about it, check out this post: Connect to SharePoint Online with PowerShell (workplace-automation.com/)

    Connect-PnPOnline -Url https://devmodernworkplace.sharepoint.com/sites/sales -Credentials $Credential

    But be sure to initialize the $Credential afterwards, so the potential security vector is as small as possible when you export credentials with PowerShell.

    Additional links

    Get-Credential (Microsoft.PowerShell.Security) – PowerShell | Microsoft Docs

  • How to use LINQ in PowerShell to compare arrays

    How to use LINQ in PowerShell to compare arrays

    LINQ stands for Language Integrated Query and if you use LINQ in PowerShell it might boost the performance of your scripts. In this article, I’ll show you how to use LINQ in PowerShell for comparing arrays.

    In this article, I will show you except and intersect of LINQ. There are many more methods. If you are interested in other methods, check out the official documentation of Microsoft.

    Concept of using LINQ in PowerShell

    We have three amounts red, orange and yellow. The aim is to only get a specific amount e.g. only the red portion.

    Amounts with strings
    $Red = @( "A", "B", "C")
    $Yellow = @("C","D","E")

    We also can do this for integer values.

    amounts with integers

    $Red = @( 1..5)
    $Yellow = @(4..10)

    Using LINQ for Strings in arrays

    I will show you how to use LINQ for string in this chapter. We will cover the methods except and intersect.

    String – Get the red amount

    In order to get the red amount, you have to do following:

    $Red = @( "A", "B", "C")
    $Yellow = @("C","D","E")
    
    $Left  = [string[]]$Red
    $Right = [string[]]$Yellow
    
    [string[]][Linq.Enumerable]::Except($Left, $Right)

    By doing this, you’ll get only A and B:

    LINQ get the red amount in PowerShell

    String – Get the yellow amount

    In order to get the red amount, you have to change Right and Left in the LINQ cmdlet:

    $Red = @( "A", "B", "C")
    $Yellow = @("C","D","E")
    
    $Left  = [string[]]$Red
    $Right = [string[]]$Yellow
    
    [string[]][Linq.Enumerable]::Except($Right, $Left)

    By doing this, you’ll get only D and E:

    LINQ get the yellow amount in PowerShell

    String – Get the orange amount

    If we want to get the orange amount, we have to make use of intersect

    $Red = @( "A", "B", "C")
    $Yellow = @("C","D","E")
    
    $Left  = [string[]]$Red
    $Right = [string[]]$Yellow
    
    [string[]][Linq.Enumerable]::Intersect($Left, $Right)
    LINQ get the orange amount in PowerShell

    String – Get everything except orange

    $Red = @( "A", "B", "C")
    $Yellow = @("C","D","E")
    
    $Left  = [string[]]$Red
    $Right = [string[]]$Yellow
    
    [string[]]([Linq.Enumerable]::Except($Left, $Right) + [Linq.Enumerable]::Except($Right, $Left))

    By doing this, you’ll everything but not C:

    linq - get everything except the orange amount powershell

    Using LINQ for integers in arrays

    I will show you how to use LINQ for integers in this chapter. We will cover the methods except and intersect.

    Integer – Get the red amount

    In order to get the red amount, you have to do following:

    $Red = @( 1..5)
    $Yellow = @(4..10)
    
    $Left  = [int[]]$Red
    $Right = [int[]]$Yellow
    
    [int[]][Linq.Enumerable]::Except($Left, $Right)

    By doing this, you’ll get only 1, 2, 3:

    LINQ get only the red amount in PowerShell

    Integer – Get the yellow amount

    In order to get the red amount, you have to change Right and Left in the LINQ cmdlet:

    $Red = @( 1..5)
    $Yellow = @(4..10)
    
    $Left  = [int[]]$Red
    $Right = [int[]]$Yellow
    
    [int[]][Linq.Enumerable]::Except($Right, $Left)

    By doing this, you’ll get only 6, 7, 8, 9, 10:

    LINQ get the yellow amount in PowerShell for integers

    Integer – Get the orange amount

    If we want to get the orange amount, we have to make use of intersect

    $Red = @( 1..5)
    $Yellow = @(4..10)
    
    $Left  = [int[]]$Red
    $Right = [int[]]$Yellow
    
    [int[]][Linq.Enumerable]::Intersect($Right, $Left)
    LINQ get the orange amount in PowerShell for integers

    Integer – Get everything except orange

    $Red = @( 1..5)
    $Yellow = @(4..10)
    
    $Left  = [int[]]$Red
    $Right = [int[]]$Yellow
    
    [int[]]([Linq.Enumerable]::Except($Left, $Right) + [Linq.Enumerable]::Except($Right, $Left))

    By doing this, you’ll everything but not 5:

    LINQ get the everything but not the orange amount in PowerShell for integers
    Read more