In this article, I want to show you how you can create SharePoint list items using Graph API.
Prerequistes
- You need to install the PNP PowerShell module for step 2:
Connect to SharePoint with PowerShell | SharePoint Online (workplace-automation.com/) - You will need the consent of a global administrator for the enterprise application
Step 1: Configure the Azure Enterprise Application
I am following the least privilege approach and grant only the necessary permission for the app registration to create SharePoint list items using Graph API.
Hence, I have created an App registration with following permissions:
| Permission Name | Type |
| Sites.Selected | Application |
| User.Read | Delegated |

If you don’t know how to create it, follow my next steps, otherwise if you are familiar with it, you can also skip to the Step 2 – Grant the Enterprise Application the Permission.
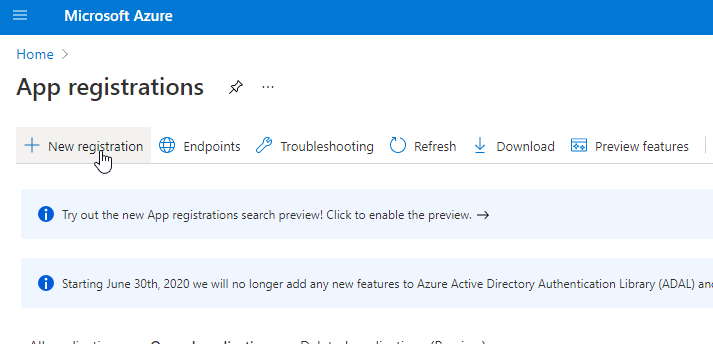
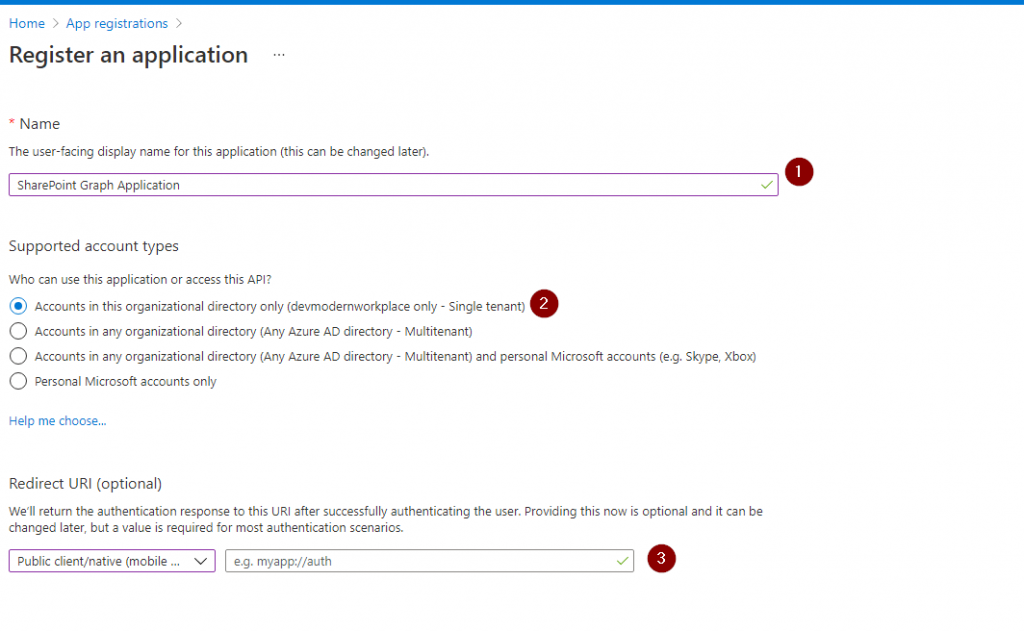
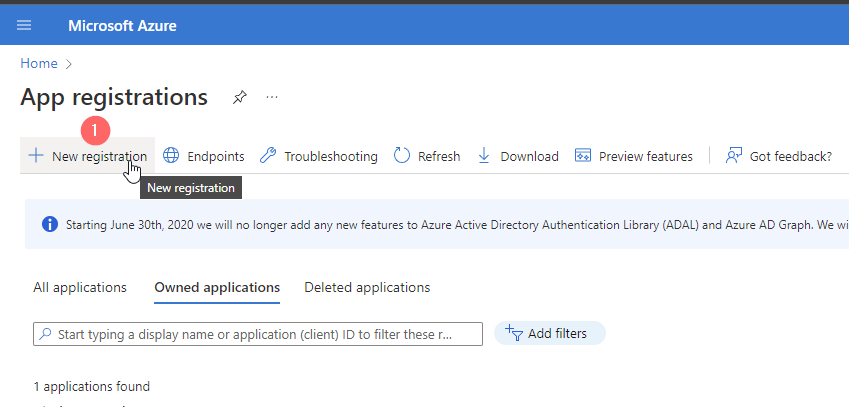
1. Browse to Azure Portal and Search for Application Registrations and click on New registration
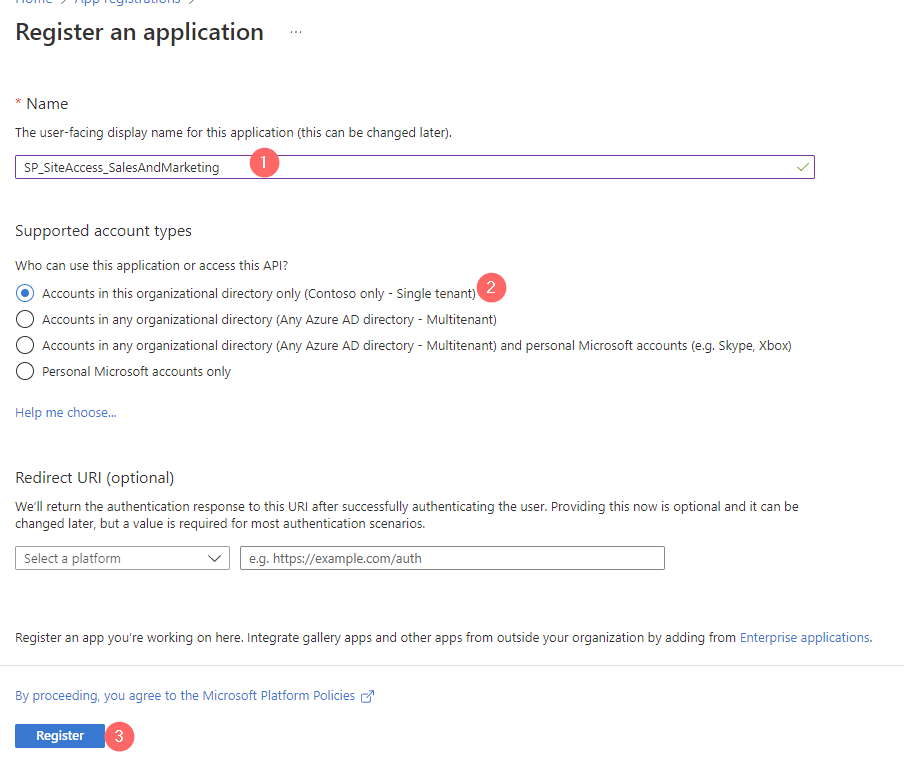
2. Give the App a meaningful name, which follows your organization standards (Different admins should recognize what the purpose for this app is) and Register it
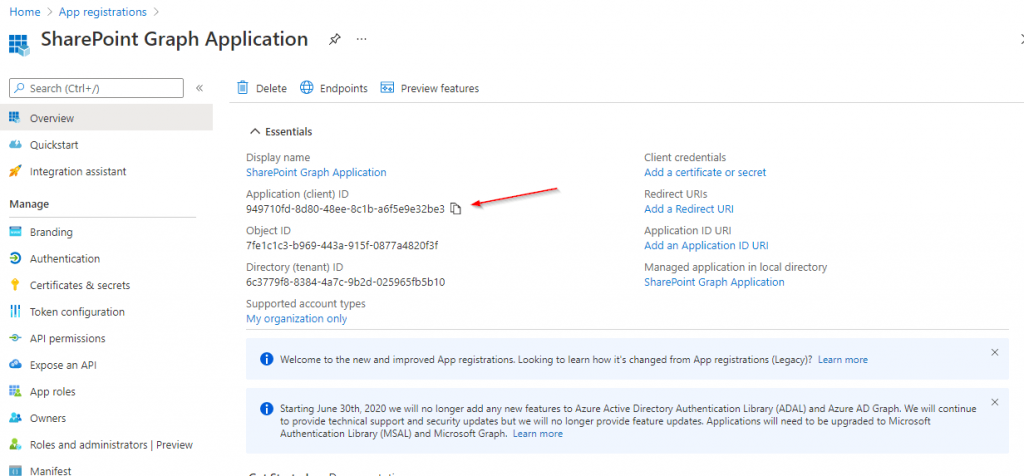
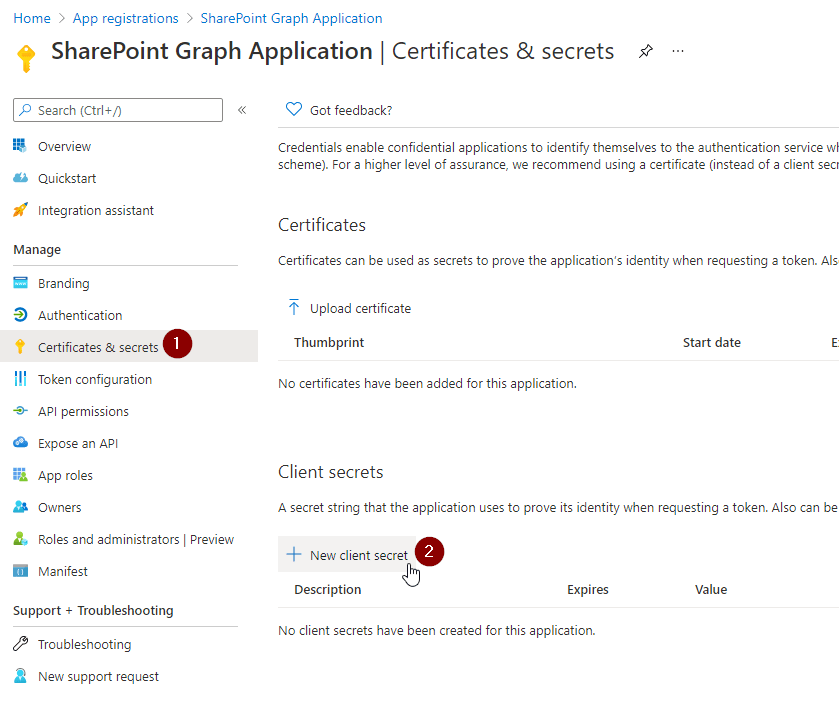
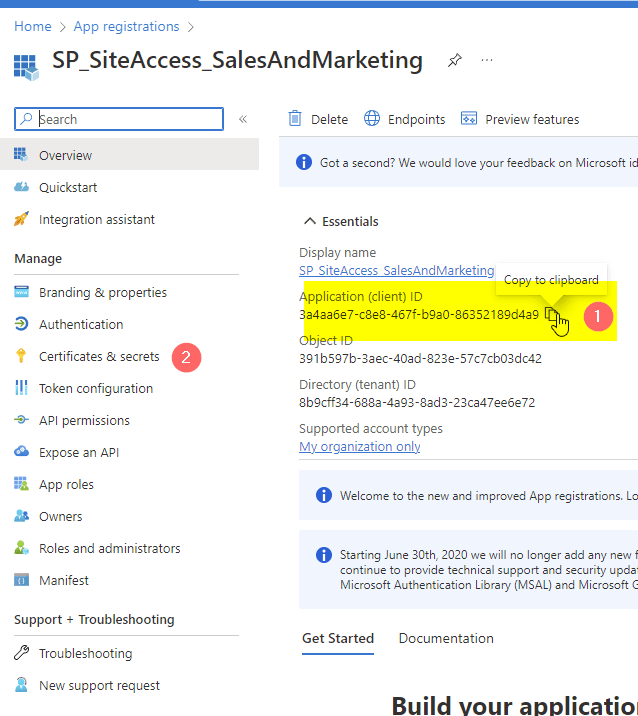
3. Note down the Application ID and go to Certificates & Secrets
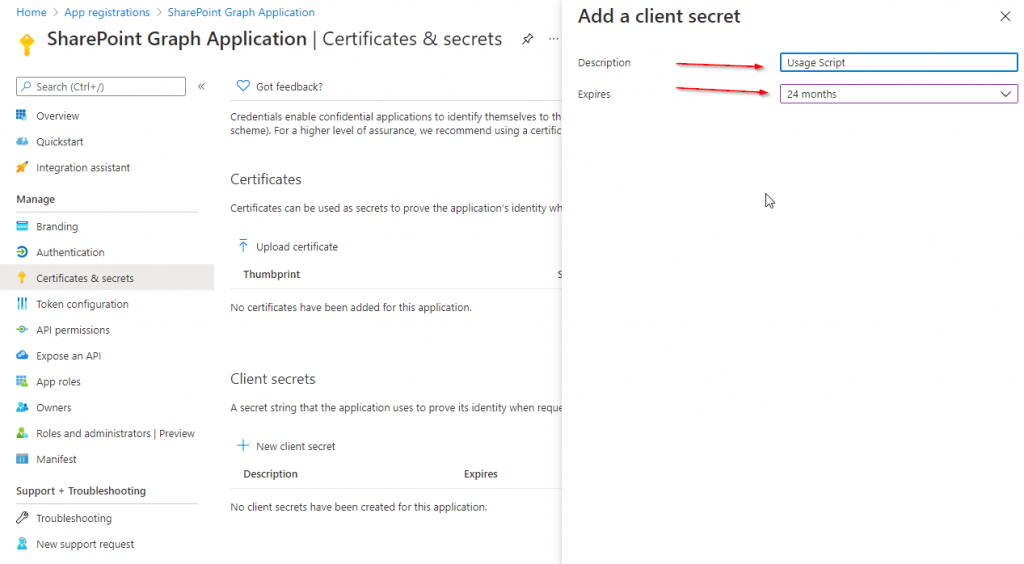
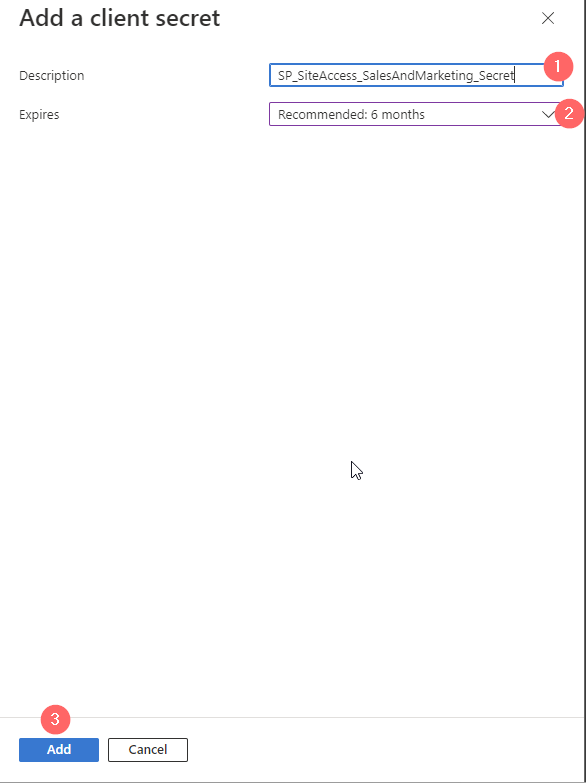
4. Create a new client secret or upload a certificate (I will show the secret approach)

5. Also, here a meaningful name is supportive for other colleagues. For the duration, it makes sense to go with a reasonable duration. I would go with the recommendation of Microsoft as you might have lost this application out of sight in 24 months, which is the maximum duration for a client secret.
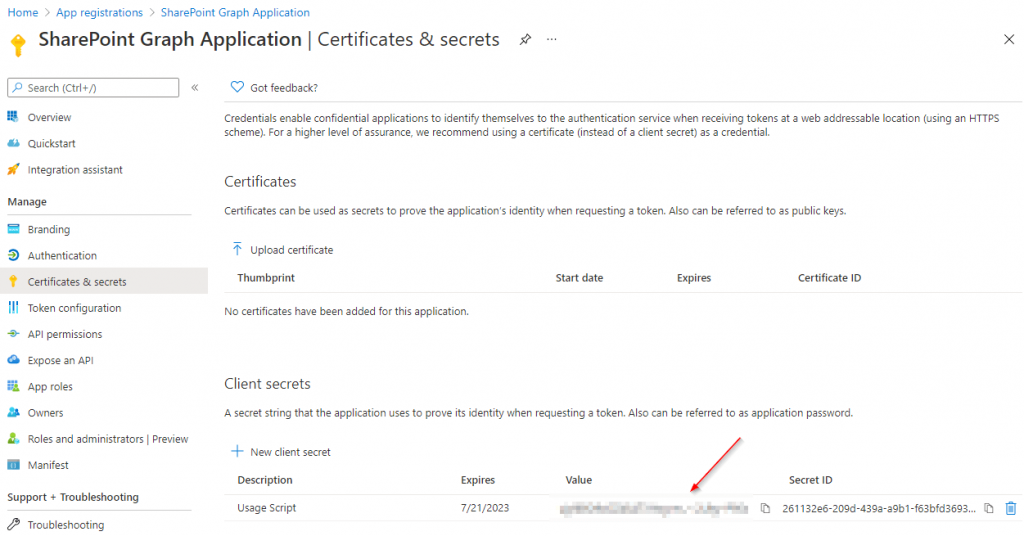
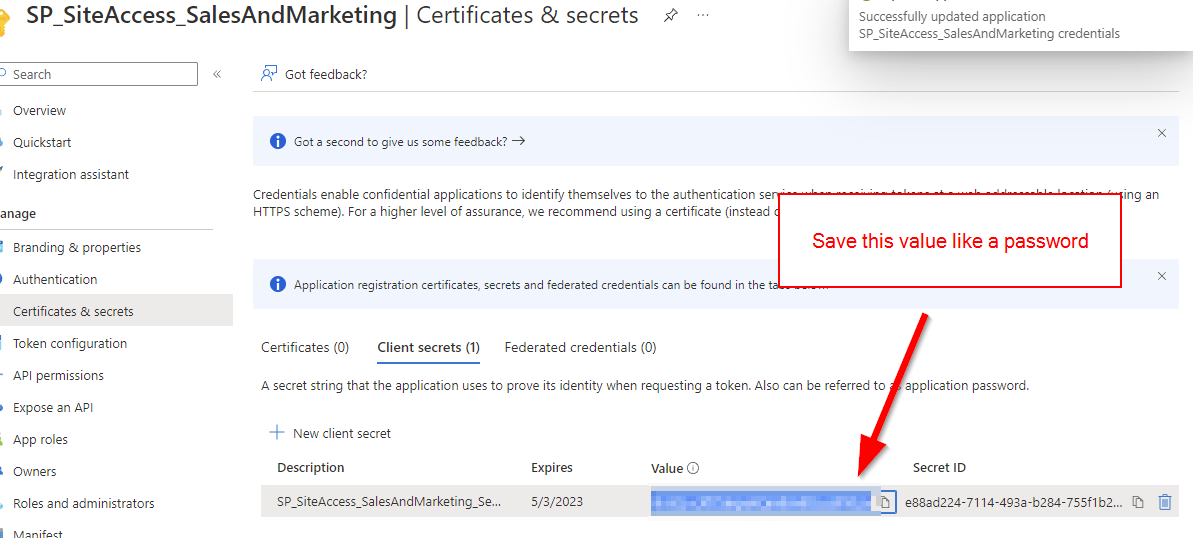
6. Now you will have ONE chance to note down the client secret. Treat it like a password. Depending on your App Permission your App might be powerful. Hence you should save for instance in a Password Manager.
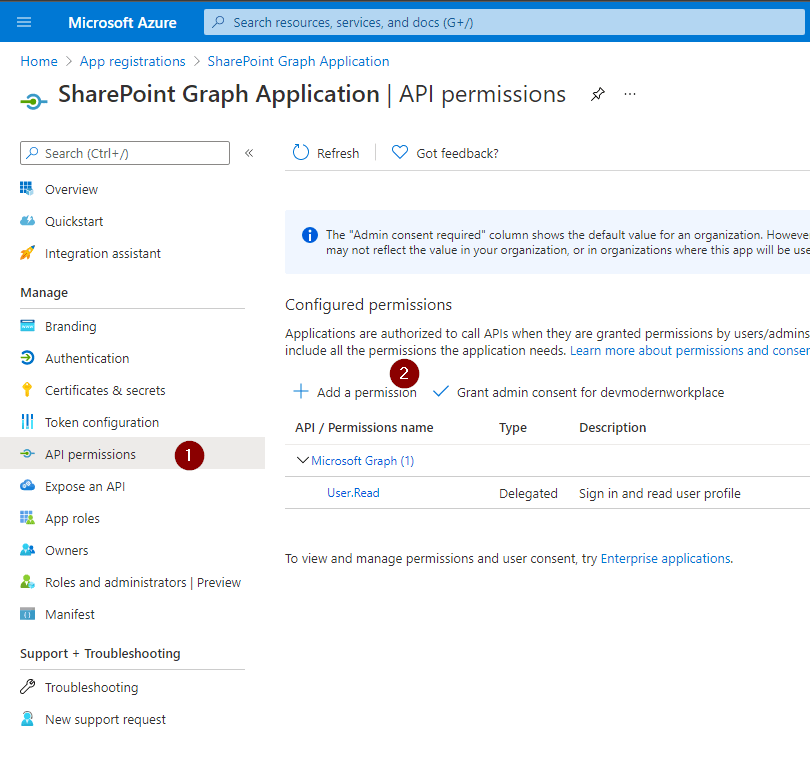
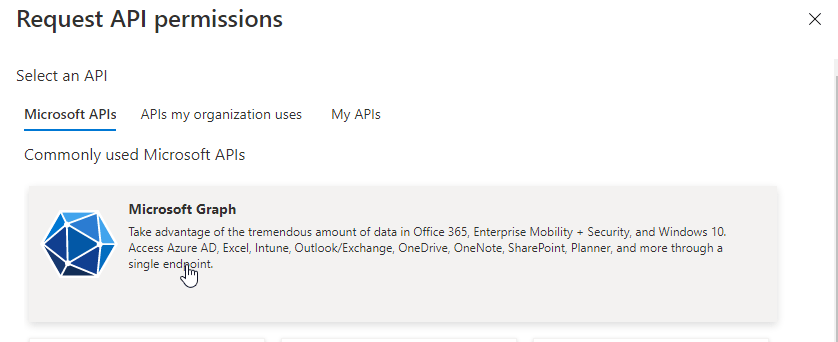
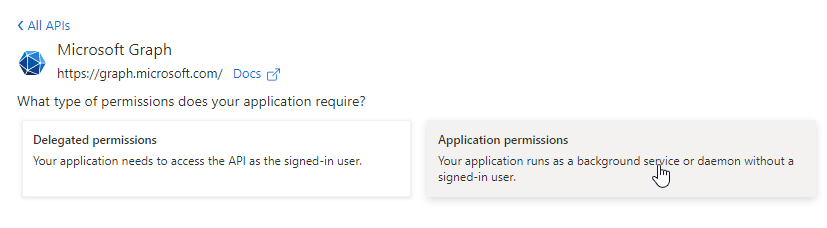
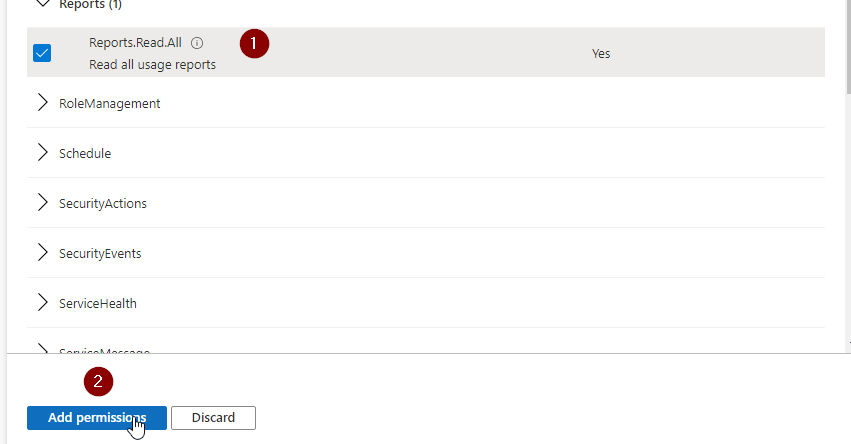
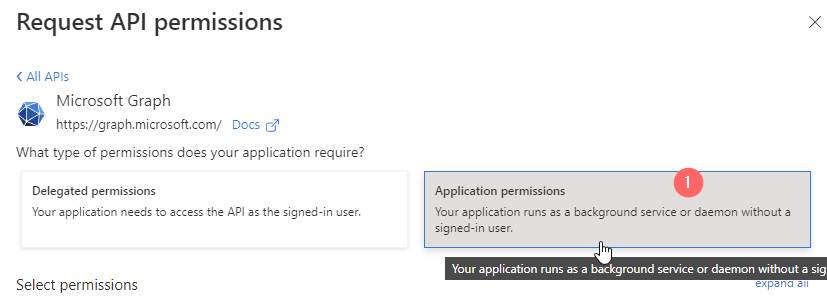
7. Now Click on API permissions on the left navigation pane and add a permission for Microsoft Graph
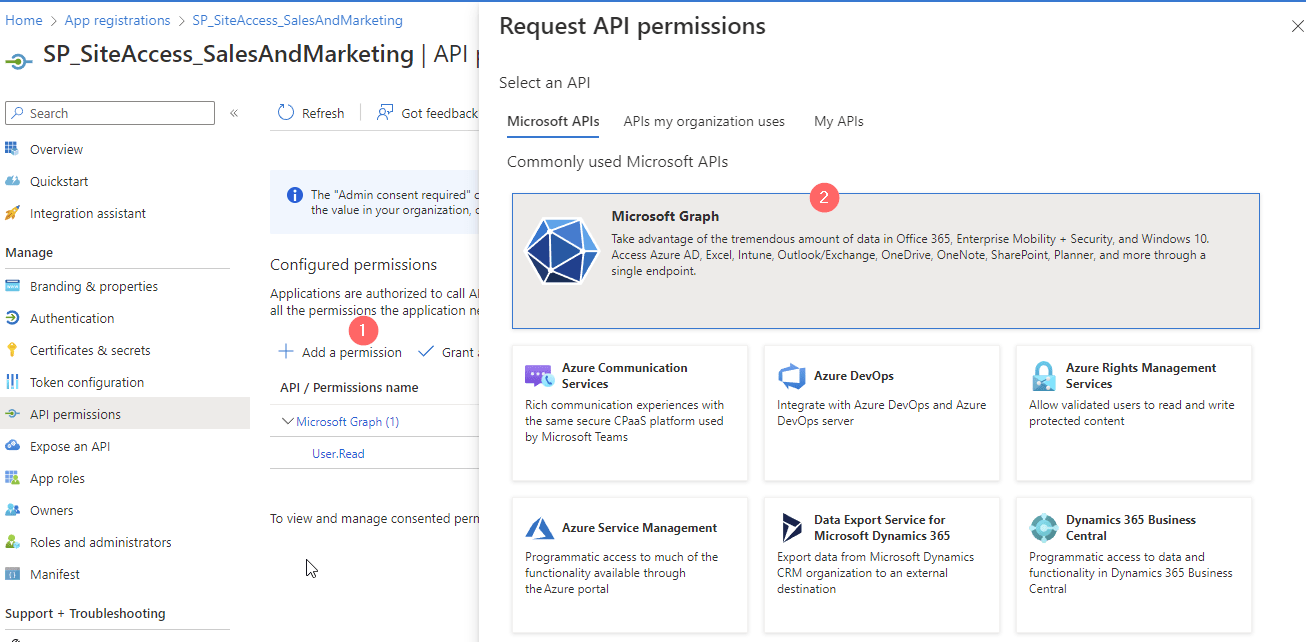
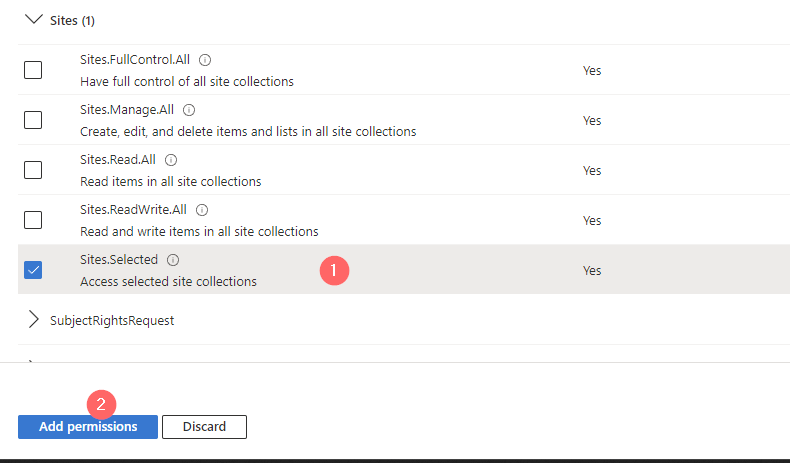
8. Add the Application Permission Sites.Selected if you want the code run in the background without a signed-in user.
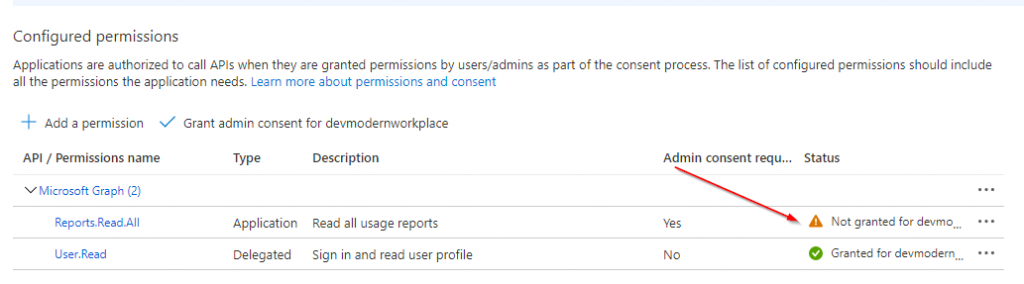
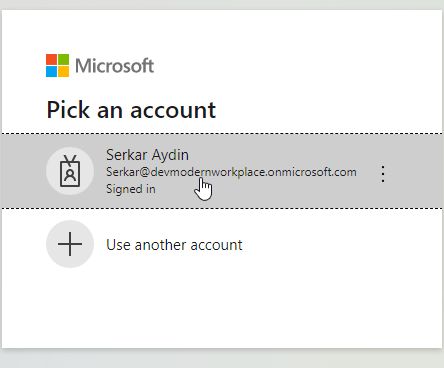
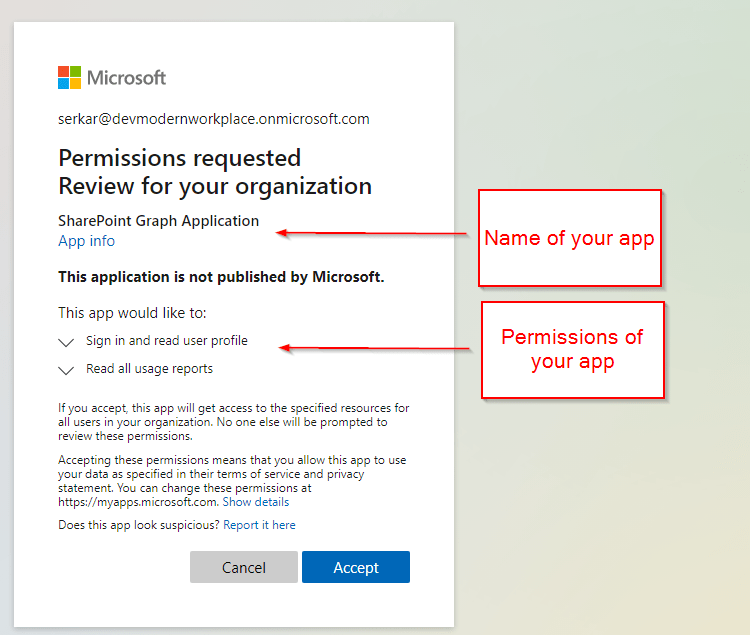
9. Once you added that, you will need to consent the permission from a global administrator.

Granted permissions look like this:
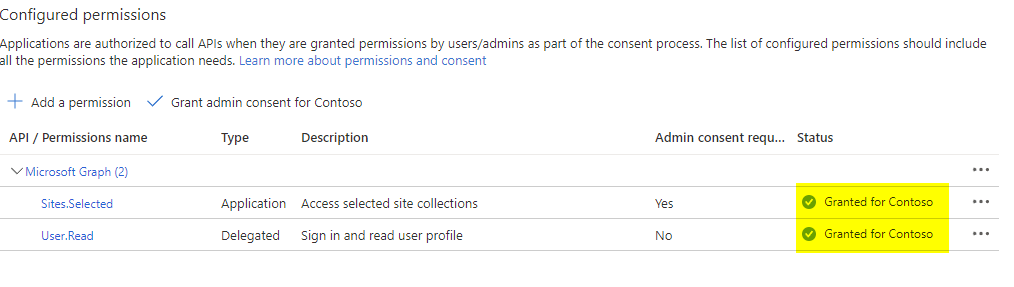
That’s it. You created an Azure App registration with Sites.Selected permission, where you need now to grant the permissions for the specific site.
Step 2: Grant Enterprise application write permissions for SharePoint site
For this step, you need to ensure that PNP Module is installed on your client and that you are allowed to use it.
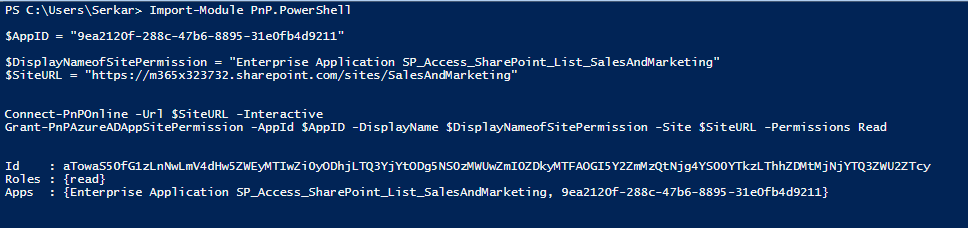
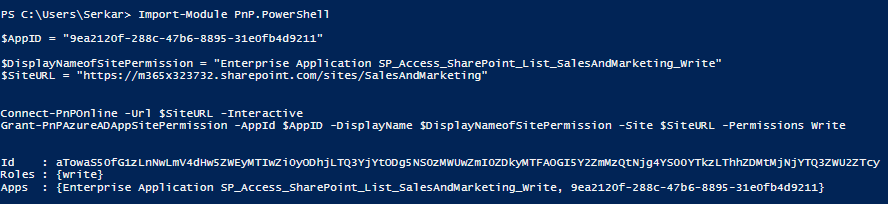
If both conditions are applying, you can use this code to grant Enterprise App, created in Step 1 the right permission for the site. In this case, I am granting a write role.
Import-Module PnP.PowerShell

$AppID = "9ea2120f-288c-47b6-8895-31e0fb4d9211"

$DisplayNameofSitePermission = "Enterprise Application SP_Access_SharePoint_List_SalesAndMarketing_Write"
$SiteURL = "https://m365x323732.sharepoint.com/sites/SalesAndMarketing"


Connect-PnPOnline -Url $SiteURL -Interactive
Grant-PnPAzureADAppSitePermission -AppId $AppID -DisplayName $DisplayNameofSitePermission -Site $SiteURL -Permissions Write
You will need to log in with an account, which has access to the site.
After that you will see, that the Enterprise Application has now write access to the Site.
Step 3: Create SharePoint list items using Graph API with PowerShell
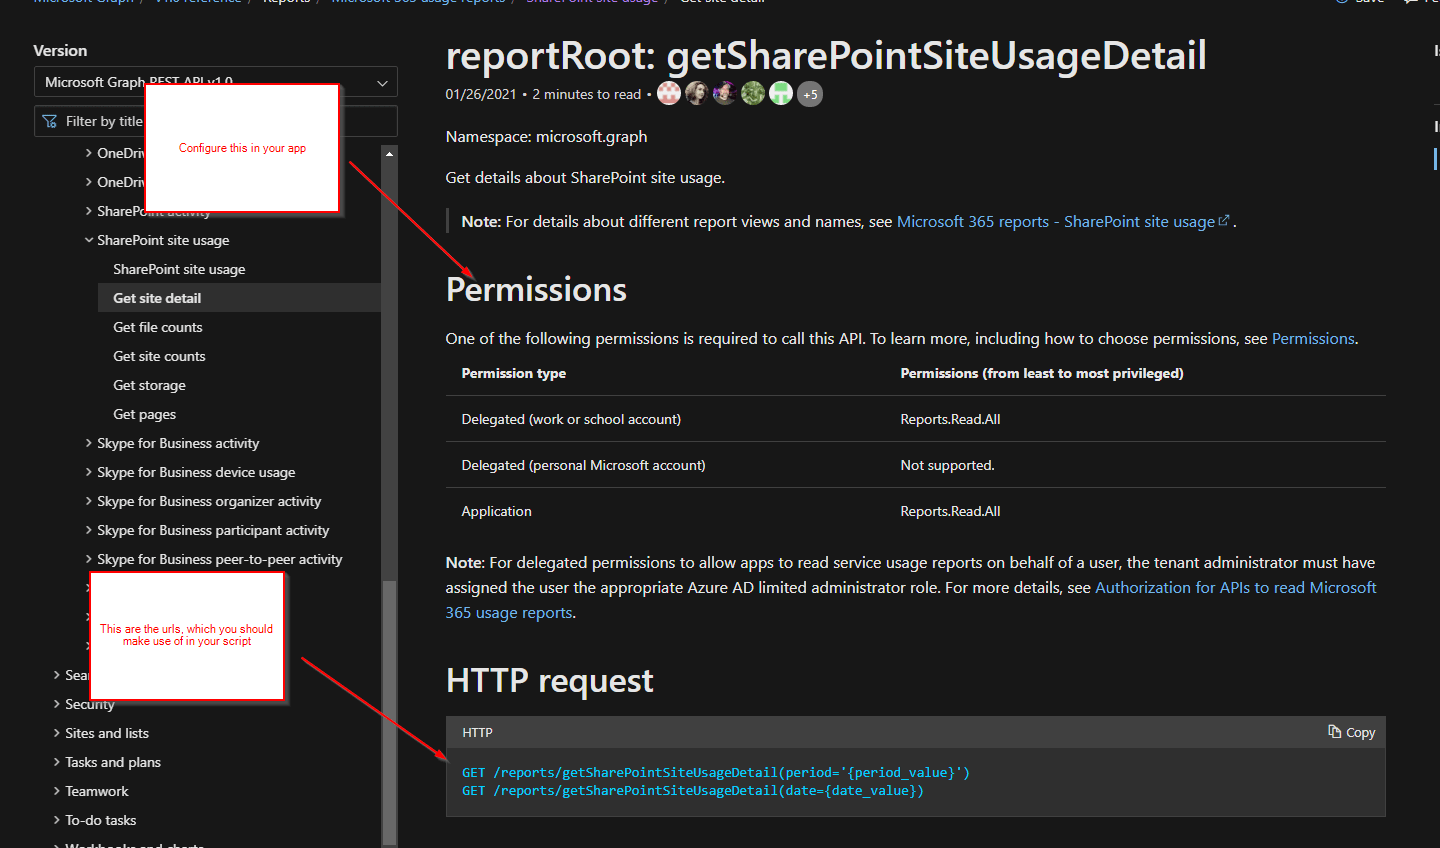
As the enterprise application has now the permission to write contents to the designated SharePoint Site, you are able create SharePoint list items using Graph API.
For this we need the app credentials and the site id of the site in which you want to create SharePoint list items using Graph API.
Param (
$AppID = "9ea2120f-288c-47b6-8895-31e0fb4d9211",
$Scope = "https://graph.microsoft.com/.default",
$Tenant = "m365x323732",
$SiteID = "e35cee33-6d10-4e2c-a83b-496a26062ad3",
$ListTitle = "Product%20List"
)
Import-Module PnP.PowerShell
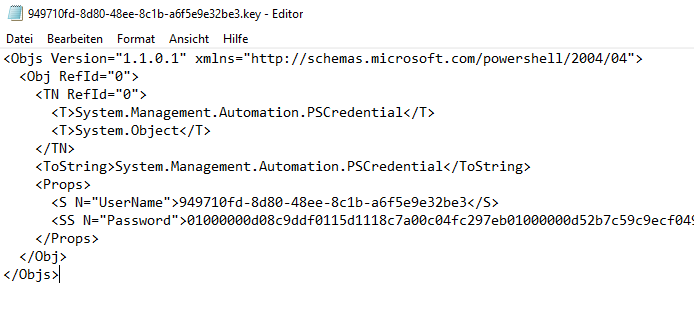
$AppCredential = Get-Credential($AppID)
#region authorize
$Body = @{
client_id = $AppCredential.UserName
client_secret = $AppCredential.GetNetworkCredential().password
scope = $Scope
grant_type = 'client_credentials'
}
$GraphUrl = "https://login.microsoftonline.com/$($Tenant).onmicrosoft.com/oauth2/v2.0/token"
$AuthorizationRequest = Invoke-RestMethod -Uri $GraphUrl -Method "Post" -Body $Body
$Access_token = $AuthorizationRequest.Access_token
$Header = @{
Authorization = $AuthorizationRequest.access_token
"Content-Type"= "application/json"
}
#endregion
#region create items
$Body = @{
fields = @{
Title = "Test"
}
}
$GraphUrl = "https://graph.microsoft.com/v1.0/sites/$SiteID/lists/$ListTitle/items"
$BodyJSON = $Body | ConvertTo-Json -Compress
Invoke-RestMethod -Uri $GraphUrl -Method 'POST' -Body $BodyJSON -Headers $Header -ContentType "application/json"
#endregion
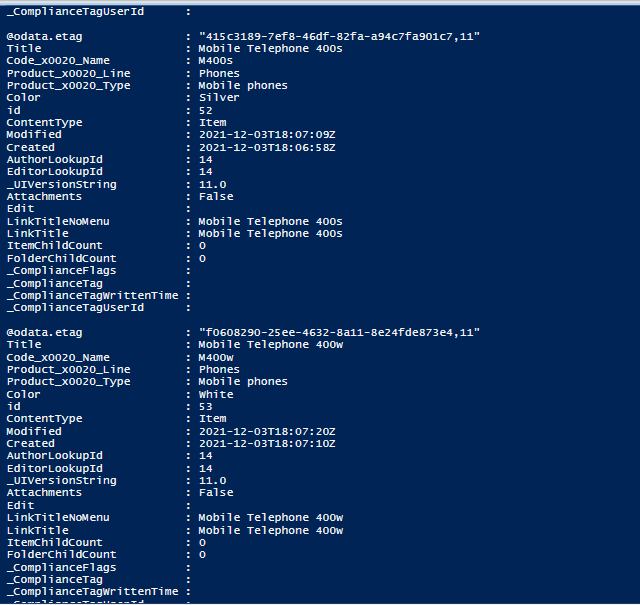
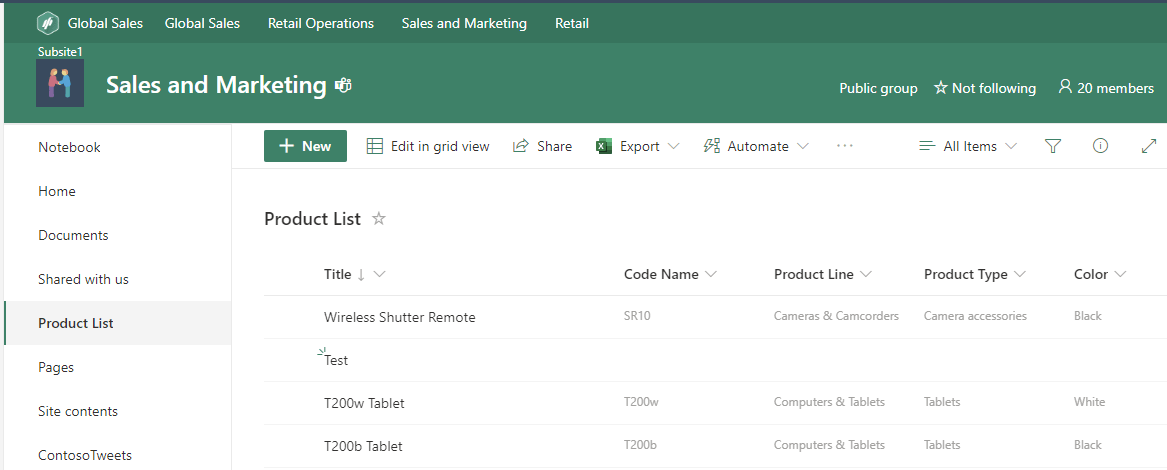
As you can see the item with the title Test was created in the SharePoint List Product List.
Further Reference
3 of the most important SharePoint PowerShell Modules and Snappins
Access SharePoint via Graph API in PowerShell
Add items to SharePoint Online lists with Powershell
Microsoft Graph overview – Microsoft Graph | Microsoft Learn
Working with SharePoint sites in Microsoft Graph – Microsoft Graph v1.0 | Microsoft Learn