
Sometimes it’s hard enough to map the exact business requirements on the intranet. Implementing them manually afterwards can lead to the requirements not being implemented exactly in the further course. Also doing it manually is very time consuming and frustrating, when mistakes are made. This is where automation comes in handy. If you are looking forward to automate your intranet, it is crucial to design lists by adding them programtically. When you add SharePoint columns with PowerShell, you can be sure, that mistakes are not made like choosing the wrong column type or wrong internal name. You basically ensure that your intranet follows the standards, which have been defined in the beginning by your stakeholders. Thus I thought it might be interesting to share my experiences with you. All my descriptions have been tested and can be used on lists and libraries.
Prerequisites
You have to have access to the sites, where you want to add the SharePoint columns with PowerShell. Check out the article of Microsoft, if you are not sure, how to customize the permissions: Customize permissions for a SharePoint list or library – SharePoint (microsoft.com).
To have a understanding, how lists / libraries can be designed, will help you to automate the procedures. If you are not familiar with this, try out creating and defining a list manually, to know what options are available.
Scenario
Lets assume, we are looking forward, to create a list with various column types.
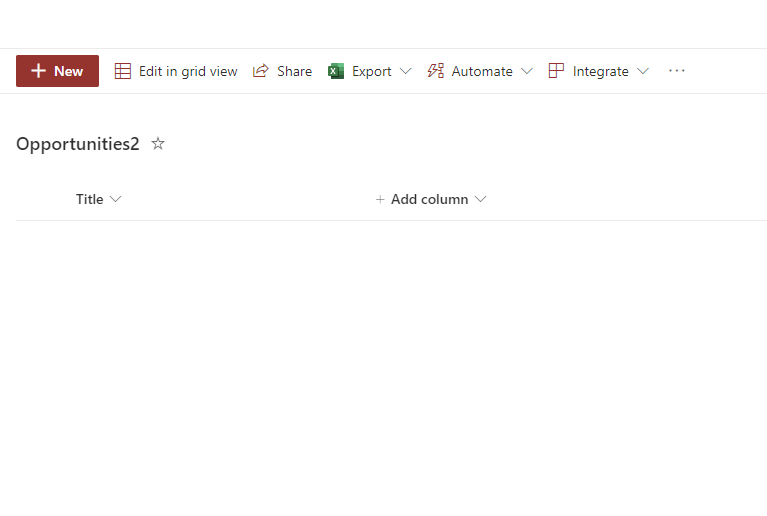
The beginning will be this plank list:
Description
In the following, I will show you step by step how to add the SharePoint columns with PowerShell.
Step 1 – Connect to SharePoint
In order to add SharePoint Columns with PowerShell, you have to connect to SharePoint Online with PNP. PowerShell. If you are not sure about how to, check out: Connect to SharePoint Online with PowerShell (workplace-automation.com/)
$Credential = Get-Credential
Connect-PnPOnline -Url "https://devmodernworkplace.sharepoint.com/sites/sales" -Credential $Credential
Step 2 – Get the List
Get the SharePoint list or library with Get-PNPList
$List = Get-PnPList -Identity "ID of the list"
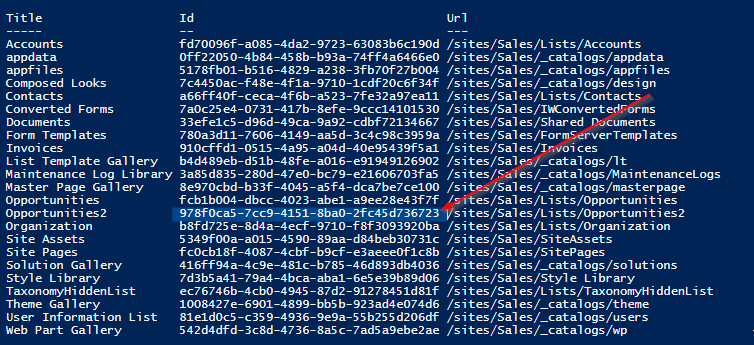
$List = Get-PnPList -Identity "978f0ca5-7cc9-4151-8ba0-2fc45d736723"
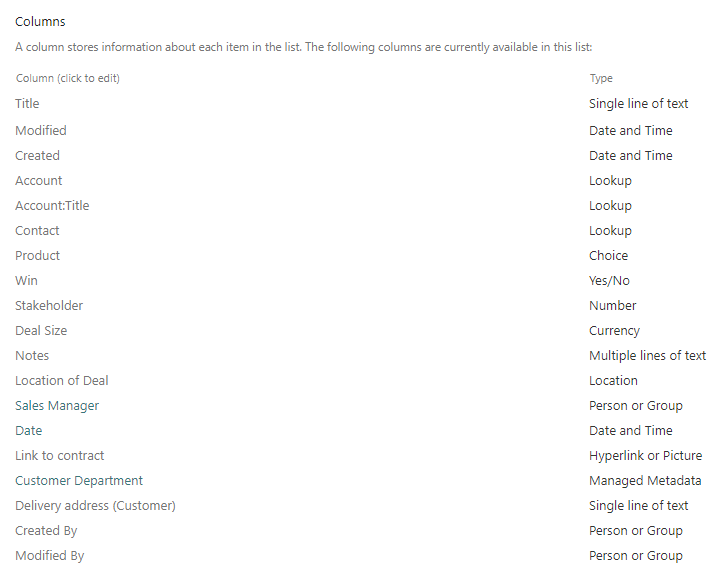
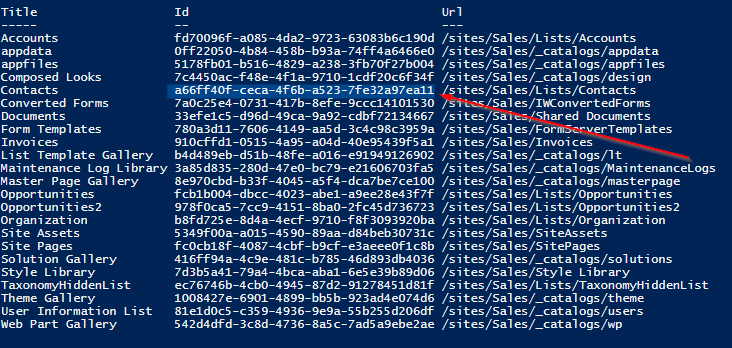
You can find the internal name of the list by running Get-PNPList.
Step 3 – Add SharePoint Columns
After we have connected to the site and got the list/ library, we can add the desired fields. If you don’t want to add the fields to the default view, remove the paramter -AddToDefaultView.
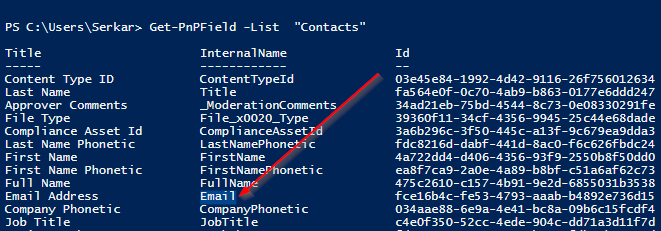
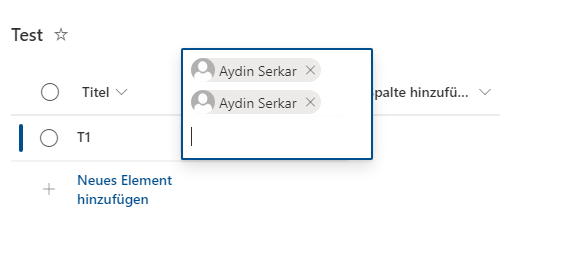
I have used $DisplayName also for the paremter InternalName, since we cannot ensure, that the name for the internal name will be set, as you can see in the screenshot:

Add String Column
$DisplayName = "Delivery address (Customer)"

Add-PnPField -List $List -DisplayName $DisplayName -InternalName $DisplayName -Type Text -AddToDefaultView
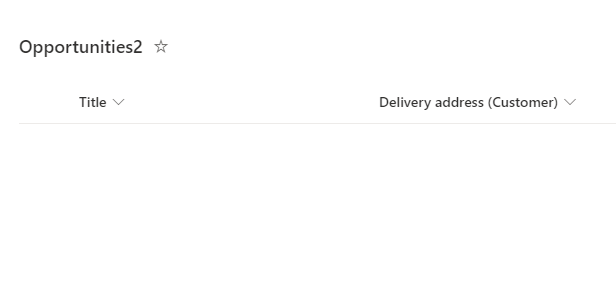
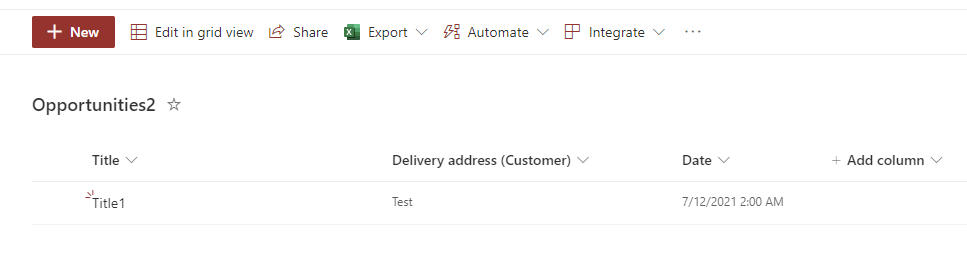
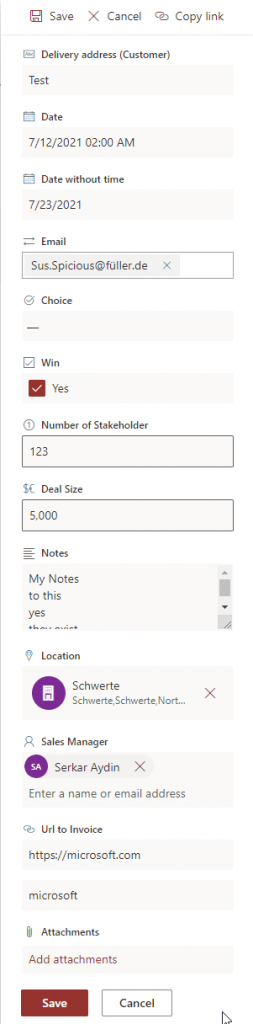
The result of the string column looks like this:
Add Date Colum with Time
If you want to add the date column, without time, you can do it like this:
$DisplayName = "Date"
Add-PnPField -List $List -DisplayName $DisplayName -InternalName $DisplayName -Type DateTime -AddToDefaultView
The result of the date column with time looks like this:
Add Date Column without Time
If you want to add the date column without time, you can do it like this:
$DisplayName = "Date without time"
$PNPField = Add-PnPField -List $List -DisplayName $DisplayName -InternalName $DisplayName -Type DateTime -AddToDefaultView
[XML]$SchemaXml = $PNPField.SchemaXml
$SchemaXml.Field.SetAttribute("Format","DateOnly")

Set-PnPField -List $List -Identity $PNPField.Id -Values @{SchemaXml =$SchemaXml.OuterXml} -UpdateExistingLists
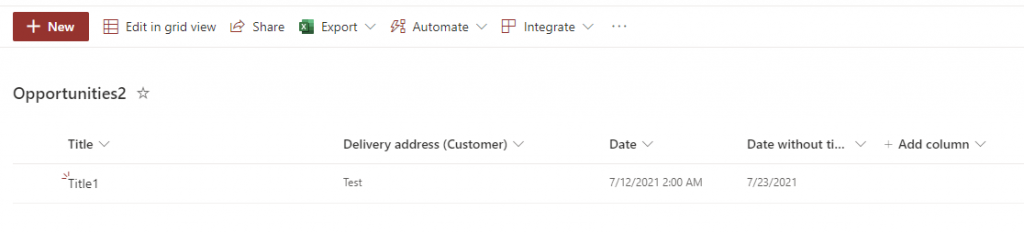
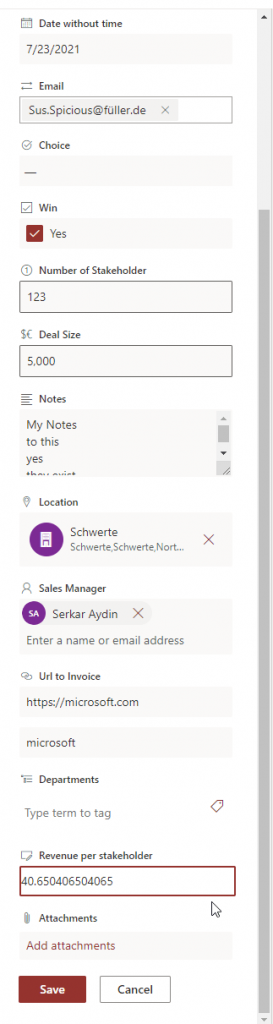
The result of the date column looks like this:
Add Lookup Column
If you want to add lookup columns, you have to know the ID of the list and the Internal Name of the column, which you want to look up.
Let’s assume, that we will lookup the email address from the list Contacts.
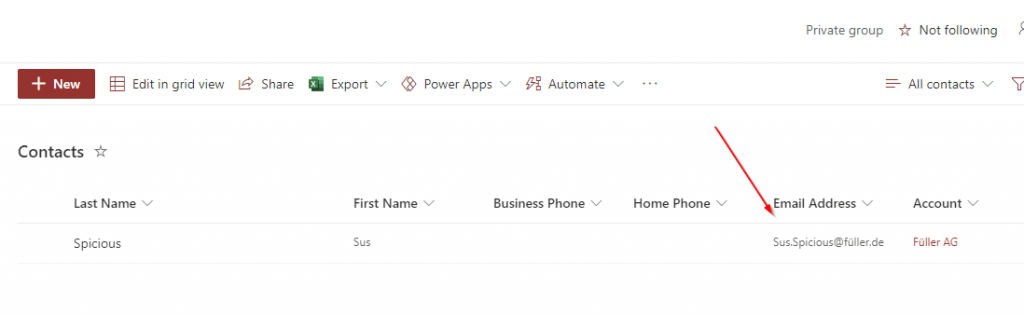
The ID of the list contact is: a66ff40f-ceca-4f6b-a523-7fe32a97ea11
For the email column, you other can do it with GUI: Determine internal name of SharePoint Columns with GUI – SPO Scripts or with PowerShell:
Get-PnPField -List $List

#Or

Get-PNPField -List "INTERNALNAME OFLIST"
Now you can add the column email address to the opportunity list.
$DisplayName = "Email"
$PNPField = Add-PnPField -List $List -DisplayName $DisplayName -InternalName $DisplayName -Type Lookup  -AddToDefaultView
Set-PnPField -List $List -Identity $PNPField.Id -Values @{LookupList= "a66ff40f-ceca-4f6b-a523-7fe32a97ea11"; LookupField="Email"}
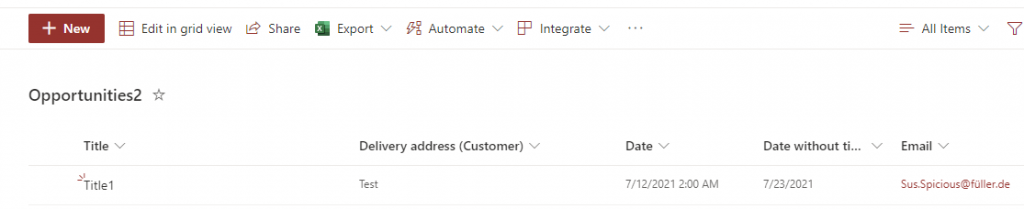
The result of the lookup column looks like this:
Add Choice Column
First you define the choices, than you add the column.
$Choices = (
"Choice 1",
"Choice 2",
"Choice 3"
)

$DisplayName = "Choice"
$PNPField = Add-PnPField -List $List -DisplayName $DisplayName -InternalName $DisplayName -Type Choice -AddToDefaultView -Choices $Choices
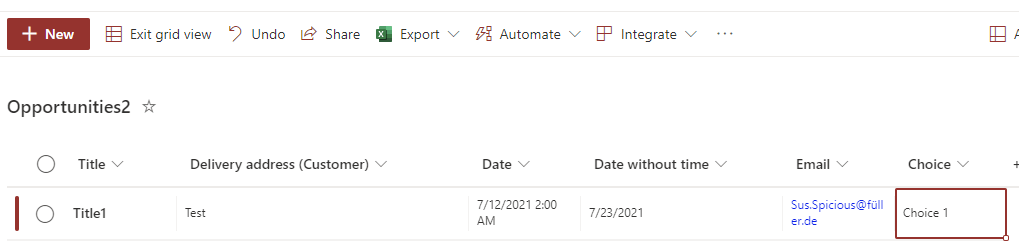
Result:
Add Boolean Column
$DisplayName = "Win"
$PNPField = Add-PnPField -List $List -DisplayName $DisplayName -InternalName $DisplayName -Type Boolean -AddToDefaultView
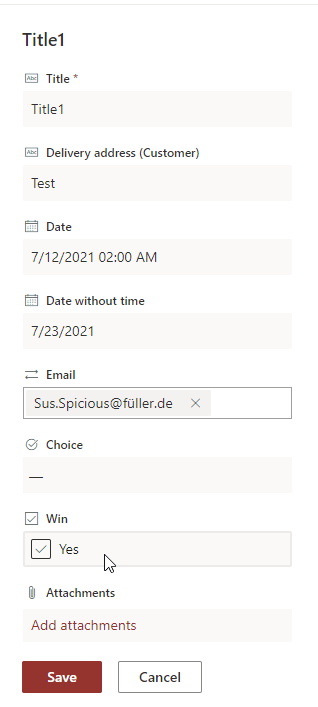
The result of the boolean column looks like this:
Add Number Value
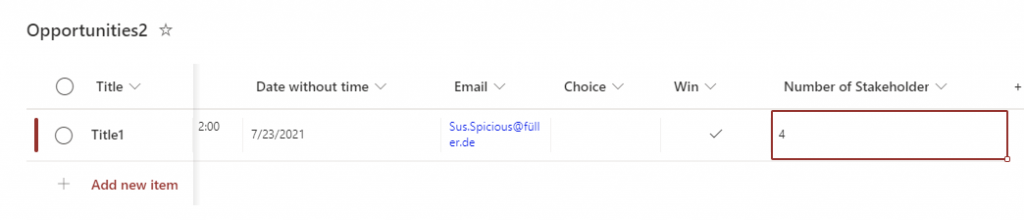
$DisplayName = "Number of Stakeholder"
$PNPField = Add-PnPField -List $List -DisplayName $DisplayName -InternalName $DisplayName -Type Number -AddToDefaultView
The result of the number column looks like this:
Add Currency Column
$DisplayName = "Deal Size"
$PNPField = Add-PnPField -List $List -DisplayName $DisplayName -InternalName $DisplayName -Type Currency -AddToDefaultView
The result of the currency column looks like this:

Add Notes Column
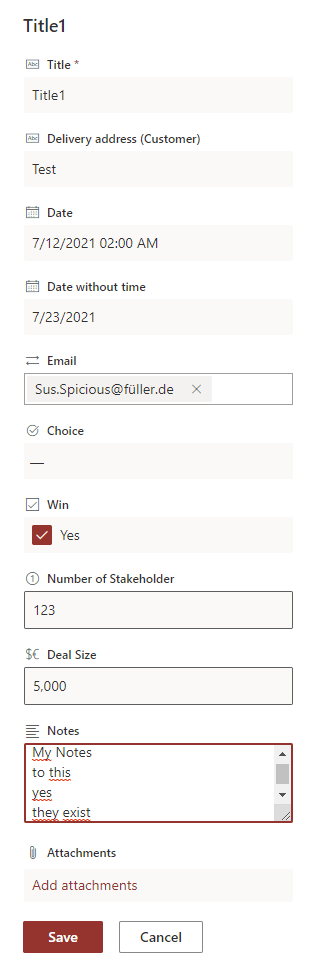
$DisplayName = "Notes"
$PNPField = Add-PnPField -List $List -DisplayName $DisplayName -InternalName $DisplayName -Type Note -AddToDefaultView
Result:
Add Location Column
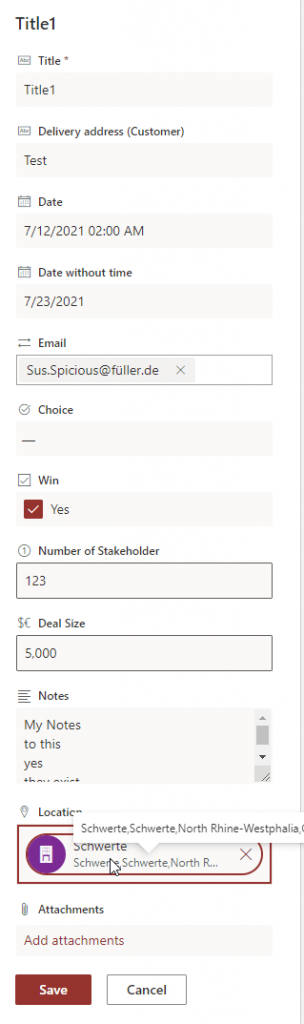
$DisplayName = "Location"
$PNPField = Add-PnPField -List $List -DisplayName $DisplayName -InternalName $DisplayName -Type Location -AddToDefaultView
The result of the location column looks like this:
Add Person / User Column (single person)
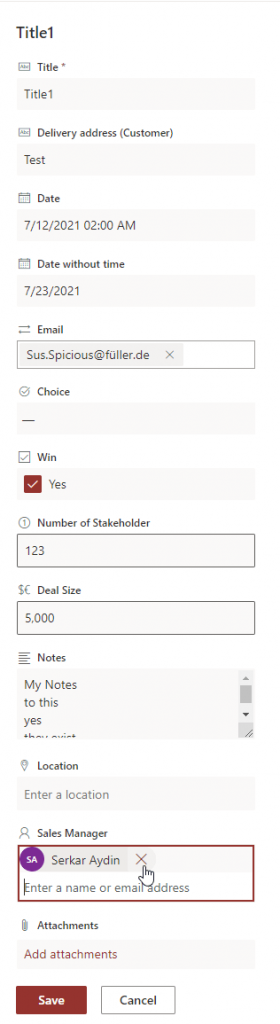
$DisplayName = "Sales Manager"
$PNPField = Add-PnPField -List $List -DisplayName $DisplayName -InternalName $DisplayName -Type User -AddToDefaultView
The result of the single people column looks like this:
Add Person / User Column (multiple persons)
$DisplayName = "MultiPerson"
$PNPField = Add-PnPField -List $List -InternalName $DisplayName -DisplayName $DisplayName -Type User -AddToDefaultView
[XML]$SchemaXml = $PNPField.SchemaXml

$SchemaXml.Field.SetAttribute("Mult","TRUE")
$OuterXML = $SchemaXml.OuterXml.Replace('Field Type="User"','Field Type="UserMulti"')
Set-PnPField -List $List -Identity $PNPField.Id -Values @{SchemaXml =$OuterXML} -UpdateExistingLists
The result of the multi people column looks like this:
Add Hyperlink Column
$DisplayName = "Url to Invoice"
$PNPField = Add-PnPField -List $List -DisplayName $DisplayName -InternalName $DisplayName -Type  -AddToDefaultView
The result of the hyperlink column looks like this:
Add Managed Metadata Column
Retrieve the Unique Identifier of the term set, which you want to add as a metadata column.
Visit admin center url and follow the numbers in the screenshot:
https://tenant-admin.sharepoint.com
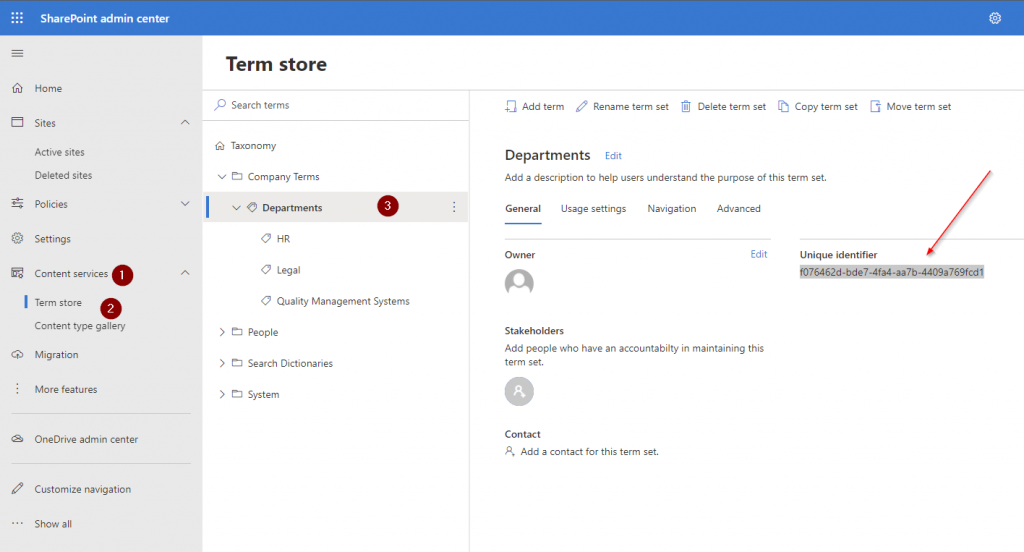
Now add it to TaxononmyItemID and run the cmdlets
$DisplayName = "Departments"
Add-PnPTaxonomyField -List $List -DisplayName $DisplayName -InternalName $DisplayName -TaxonomyItemId f076462d-bde7-4fa4-aa7b-4409a769fcd1
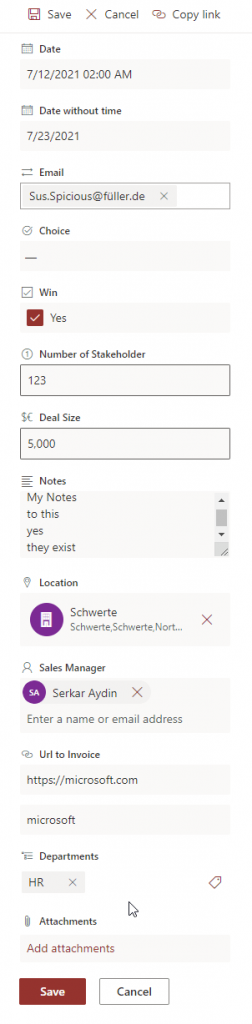
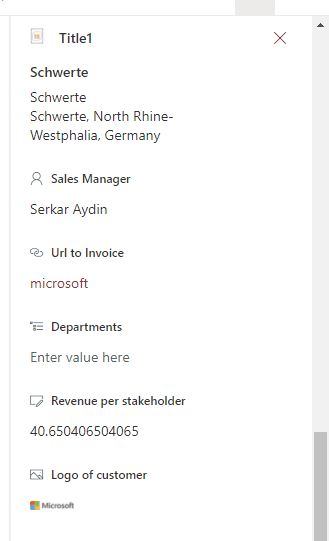
The result is, that the department column, pops up as a managed metadata column.
Add Calculated Column
You can add a calculated column by defining a formular per each column. Check the reference, which shows you, how to define a formular: Examples of common formulas in lists – SharePoint (microsoft.com)
Note: When you define the formular, you have to take the displayname. Internal names do not work currently.
Otherwise, you see this error:

$DisplayName = "Revenue per stakeholder"
$PNPField = Add-PnPField -List $List -DisplayName $DisplayName -InternalName $DisplayName -Type Calculated -AddToDefaultView -Formula ="[Deal Size]/[Number of Stakeholder]"
The result of the calculated column looks like this:
Add Image Column
$DisplayName = "Logo of customer"
$PNPField = Add-PnPField -List $List -DisplayName $DisplayName -InternalName $DisplayName -Type Thumbnail -AddToDefaultView
The result of the image column, looks like this:
Add Task Outcome Column
The task outcome column is designed to define the outcome of tasks like approvals. So basically it is a choice column, but you cannot allow fill-in choices and it is a single selection choice.
I will define following choices:
approved
rejected
to be reviewed by supervisor
The default is empty. I want the people to make conscious decisions.
[array]$Choices = (
"approved",
"rejected",
"to be reviewed by supervisor"
)
$DefaultChoice = ""

$Choices = $Choices |ConvertTo-Xml -NoTypeInformation
$Choices = $Choices.Objects.OuterXml
$Choices =  $Choices -replace "Objects", "CHOICES"
$Choices =  $Choices -replace "Object", "CHOICE"


$FieldXML = @"
<Field RowOrdinal="0" ColName="nvarchar15" Name="$DisplayName" StaticName="$DisplayName" SourceID="{$($List.Id)}" ID="{$([guid]::NewGuid())}" Indexed="FALSE" Viewable="TRUE" EnforceUniqueValues="FALSE" Required="FALSE" DisplayName="$DisplayName" Type="OutcomeChoice">
    <Default>$DefaultChoice</Default>
    $($Choices)
</Field>
"@
$PNPField = Add-PnPFieldFromXml -List $List -FieldXml $FieldXML
If you want to make the field visible in the default view, you have to run following cmdlets:
$PNPView = Get-PnPView -List $List | Where-Object {$_.DefaultView -eq $true}
$PNPView.ViewFields.Add($PNPField.InternalName)
$PNPView.Update()
The result of our task outcome column looks like this:

Bonus: Complete Script
Like everytime, I have provided you the whole script to add a column:
$Credential = Get-Credential
Connect-PnPOnline -Url "https://devmodernworkplace.sharepoint.com/sites/sales" -Credential $Credential
$List = Get-PnPList -Identity 978f0ca5-7cc9-4151-8ba0-2fc45d736723


$DisplayName = "Departments"
$PNPField = Add-PnPField -List $List -DisplayName $DisplayName -InternalName $DisplayName -Type  -AddToDefaultView
Conclusio
As you can see, adding SharePoint Columns with PowerShell can save you a lot time, especially if you have to do it on multiple lists/ libraries and sites. I hope to save you a ton of work with this cheat sheet.
References
GitHub – pnp/powershell: PnP PowerShell
FieldCollection.AddFieldAsXml-Methode (Microsoft.SharePoint.Client) | Microsoft Docs
Image by StartupStockPhotos from Pixabay