Category: Sites

  • How to create SharePoint Sites using Graph

    In the previous article I was showcasing how to create a SharePoint Site with PNP.PowerShell. In this article I want to elaborate how to create a SharePoint Site with MS Graph.

    Creating SharePoint Sites with MS Graph can be interesting for integration scenarios as part of a overarching process. Let’s assume, that you want to create a SharePoint Site for each Sales opportunity or whenever a new Project is initiated, for this purpose it makes sense to create SharePoint Sites using Graph.

    The benefit for this approach in comparison to the PNP.PowerShell is, that you don’t need PowerShell for it, so you could theoretically also leverage every other programming language. In this article, I will create SharePoint sites using Graph in PowerShell, but you can easily replicate the approach to every different programing language as long as you stick to the foundation.

    You could create the SharePoint Sites using either a user account or an Azure Application Permission. In this article I will explain the SharePoint site creation based on an Azure Application Registration.

    In this article, I’ll leverage the MS Graph call POST /groups. With the creation of the M365 Group, a SharePoint teams site will be created.

    Why would you prioritize direct Graph Access vs Pnp.Powershell?

    There are integration scenarios, where you cannot install PowerShell modules. Either because it is not permitted by your organization or because your automation execution host is not using PowerShell as the programing language. This might be the case when you use ServiceNow Orchestration. Having an standard REST API adds flexibility in comparison to a PowerShell module, which can be only used on PowerShell execution hosts.

    Prerequisites to Create SharePoint Sites using Graph

    In order to create SharePoint Sites using Graph, you need to setup an App Registration in Azure Portal. The App Registration needs to have following permission.

    Permission typeLeast privileged permissionsHigher privileged permissions
    Delegated (work or school account)Group.ReadWrite.AllDirectory.ReadWrite.All
    Delegated (personal Microsoft account)Not supported.Not supported.
    ApplicationGroup.CreateDirectory.ReadWrite.All, Group.ReadWrite.All
    Permission Reference for creating SharePoint sites using Graph

    Looking forward, I’ll utilize the Application permission Group.Create following least privilege principles.

    Azure App Registration to Create SharePoint Sites using graph

    In order to create SharePoint sites using Graph, we need the Azure App registration considering the aforementioned application permission Group.Create.

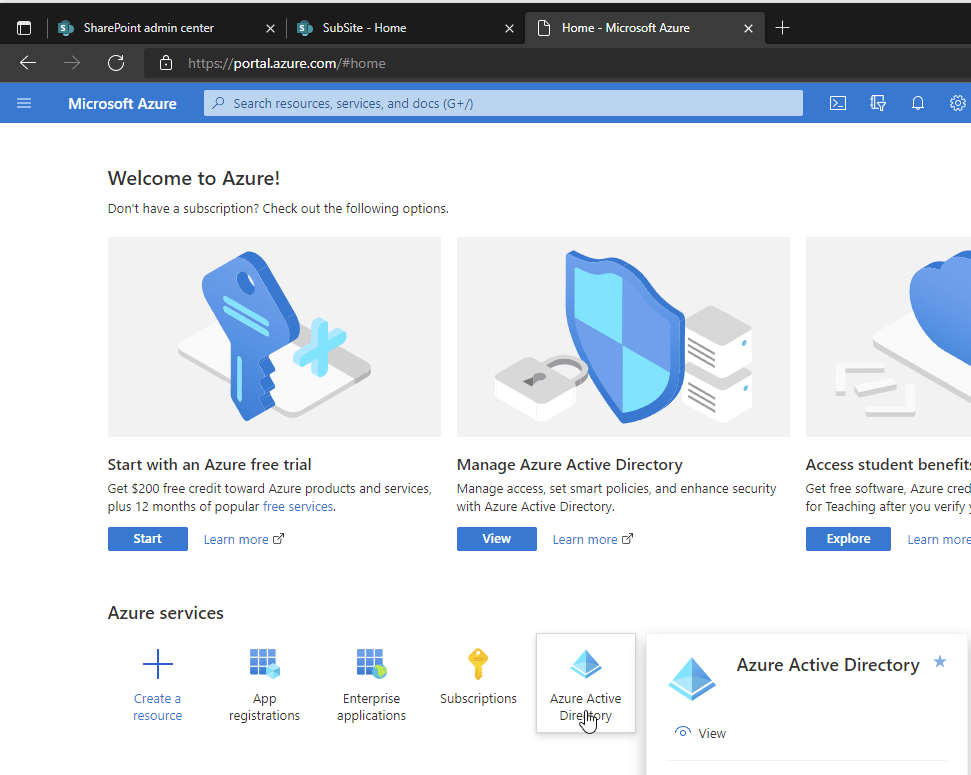
    To create the Azure App Registration, browse to the Azure App Registration page in the Microsoft Azure Portal:

    Click on New registration:

    Provide a meaningful name and register the App by clicking on Register.

    Click on API Permissions

    By default the App is able to read user information from Entra ID. Click on Add a permission to add permissions.

    Now select Microsoft Graph

    Now click on Application Permissions, search for Group and provide the Group.Create permission.

    Now you have requested the permission. Make sure that the permission is also granted. You can grant it by a Global Administrator, Application Administrator, or Cloud Application Administrator.

    Once the permission is granted, the page should look like this:

    Now we made sure that the App registration is created and the necessary permissions are granted. We just need to make sure to configure the authentication of the Application. There are two approaches, which can be used to authenticate with Entra ID:

    1. Certificate based authentication
    2. Secret based authentication

    For this article, I’ll use the secret based authentication. However in production use, consider using a certificate, which is considered to be more secure.

    Browse to the Certificates and secrets blade, click on Client secrets and on New client secret.

    Provide a meaningful name to the client secret. I’ll use GroupMgmt_GroupCreate_180days and configure the lifetime. I’ll use the default lifetime of 180 days. Before expiration you need to make sure to create an additional client secret, and change it in your code. Else your app and the use case won’t work.

    After addition, you’ll be shown only once the value of the client secret. Make sure to store it in a secure place like a key vault.

    Create SharePoint Site Using Graph: PowerShell code

    With the code below you can create SharePoint Sites using Graph with PowerShell. Before you run the code, make sure that you change the parameters.

    If you trigger the code below, you’ll get prompted the app secret, which you have created previously.

    How can I avoid getting prompted on Windows?

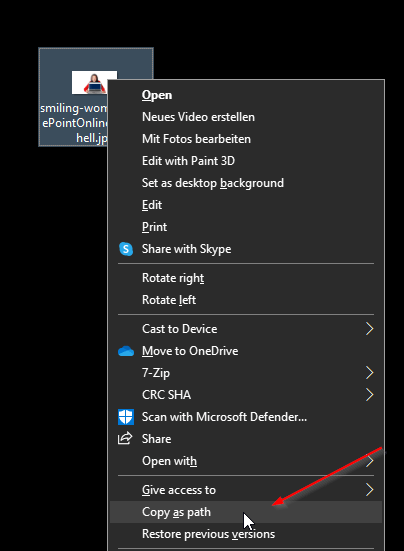
    To avoid getting prompted each time for the app secret value, make sure to export it like this:

    Make sure that you export the credential with the user account, with which you want to run the code, and also the machine, on which the code shall run. If you copy the credential xml to another machine or try to decode the credential file with a different user account, you’ll notice that you won’t be able to do so.

    If you use the PowerShell code in Azure (like in Azure Automation, Azure Functions), make sure that you store the credentials in a secure place e.g. Azure Key Vault.

    # Export the Credential path to specified path   
    Get-Credential | Export-CliXml -Path c:\creds\credential.xml
    
    # Import the credential object from specified path
    $Credential = Import-CliXml -Path c:\creds\credential.xml

    The code below is first attempting to obtain a bearer token from Entra Id. Once the token is obtained, it is intended to create an Entra ID group, based on which the SharePoint Site is getting created.

    # Define parameters for the tenant, application ID, site name, and mail nickname
    Param (
        # The Azure AD tenant ID for authentication
        $Tenant = "m365x16735261", 
        # The Application (client) ID of the registered Azure AD application
        $AppID = "730efedf-b000-4deb-92c6-25da0e27e24d",   
        # The display name of the group to be created
        $SiteName = "GraphSite7",   
        # The mail nickname for the group (used for email addressing)
        $Mailnickname = "GraphSite7"   
    )
    
    # Securely prompts for application credentials (Client ID and Secret)
    #$AppCredential = Get-Credential -UserName $AppID -Message "Enter the client secret"
    
    # Function to obtain the Microsoft Graph API token
    function Get-GraphToken {
        param (
            [string]$Tenant,
            [PSCredential]$AppCredential
        )
        
        # Define the required scope for accessing the Microsoft Graph API
        $Scope = "https://graph.microsoft.com/.default"
    
        # Prepare the body for the token request with client ID, client secret, and scope
        $Body = @{
            client_id = $AppCredential.UserName                     # Client ID from app registration
            client_secret = $AppCredential.GetNetworkCredential().password   # Securely retrieve the client secret
            scope = $Scope                                         # API scope required for MS Graph API access
            grant_type = 'client_credentials'                      # Grant type for app-only authentication
        }
    
        # Azure AD endpoint to request an OAuth token
        $GraphUrl = "https://login.microsoftonline.com/$($Tenant).onmicrosoft.com/oauth2/v2.0/token"
    
        try {
            # Request the access token from Azure AD
            $AuthorizationRequest = Invoke-RestMethod -Uri $GraphUrl -Method "Post" -Body $Body
            # Retrieve the access token from the response
            return $AuthorizationRequest.Access_token
        } catch {
            # Handle authentication errors, if any
            Write-Error "Error during token retrieval: $_"
            return $null
        }
    }
    
    # Call the Get-GraphToken function and store the result
    $Access_token = Get-GraphToken -Tenant $Tenant -AppCredential $AppCredential
    
    # Check if access token is successfully obtained
    if (-not $Access_token) {
        Write-Error "Failed to retrieve access token. Exiting script."
        return
    }
    
    # Set the Authorization header with the bearer token for API requests
    $Header = @{
        Authorization = "Bearer $Access_token"              # Bearer token for API authorization
        "Content-Type" = "application/json"                 # JSON content type for the request body
    }
    Write-Output "Access token retrieved successfully."
    
    #region create site
    # Define the group properties for the new group creation request
    $Body = @{
        displayName = $SiteName                   # Name displayed for the new group in Azure AD
        groupTypes = @("Unified")                 # "Unified" indicates an Office 365 group
        mailEnabled = $false                       # Enable mail functionality for the group
        mailNickname = $Mailnickname              # The mail alias for the group, unique for Microsoft 365 groups in the organization
        securityEnabled = $false                  # Indicates that this is not a security group
    }
    
    # Set the endpoint URL for creating a group in Microsoft Graph API
    $Url = "https://graph.microsoft.com/v1.0/groups"
    # Convert the group properties to JSON format required for the API request
    $BodyJSON = $Body | ConvertTo-Json -Compress
    
    try {
        # Send the HTTP POST request to create the group with the defined properties
        $response = Invoke-RestMethod -Uri $Url -Headers $Header -Method Post -Body $BodyJSON
        # Output the ID of the newly created group for confirmation
        Write-Output "Group created successfully: $($response.id)"
        Write-Output "Site created succesfully: $SiteName"
    } catch {
        # Handle errors that may occur during the group creation request
        Write-Error "Failed to create group: $_"
    }
    #endregion

    Upon submission of the code, you’ll get following similar output:

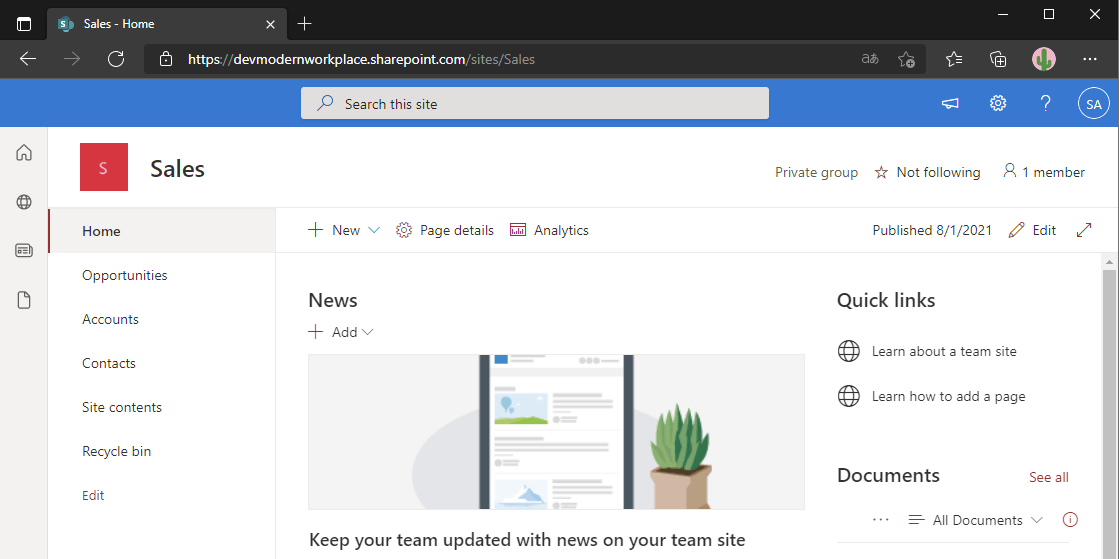
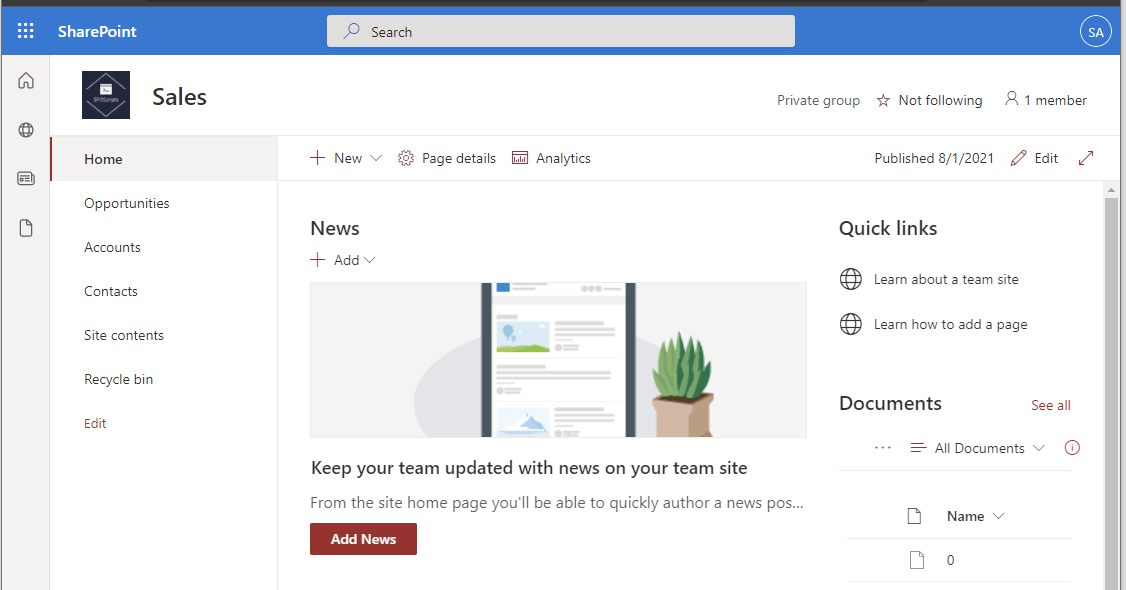
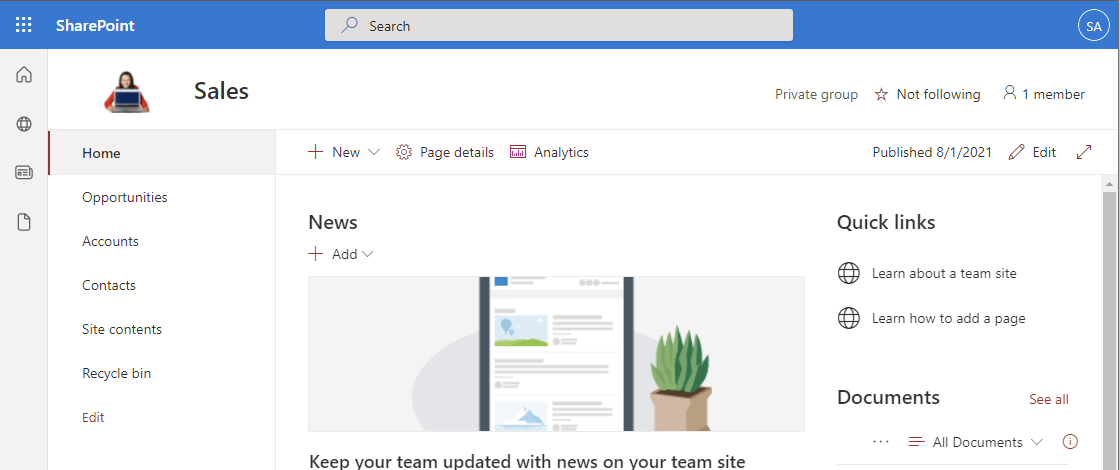
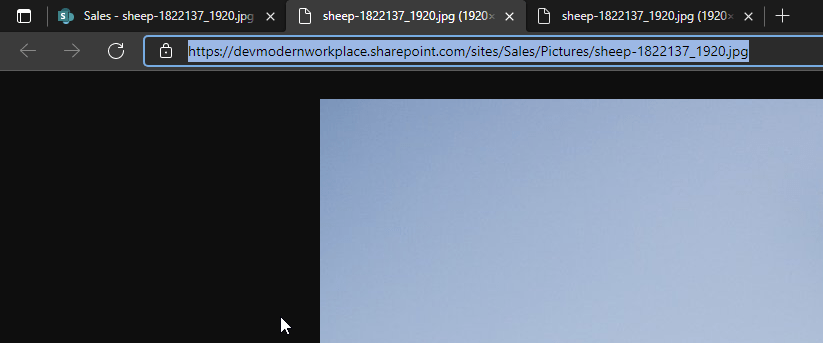
    With the execution of the code, the SharePoint site https://m365x16735261.sharepoint.com/sites/GraphSite8 was just created:

    Create SharePoint Sites using Graph: Postman

    I want to showcase the strength of the usage of MS Graph by showing how to create SharePoint sites with Postman. The approach consists of a two staged process: Obtain Bearer Token and creation of Entra ID group.

    Create SharePoint Sites using Graph: Postman – Prerequisites

    Make sure that you install Postman or utilize the web version of postman. You can download it from the official website: Postman API Platform

    Create SharePoint Sites using Graph: Postman – Obtain bearer token

    To create the bearer token, you need to trigger a POST call for the endpoint https://login.microsoftonline.com/<tenanturl>/oauth2/v2.0/token

    In my example it is: https://login.microsoftonline.com/m365x16735261.onmicrosoft.com/oauth2/v2.0/token

    Make sure you maintain following body as x-www-form-urlencoded:

    KeyValue
    grant_typeclient_credentials
    client_id<app id of the Azure App registration>
    In my example:
    730efedf-b000-4deb-92c6-25da0e27e24d
    client_secret<secret of the Azure App registration>
    scope.default

    Your call shall look like this:

    After calling it you should receive a bearer token as part of a response:

    {
        "token_type": "Bearer",
        "expires_in": 3599,
        "ext_expires_in": 3599,
        "access_token": "eyJ0eXAiOiJKV1QiLCJub2...<SANITIZED>"
    }

    Copy the bearer token value, you’ll need it in the next step.

    Create SharePoint Sites using Graph: Postman – Create Group

    Now as you have obtained the bearer token, create another tab and make sure to Enter following header information:

    KeyValue
    Content-Typeapplication/json
    AuthorizationBearer eyJ0eXAiOiJKV1QiLCJub25jZSI6ImkyQUxLTktKMVpoRXdTU2xoWDJrYXZ1a09IRVFocUdQMnRESzhGWS1naGciLCJhbGciOiJSUzI1NiIsIng1dCI6IjNQYUs0RWZ5Qk5RdTNDdGpZc2EzWW1oUTVFMCIsImtpZCI6<SANITIZED>

    Proceed with the body configuration:

    Provide the body as JSON. Make sure to adjust it based on your scenario:

    {
      "mailEnabled": false,
      "displayName": "GraphSite10",
      "mailNickname": "GraphSite10",
      "securityEnabled": false,
      "groupTypes": [
        "Unified"
      ]
    }

    After submitting the POST request, you’ll get the Entra ID group and the Site created. This is a sample response, upon submission of the request.

    {
        "@odata.context": "https://graph.microsoft.com/v1.0/$metadata#groups/$entity",
        "id": "d32e29f1-68e2-4a55-a9cd-bda027125522",
        "deletedDateTime": null,
        "classification": null,
        "createdDateTime": "2024-11-01T23:32:57Z",
        "creationOptions": [],
        "description": null,
        "displayName": "GraphSite10",
        "expirationDateTime": null,
        "groupTypes": [
            "Unified"
        ],
        "isAssignableToRole": null,
        "mail": "GraphSite10@M365x16735261.onmicrosoft.com",
        "mailEnabled": true,
        "mailNickname": "GraphSite10",
        "membershipRule": null,
        "membershipRuleProcessingState": null,
        "onPremisesDomainName": null,
        "onPremisesLastSyncDateTime": null,
        "onPremisesNetBiosName": null,
        "onPremisesSamAccountName": null,
        "onPremisesSecurityIdentifier": null,
        "onPremisesSyncEnabled": null,
        "preferredDataLocation": null,
        "preferredLanguage": null,
        "proxyAddresses": [
            "SMTP:GraphSite10@M365x16735261.onmicrosoft.com"
        ],
        "renewedDateTime": "2024-11-01T23:32:57Z",
        "resourceBehaviorOptions": [],
        "resourceProvisioningOptions": [],
        "securityEnabled": false,
        "securityIdentifier": "S-1-12-1-3543017969-1247111394-2696793513-576000551",
        "theme": null,
        "uniqueName": null,
        "visibility": "Public",
        "onPremisesProvisioningErrors": [],
        "serviceProvisioningErrors": []
    }

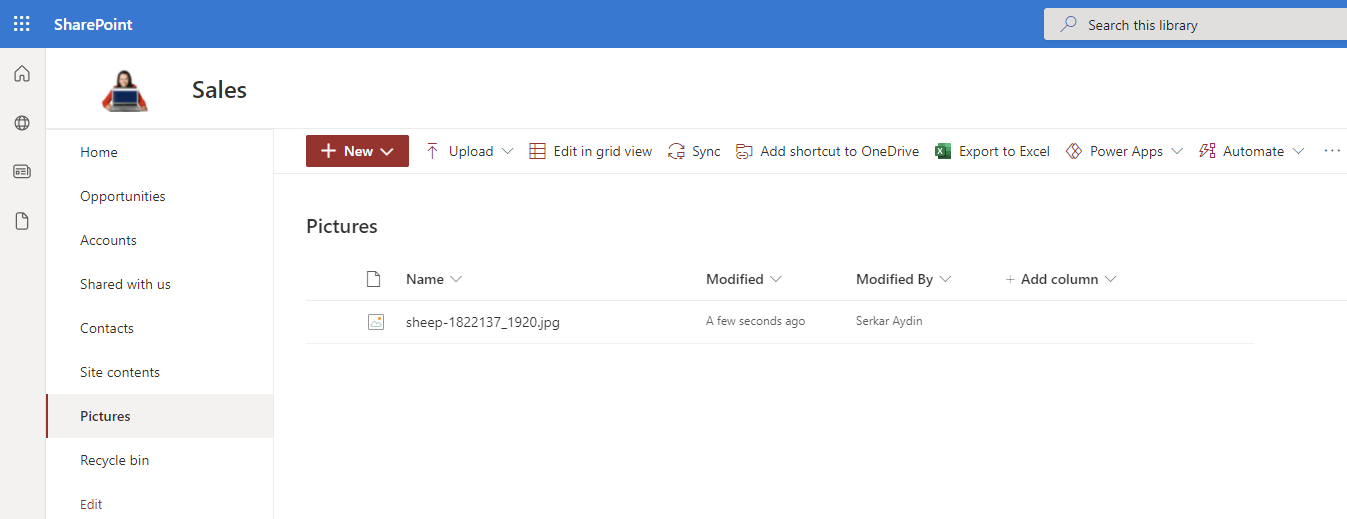
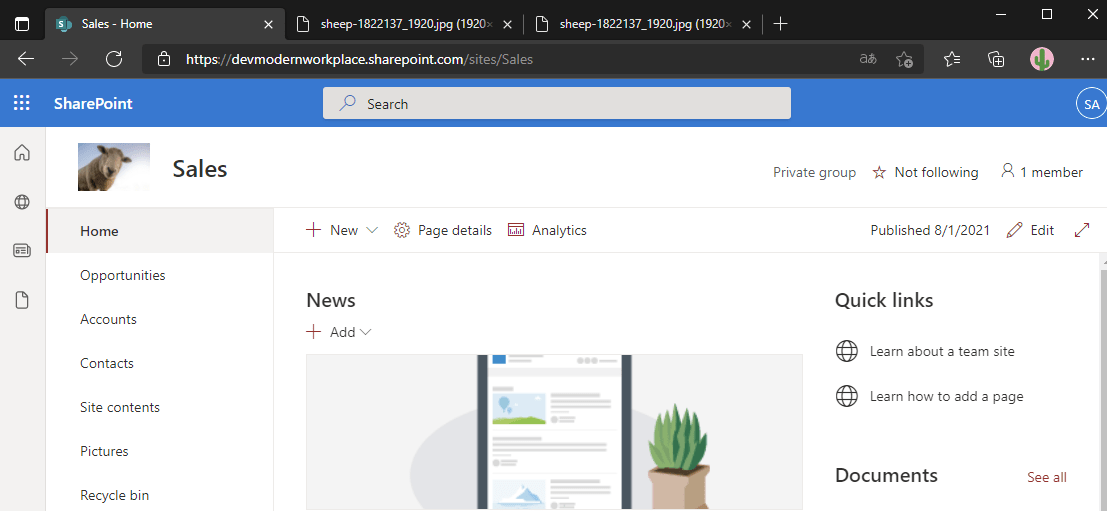
    As one can see below, the SharePoint site was created.

    With the Postman approach, you can see the benefit: You really don’t rely anymore on PowerShell. With Graph you can create SharePoint Sites, with every REST API execution host.

    Conclusion

    With the approach, we have a straight forward approach to create SharePoint sites, without being dependent on PowerShell. Now I am curious about your setup: Do you create SharePoint Sites as part of a workflow? Which business use case are you supporting with it and what else are you creating apart from the SharePoint Site?

    References

  • A Complete Guide For SharePoint Site Creation with PowerShell

    In this article I want to show you how you can streamline the SharePoint Site creation with PowerShell. You can save time by doing it with PowerShell especially, if you want to create multiple sites as part of a backend process.

    Typical backend processes could be:

    You have a domain specific process – e.g. as part of each opportunity you want to gather content in a separate SharePoint site. After the opportunity closure you want to make sure that the content is handled as per your organizational guidelines. With the automated approach to create SharePoint sites, you can make sure that the Site is following specified structure – e.g. you keep a naming concept, language settings etc. This is a common use case for many customers I am working with when it comes to SharePoint Site creation with PowerShell.

    The SharePoint site creation with PowerShell is a basic task for administrators looking to efficiently manage and scale their SharePoint environments. Especially if the SharePoint environment need to follow a consistent design.

    The approach for SharePoint Site creation with PowerShell is pretty straight forward, you just need to authenticate with the admin console, define the parameters and create the SharePoint site.

    Process for SharePoint Site Creation with PowerShell

    Prerequisites for SharePoint Site Creation with PowerShell

    In order to create SharePoint sites with PowerShell, following prerequisites need to be fulfilled:

    Step-by-Step Instructions for SharePoint Site Creation with PowerShell

    First of all you need to connect to the SharePoint Admin center in your PowerShell console. Make sure that you adjust the variable SharePointAdminURL, so that you connect to your tenant. The SharePoint Admin URL is specifying the backend address for administrative purposes for your SharePoint tenant. In my case it is “https://m365x04995906-admin.sharepoint.com”, which is derived from the M365 demo tenant prefix.

    Import-Module -Name Microsoft.Online.SharePoint.PowerShell
    $sharePointAdminURL= "https://m365x04995906-admin.sharepoint.com"
    
    Connect-SPOService -Url $sharePointAdminURL

    If you run the code an interactive authentication prompt window will show up, make sure that you use the SharePoint Administrator or Global Administrator for the tenant.

    Now you can create the site with following code – again make sure that you update the parameters for your specific use case.

    Parameters Explained: SharePoint Site Creation with PowerShell

    • Owner (owner)
      The owner of the site is defined using the UPN (User Principal Name), which is typically the email address of the user. In this example I use “admin@M365x04995906.onmicrosoft.com”, which is the global admin for M365 demo tenants.
    • Storage Quota (storageQuota)
      This parameter sets the storage limit for the SharePoint site. Here, I have specified 1000, meaning the site will have 1 GB of storage. Adjust this value according to the needs of your organization, as storage quotas help in managing SharePoint resources efficiently.
    • Site URL (url)
      This is the URL where the new SharePoint site will be accessible. In this case, it’s set to “https://m365x04995906.sharepoint.com/sites/Demo2”. Each site in SharePoint must have a unique URL, so you’ll need to customize this for each new site you create.
    • Template (template)
      SharePoint offers a variety of site templates for different use cases (e.g., team sites, communication sites). In this example, I use “STS#3”, which refers to a Team Site template. You can view all available templates using the Get-SPOWebTemplate cmdlet to find one that suits your needs.
    • Time Zone (timezoneID)
      Setting the correct time zone for your site is important for accurate scheduling and regional settings. The timezoneID parameter uses numeric codes to specify time zones. Here, 4 refers to a specific time zone, and you can find a full list of time zone IDs in the Microsoft documentation.
    • Site Title (title)
      The title is how your site will be identified within SharePoint. In this example, I named the site “Demo2”. This title will be visible in the site header and navigation.
    • No Wait (noWait)
      By setting this parameter to $true, the script does not wait for the site creation process to complete before continuing. This is useful when you need to deploy multiple sites in parallel or run the script in an environment where you don’t need immediate feedback.
    $SpoSiteArguments = @{
        owner = "admin@M365x04995906.onmicrosoft.com" #type in the upn of the owner of the site
        storageQuota = 1000  #specify the quota of the site in MB
        url= "https://m365x04995906.sharepoint.com/sites/Demo2" #specify the url of the site
        template = "STS#3" #specify, which template shall be used, run Get-SPOWebTemplate to find available templates
        timezoneID = 4  #specify the time zone for the site https://learn.microsoft.com/en-us/previous-versions/office/sharepoint-csom/jj171282(v=office.15)#remarks
        title= "Demo2" #specify the title of the site
        noWait = $true
    }
    
    New-SPOSite @SpoSiteArguments

    Using the New-SPOSite command, you can streamline SharePoint site creation with PowerShell by specifying parameters like owner, storage quota, and site template, so you could make sure that the owner is a specific Entra ID group for e.g. your sales support team.

    Create SharePoint Site: Interactive PowerShell code

    Below you’ll find the code to create sites interactively. The interactive approach makes sense to get a hands on experience how the code works, before you implement it in production as part of a backend automation. With that you’ll be sure that your infrastructure and modules are all set and settled and that you don’t run into any surprise.

    Before you run the code, You need to change the values in the SharePoint Admin URL variable and SPOSiteArguments hashtable.

    Param{
        $sharePointAdminURL= "https://m365x04995906-admin.sharepoint.com"
    }
    
    Import-Module -Name Microsoft.Online.SharePoint.PowerShell
    
    
    Connect-SPOService -Url $sharePointAdminURL
    
    $SpoSiteArguments = @{
        owner = "admin@M365x04995906.onmicrosoft.com" #type in the upn of the owner of the site
        storageQuota = 1000  #specify the quota of the site in MB
        url= "https://m365x04995906.sharepoint.com/sites/Demo2" #specify the url of the site
        template = "STS#3" #specify, which template shall be used, run Get-SPOWebTemplate to find available templates
        timezoneID = 4  #specify the time zone for the site https://learn.microsoft.com/en-us/previous-versions/office/sharepoint-csom/jj171282(v=office.15)#remarks
        title= "Demo2" #specify the title of the site
        noWait = $true
    }
    
    New-SPOSite @SpoSiteArguments

    Create SharePoint Site: Non-Interactive PowerShell Code

    With the code below, you won’t get any prompt, but you need to make sure that you have stored the credentials locally. This code can be used if you are looking forward to create sites as part of a backend process.

    If you have not exported your credentials, you can do it like this:
    $credentialPath = "C:\Users\Serka\OneDrive\Desktop\PS\Keys\admin@M365x323732.onmicrosoft.com.txt" #Path, where the encrypted credential file will be stored at
    $username = "admin@M365x323732.onmicrosoft.com" #Usename of the credential object
    
    $credential = Get-Credential($username)
    $credential | Export-Clixml -Path $credentialPath
    Return $Credential

    Param(
        $sharePointAdminURL= "https://m365x04995906-admin.sharepoint.com",
        $credentialPath = "C:\Users\Serkar\OneDrive\Desktop\PS\Keys\admin@M365x04995906.onmicrosoft.com.txt"
    )
    
    Import-Module -Name Microsoft.Online.SharePoint.PowerShell
    
    #region credential import
    $credential | Import-Clixml -Path $credentialPath
    Return $Credential
    
    #endregion
    
    #region create the SPOSite
    
    Connect-SPOService -Url $sharePointAdminURL -Credential $credential 
    
    $SpoSiteArguments = @{
        owner = "admin@M365x04995906.onmicrosoft.com" #type in the upn of the owner of the site
        storageQuota = 1000  #specify the quota of the site in MB
        url= "https://m365x04995906.sharepoint.com/sites/Demo2" #specify the url of the site
        template = "STS#3" #specify, which template shall be used, run Get-SPOWebTemplate to find available templates
        timezoneID = 4  #specify the time zone for the site https://learn.microsoft.com/en-us/previous-versions/office/sharepoint-csom/jj171282(v=office.15)#remarks
        title= "Demo2" #specify the title of the site
        noWait = $true
    }
    
    New-SPOSite @SpoSiteArguments
    
    #endregion


    With this code, we are now able to create SharePoint sites in bulk in interactive sessions or as part of backend automations. Do you have any questions or ideas for future automation topics? Let me know in the comments below!

    References, which you want to check for SharePoint Site creation with Powershell

    • To deepen your understanding of SharePoint site creation with PowerShell, check out the official Microsoft documentation.
    • You could also handle SharePoint Sites creation with Powershell utilizing Pnp.PowerShell – however it’s limited to some communication sites:
      New-PnPSite | PnP PowerShell
  • SharePoint Site Usage: Get active Sites for last 6 months with PowerShell

    SharePoint Site Usage: Get active Sites for last 6 months with PowerShell

    Hi folks, when migrating our SharePoint to SharePoint Online, it can be really hard to separate the wheat from the chaff. SharePoint Site usage helps you find, what is actually used in your current farm. SharePoint farms grow by new projects and with the change of structures. If you want to have an overview, it is every time a good idea, to get rid of old stuff.

    Administrators, who is searching for SharePoint Site usage

    In a previous article, I showed you how to get all sites and subsites in SharePoint Online. This is a good basis, but if you need more, you should definitely continue reading. In this article, I want to show you one of my tools, which shows you the SharePoint site usage for previous months, so you understand what is needed in your new environment and what’s not. I am getting the data by using the interface IAnalyticsItemData of the search analytics component.

    Prerequisites

    • SharePoint Search is up and running
    • You have access to SharePoint Server with a highly privileged account (SP_Admin or SP_Farm)

    Description of the PowerShell script

    This script iterates through all sites and asks the Search service application for the roll-up analytics data for the month specific month. The offset is the integer, which states a gap between the current month and the offset month.

    Example:

    If the variable PrevMonthOffset is 3, it is 3 months ago from the current month.

    After you run the script and export will be created at your user’s desktop with all the site usage for the previous months. The current configuration in the script shows the SharePoint Site usage for the previous six months ($PrevMonthOffset = 6). You can change it for more months, if you need to.

    SharePoint Site Usage PowerShell script

    If you run the script like this, you do get the SharePoint site usage statistics for the last six months.

    param (
        $DesktopPath = [System.Environment]::GetFolderPath([System.Environment+SpecialFolder]::Desktop),
        $global:exportpath = $DesktopPath + "\sitestats.csv",
        $PrevMonthOffset = 6
    )
    
    Add-PSSnapin "Microsoft.SharePoint.PowerShell"
    
    $global:SuccesCount = 0
    $global:ErrorCount= 0
    
    $SearchApp = Get-SPEnterpriseSearchServiceApplication
    
    function Get-Stats {
        param
        (
            $SiteCollection,
            $Subsite,
            $PrevMonthOffset
        )
    
        $Offset = $PrevMonthOffset
        while ($Offset -lt 6)
        {
            [System.Int32]$Hits =0
            [System.Int32]$UniqueVisitor =0
            $Offsetfactor = -1 * $Offset
            $RootResult = $SearchApp.GetRollupAnalyticsItemData(1,[System.Guid]::Empty,$SiteCollection.ID,$Subsite.id)
            $Date = (Get-Date).AddMonths($Offsetfactor)    
            
            $RootResult.GetMonthlyData($Date,[REF]$Hits,[REF]$UniqueVisitor)
            $HitsPreviousName = "_HitsPrevious"+$Offset + "month" 
            $UniqueVisitorName = "_UniqueVisitor" +$Offset +"month"
    
            $Subsite | Add-Member -MemberType NoteProperty -Name $HitsPreviousName -Value $Hits -Force
            $Subsite | Add-Member -MemberType NoteProperty -Name $UniqueVisitorName -Value $UniqueVisitor -Force


            $Offset ++
        }
        try
        {
            $Subsite | Select-Object url, *_* | Export-Csv -Path $exportpath -Append -Delimiter ";" -NoTypeInformation -ErrorAction Stop
            $global:SuccesCount++
        }
        catch
        {
            $Subsite.url
            $global:ErrorCount++
        }
    }
    
    $SiteCollections = Get-SPSite -Limit All
    
    Foreach ($SiteCollection in $SiteCollections)
    {
        $SiteCollection.AllWebs | ForEach-Object{ Get-Stats -SiteCollection $SiteCollection -Subsite $_ -PrevMonthOffset $PrevMonthOffset}
    
    }
    
    Write-Host "success: $global:SuccesCount error: $global:ErrorCount "

    Further reading

    There are a few more methods the analytics item data provides. You can find them here:

    GetDailyData(DateTime, Int32, Int32)
    GetHitCountForDay(DateTime)
    GetHitCountForMonth(DateTime)
    GetMonthlyData(DateTime, Int32, Int32)
    GetUniqueUsersCountForDay(DateTime)
    GetUniqueUsersCountForMonth(DateTime)

    IAnalyticsItemData Interface (Microsoft.Office.Server.Search.Analytics) | Microsoft Docs

    Image reference

    Data vector created by stories – www.freepik.com

    Image by mohamed Hassan from Pixabay

  • SharePoint get all sites and subsites PowerShell script

    SharePoint get all sites and subsites PowerShell script

    SharePoint sites are created very fast. With a few clicks, admins and users can create dozens of sites and subsites. Since it is so easy to create sites, we as admins should have an overview, what is going on at our SharePoint environment. You need also an overview of your environment, If you are looking forward to migrate your environment to a different environment. For this purpose I wrote scripts to get all sites and subsites of your SharePoint, so you can trim your SharePoint to your business needs. You will find a script for SharePoint Online and SharePoint Server.

    If you run the script, an export will be created at the path, which you have specified. If you want to change the separation of columns to comma separated, change the following export line:

    $Export | Export-Csv -Path $ExportPath -NoTypeInformation -Delimiter ";" -Force

    to this:

    $Export | Export-Csv -Path $ExportPath -NoTypeInformation -Delimiter "," -Force

    Get all sites and subsites for SharePoint Online

    For SharePoint Online I am using the PowerShell Module PNP.PowerShell. You have to install it on your client/ server, for this purpose.

    Prerequisites

    In order to get all sites and subsites, you need following prerequisites fulfilled:

    1. Installation of PNP PowerShell Module
      Here you can see, how it can be done: Connect to SharePoint with PowerShell | SharePoint Online (workplace-automation.com/)
    2. SharePoint Administrator role
    3. Access to all SharePoint sites
      I wrote a blog post for this purpose, how you can get access to all sites: SharePoint Powershell add site collection administrator (workplace-automation.com/)

    If you don’t have access to all SharePoint sites, you will only get the SharePoint sites (not the subsites).

    PowerShell Script to get all sites and subsites for SharePoint Online

    In this script I used an exported credential to authenticate with the PNP module. As always, please change the values in the parameter block.

    $CredentialPath is the path to an exported credential file of the user with the SharePoint administrator role. If you leave the variable empty, the script will notice, that the credential is empty (line 47). Thus, it will ask you for the username and password for the user, and also the path, where the script can locate the credential file (line 17, 29 and 22). After the export, it will import the credential file to connect to SharePoint Online.

    If you want to read more about the credential handling, consider reading Use credentials in PowerShell | SPO Scripts

    Depending on your locality, you have to change the delimiter in the last line:

    Param(
        $TenantUrl = "https://devmodernworkplace-admin.sharepoint.com/",
        $CredentialPath = "C:\Users\Serkar\Desktop\devmod.key",
        $DesktopPath = [System.Environment]::GetFolderPath([System.Environment+SpecialFolder]::Desktop),
        $ExportPath = $DesktopPath + "\SitesExport.csv"
    )
    
    Function Export-CredentialFile 
    {
        param(
        $Username,
        $Path
        )
    
        While ($Username -eq "" -or $null -eq $Username)
        {
            $Username = Read-Host "Please enter your username (john.doe@domain.de)"
        }
        
        While ($Path -eq ""-or $null -eq $Path)
        {
            $Path = Read-Host "Where should the credentials be exported to?"
        }
        $ParentPath = Split-Path $Path
        If ((Test-Path $ParentPath) -eq $false)
        {
            New-Item -ItemType Directory -Path $ParentPath
        }
        $Credential = Get-Credential($Username)
        $Credential | Export-Clixml -Path $Path
        Return $Credential
    }
    Function Import-CredentialFile ($Path)
    {
        if (! (Test-Path $Path))
        {
            Write-Host "Could not find the credential object at $Path. Please export your credentials first"
        }
        else
        {
            Import-Clixml -Path $Path
        }
    }
    
    $Credential = Import-CredentialFile -Path $CredentialPath 
    
    If ($Credential -eq $null)
    {
        $Username = Read-Host "Please enter your username (john.doe@domain.de)"
        Export-CredentialFile -Path $CredentialPath -Username $Username
        $Credential = Import-CredentialFile $CredentialPath
    }
    
    #Connect to tenant
    Connect-PnPOnline -Url $TenantUrl -Credentials $Credential
    
    $Export = New-Object System.Collections.Generic.List[object]
    
    $Sites = Get-PnPTenantSite
    $SitesCount = $Sites.Count
    $i= 1
    
    foreach ($Site in $Sites)
    {
        Write-Host "($i / $SitesCount) Processing site $($Site.Url)"
        Disconnect-PnPOnline
        Connect-PnPOnline -Url $Site.Url -Credentials $Credential
        $Site = Get-PnPSite
        
        #get the information of the root
        $NewExport = New-Object PsObject -Property @{
        
                Url = $Site.URl
                SubSitesCount = (Get-PnPSubWebs -Recurse).count
                ParentWeb = $null
        }
        $Export.Add($NewExport)
    
        #get the information of subwebs
        Get-PnPSubWebs -Recurse  -Includes ParentWeb| ForEach-Object {
            $NewExport = New-Object PsObject -Property @{
        
                Url = $_.URl
                SubSitesCount = $_.Webs.count
                ParentWeb = $_.ParentWeb.ServerRelativeUrl
            }
            $Export.Add($NewExport)
        }
        $i++
    }
    $Export | Export-Csv -Path $ExportPath -NoTypeInformation -Delimiter ";" -Force

    If you run the script, the export will be created on your desktop, which will look like this:

    Export if you want to get all sites and subsites for SharePoint Online

    Get all sites and subsites for SharePoint Server

    You can use this module for following SharePoint versions:

    • SharePoint 2013
    • SharePoint 2016
    • SharePoint 2019

    If you start this script, your user context is used to run the cmdlets. An dedicated authentication is not needed.

    Prerequisites

    In order to run this script, you need to use a user, with permissions to access each all subsites. For this purpose I am using the SP_Admin account or SP_Farm account.

    If you want to configure it for different users, check out Salaudeen Rajacks article: Access is denied. (Exception from HRESULT: 0x80070005 (E_ACCESSDENIED)) on Get-SPWeb, New-SPUser, Get-SPUser, Set-SPUser, etc. – SharePoint Diary

    PowerShell script to get all sites and subsites for SharePoint Server

    Since we got no authentication, It is way shorter, than the SharePoint Online script. If your export is not delimited properly, consider to change the delimiter, which I have described in the beginning.

    Param(
        $DesktopPath = [System.Environment]::GetFolderPath([System.Environment+SpecialFolder]::Desktop),
        $ExportPath = $DesktopPath + "\SitesExport.csv"
    )
    
    Add-PSSnapin Microsoft.SharePoint.PowerShell
    
    $Export = New-Object System.Collections.Generic.List[object]
    
    $Sites = Get-SPSite -Limit all
    $SitesCount = $Sites.Count
    $i= 1
      
    foreach ($Site in $Sites)
    {
        Write-Host "($i / $SitesCount) Processing site $($Site.Url)"
    
        #get the information of the root
        #removed one site from allwebs, because it contains also the root
        $NewExport = New-Object PsObject -Property @{
        
                Url = $Site.URl
                SubSitesCount = ($Site.AllWebs.Count - 1)
                ParentWeb = $null
        }
        $Export.Add($NewExport)
    
        #get the information of subwebs
        #Skip the first web, since it is the rootweb
        Get-SPWeb -Site $Site.Url -Limit all | Select-Object -Skip 1 | ForEach-Object {
            $NewExport = New-Object PsObject -Property @{
        
                Url = $_.URl
                SubSitesCount = $_.Webs.Count
                ParentWeb = $_.Site.Url
    
            }
            $Export.Add($NewExport)
        }
        $i++
    }
    $Export | Export-Csv -Path $ExportPath -NoTypeInformation -Delimiter ";" -Force

    Conclusion

    Getting an overview for migration/ clean up purposes is key for a clean migration. With the scripts, I have provided, you get a brief overview over your environment. If it does not work for you, please write me a mail: Serkar@workplace-automation.com.

    Further reading

    Here you can find the class for SPSite (SharePoint Server): SPSite Class (Microsoft.SharePoint) | Microsoft Docs

  • SharePoint PowerShell add site collection administrator

    SharePoint PowerShell add site collection administrator

    In this article, I am describing how to add site collection administrator to your SharePoint sites. I use this script, when I need to supply an application service for a new customer. I recommend running this script periodically (every day), so it is ensured, that you have access to new sites later also.

    You will learn how to add a user and an AD group to the site collection administrators.

    Prerequisites

    Before you can add a site collection administrator to a site collection, you need to ensure the following:

    Scheduled runs

    When you run the scripts below, it is only for the current existing sites, but since the departments won’t stop create sites, e.g. by creating a new team in Microsoft Teams, it makes sense to schedule the scripts. If you want to schedule the scripts, ensure that the connection to the tenant is not interactive, by exporting the credentials locally with the service user, which you will run to schedule the script and import the credential in your script. Only the user who exported the credentials object, can read the credential object on the same machine.

    Before you schedule the script, export your service user credential with this cmdlets (change the path before running):

    Get-Credential |Export-Clixml "C:\Users\Serkar\Desktop\devmod.key"

    You will be prompted for credentials and after this, a file will be created.

    Use this credential object before you connect to SharePoint like this:

    $Credential = Import-Clixml "C:\Users\Serkar\Desktop\devmod.key"
    

    And connect to SharePoint Online like this:

    Connect-SPOService -Url  $TenantUrl -Credential $Credential

    I wrote a detailed article about this. If you want to deepen your knowledge, check it out: Use credentials in PowerShell | SPO Scripts

    In the end of this article, I have also provided a script, which shows you how the script has to look, if you want to schedule it periodically.

    Add a user as a site colllection adminstrator

    If you want to add a user as a site collection administrator, you can do it like this:

    Please change the values of the variables.

    Connect-SPOService -Url  "https://devmodernworkplace-admin.sharepoint.com/"
    $User = "Serkar@devmodernworkplace.onmicrosoft.com"
    $SiteUrl = "https://devmodernworkplace.sharepoint.com/sites/Sales"
    
    Set-SPOUser -Site $SiteUrl -LoginName $User -IsSiteCollectionAdmin $true

    Add an AD group as a site collection administrators

    If you want to add the AD group to the site collection adminstrators, you need the Object ID of the group. You can look it up like this:

    Visit https://portal.azure.com

    Azure Portal home
    Azure active directory groups

    For this purpose I want to add the IT AD security group to the site collection administrators.

    Screenshot of an ad group, which I want to add as a site collection administrator

    Take a note of the Object Id

    Object ID of the ad group, which will be added as site collection administrator

    With the Object ID, we can add a group as a site collection administrator:

    Connect-SPOService -Url  "https://devmodernworkplace-admin.sharepoint.com/"
    $Group = "C:0t.c|tenant|df8e0958-7882-4835-b6a4-cc877922a1f8"
    $SiteUrl = "https://devmodernworkplace.sharepoint.com/sites/Sales"
    
    Set-SPOUser -Site $SiteUrl -LoginName $Group -IsSiteCollectionAdmin $true

    Add a user as a site collection administrator to all site collections

    If you want to add a single user as a site collection administrator, you can use this script:

    $TenantUrl = "https://devmodernworkplace-admin.sharepoint.com/"
    $User = "Serkar@devmodernworkplace.onmicrosoft.com"
    
    Connect-SPOService -Url  $TenantUrl 
    
    $SPOSites = Get-SPOSite 
    
    foreach ($SPOSite in $SPOSites)
    {
        Set-SPOUser -Site $SPOSite.Url -LoginName $User -IsSiteCollectionAdmin $true
    }

    Add an AD group as a site collection administrator to all site collections

    $TenantUrl = "https://devmodernworkplace-admin.sharepoint.com/"
    $Group = "C:0t.c|tenant|df8e0958-7882-4835-b6a4-cc877922a1f8"
    
    Connect-SPOService -Url  $TenantUrl 
    
    $SPOSites = Get-SPOSite 
    
    foreach ($SPOSite in $SPOSites)
    {
        Set-SPOUser -Site $SPOSite.Url -LoginName $Group -IsSiteCollectionAdmin $true
    }
    

    Scheduled runs: Add an AD group as a site collection administrator to all site collections

    If you run this script, you won’t get any prompt from PowerShell, but you have to ensure, that you have exported the credential object before, otherwise the script will not work.

    $TenantUrl = "https://devmodernworkplace-admin.sharepoint.com/"
    $Group = "C:0t.c|tenant|df8e0958-7882-4835-b6a4-cc877922a1f8"
    
    $Credential = Import-Clixml -Path "C:\Users\Serkar\Desktop\devmod.key"
    
    Connect-SPOService -Url  $TenantUrl -Credential $Credential
    
    $SPOSites = Get-SPOSite 
    
    foreach ($SPOSite in $SPOSites)
    {
        Set-SPOUser -Site $SPOSite.Url -LoginName $Group -IsSiteCollectionAdmin $true
    }

    Website vector created by stories – www.freepik.com

  • Remove SharePoint Sites fastly

    Remove SharePoint Sites fastly

    Howdy guys, sometimes we create ton of sites just for testing. A clean tenant is a must for an efficient management. Have you ever removed sites by hand? It took me at least 18 seconds to remove ONE site restless by hand. Come on, there MUST be a way to do it faster. In this article I want to show you how you can remove SharePoint sites fastly by using Out-GridView.

    Step 1 – Connect to SharePoint Online with PowerShell

    In order to remove SharePoint Sites fastly, we connect to our admin Site with PNP PowerShell. Basically we make use of cmdlets handled in this article:

    Connect to SharePoint Online with PowerShell (workplace-automation.com/)

    Connect-PnPOnline https://devmodernworkplace-admin.sharepoint.com/ -Interactive

    Step 2 – Remove all sites, which you don’t need

    After connecting, I basically make use of Out-GridView -PassThru, to pass my selected sites for deletion. If you are not familiar with Out-GridView check following article. It will help definitelly:

    Get Items / Files interactively – SPO Scripts

    Get-PnPTenantSite -IncludeOneDriveSites -Detailed  | Out-GridView -PassThru | ForEach-Object { 
    
        if ($_.Template -eq "GROUP#0") 
        {
            try
            {
                Remove-PnPMicrosoft365Group -Identity $_.GroupID 
                Write-Host "Removed M365 Group $($_.GroupID)" -ForegroundColor Green
            }
            catch
            {
                Write-Error "Could not remove M365 Group $($_.GroupID) $($Error[0].ErrorDetails.Message)"
            }
            
        }
        else
        {
            try
            {
                Remove-PnPTenantSite -Url $_.Url  -Force -ErrorAction Stop
                Write-Host "Removed Site $($_.URL)" -ForegroundColor Green
            }
            catch
            {
                Write-Error "Could not remove Site $($Error[0].ErrorDetails.Message)"
            } 
        }
    }
    

    So what will happen now? A popup will show up, where you can select the sites, which you don’t want to use. As you can see, I marked 3 sites. After clicking okay, it will be removed, but you still we see them in the recycle bin – so no need for panic ;).

    Choice of sites, which have to be deleted

    If you want to remove the sites  without residue, you have to make use of following cmdlets. Sites, which belong to the a M365 Group will be put in recycle bin anyways.

    Get-PnPTenantSite -IncludeOneDriveSites -Detailed  | Out-GridView -PassThru | ForEach-Object { 
    
        if ($_.Template -eq "GROUP#0") 
        {
            try
            {
                Remove-PnPMicrosoft365Group -Identity $_.GroupID 
                Write-Host "Removed M365 Group $($_.GroupID)" -ForegroundColor Green
            }
            catch
            {
                Write-Error "Could not remove M365 Group $($_.GroupID) $($Error[0].ErrorDetails.Message)"
            }
            
        }
        else
        {
            try
            {
                Remove-PnPTenantSite -Url $_.Url  -Force -ErrorAction Stop -SkipRecycleBin
                Write-Host "Removed Site $($_.URL)" -ForegroundColor Green
            }
            catch
            {
                Write-Error "Could not remove Site $($Error[0].ErrorDetails.Message)"
            } 
        }
    }

    Thats it! The three sites I have marked, are deleted now. In my case even restless.

    Screenshots of removal

    Step 3 – Controll your Action

    Controlling this, can be done by following cmdlet:

    Get-PnPTenantSite -IncludeOneDriveSites  | Out-GridView -PassThru 

    You might see, that there are still sites, which are related to M365 groups. This sites wil be removed by a job afterwards, so no need to worry.

    Screenshot of controll action

    BONUS 1: Wrapped all in functions

    I wrapped all the stuff in functions, so you don’t have to do it and proceed to remove SharePoint Sites fastly.

    Function Invoke-SPOSiteRemoval
    {
        Param
        (
            $Site,
            [Switch]$SkipRecycleBin
        )
    
        if ($_.Template -eq "GROUP#0") 
        {
            try
            {
                Remove-PnPMicrosoft365Group -Identity $_.GroupID 
                Write-Host "Removed M365 Group $($_.GroupID)" -ForegroundColor Green
            }
            catch
            {
                Write-Error "Could not remove M365 Group $($_.GroupID) $($Error[0].ErrorDetails.Message)"
            }
            
        }
        else
        {
            try
            {
                if ($SkipRecycleBin)
                {
                    Remove-PnPTenantSite -Url $_.Url  -Force -ErrorAction Stop -SkipRecycleBin
                }
                else
                {
                    Remove-PnPTenantSite -Url $_.Url  -Force -ErrorAction Stop
                }
                
                Write-Host "Removed Site $($_.URL)" -ForegroundColor Green
            }
            catch
            {
                Write-Error "Could not remove Site $($Error[0].ErrorDetails.Message)"
            } 
        }
    
    }
    
    Get-PnPTenantSite -IncludeOneDriveSites -Detailed  | Out-GridView -PassThru | ForEach-Object { Invoke-SPOSiteRemoval -Site $_ -SkipRecycleBin }

    BONUS 2: Ready-To-Use Script

    $TenantAdminUrl = "https://devmodernworkplace-admin.sharepoint.com/"
    Connect-PnPOnline $TenantAdminUrl -Interactive
    
    Function Invoke-SPOSiteRemoval
    {
        Param
        (
            $Site,
            [Switch]$SkipRecycleBin
        )
    
        if ($_.Template -eq "GROUP#0") 
        {
            try
            {
                Remove-PnPMicrosoft365Group -Identity $_.GroupID 
                Write-Host "Removed M365 Group $($_.GroupID)" -ForegroundColor Green
            }
            catch
            {
                Write-Error "Could not remove M365 Group $($_.GroupID) $($Error[0].ErrorDetails.Message)"
            }
            
        }
        else
        {
            try
            {
                if ($SkipRecycleBin)
                {
                    Remove-PnPTenantSite -Url $_.Url  -Force -ErrorAction Stop -SkipRecycleBin
                }
                else
                {
                    Remove-PnPTenantSite -Url $_.Url  -Force -ErrorAction Stop
                }
                
                Write-Host "Removed Site $($_.URL)" -ForegroundColor Green
            }
            catch
            {
                Write-Error "Could not remove Site $($Error[0].ErrorDetails.Message)"
            } 
        }
    
    }
    
    Get-PnPTenantSite -IncludeOneDriveSites -Detailed  | Out-GridView -PassThru | ForEach-Object { Invoke-SPOSiteRemoval -Site $_ -SkipRecycleBin }
    
    #Controlling
    Get-PnPTenantSite -IncludeOneDriveSites -Detailed  | Out-GridView -PassThru

    Conclusio

    Using Out-GridView saves you a ton of time, when you want to remove sites in SharePoint fastly.

    Further links

    Microsoft Docs for the removal cmdlet Remove-PnPTenantSite (PnP.Powershell) | Microsoft Docs

    Microsoft Docs for Out-Gridview Out-GridView (Microsoft.PowerShell.Utility) – PowerShell | Microsoft Docs