Author: Serkar

  • How to restore SharePoint files with PowerShell

    Shit happens — sometimes we are not that concentrated when we are working. Somebody calls us without an appointment, and we were cleaning up our document libraries and by mistake we delete multiple files from SharePoint libraries. In this article, you will learn, how to restore SharePoint files from the diverse recycle bins in SharePoint. Like every time you will learn it for two ways: manually and automated. These instructions do also work for SharePoint items.

    Restore SharePoint files manually from the first-stage recycle bin

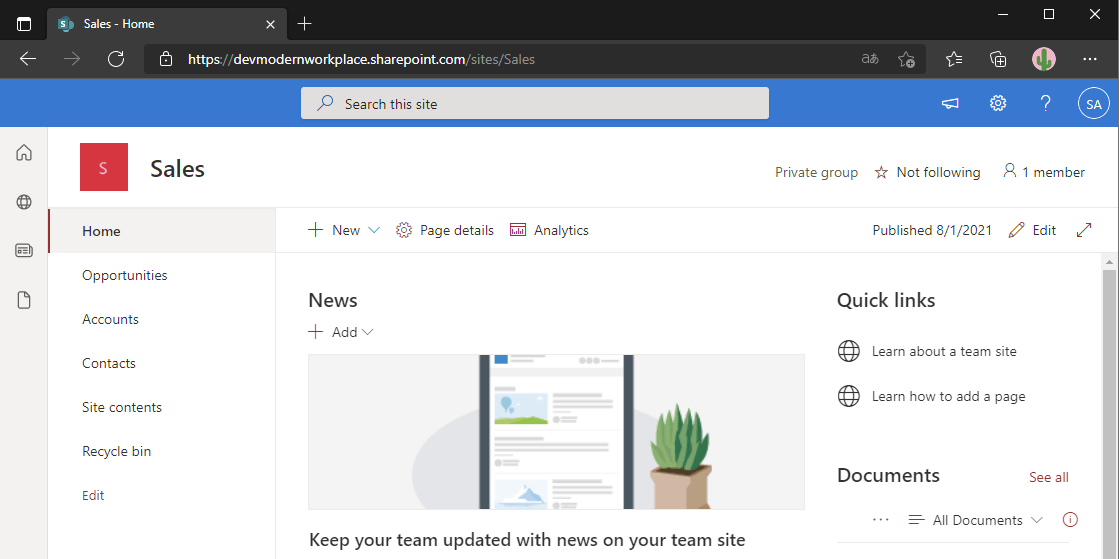
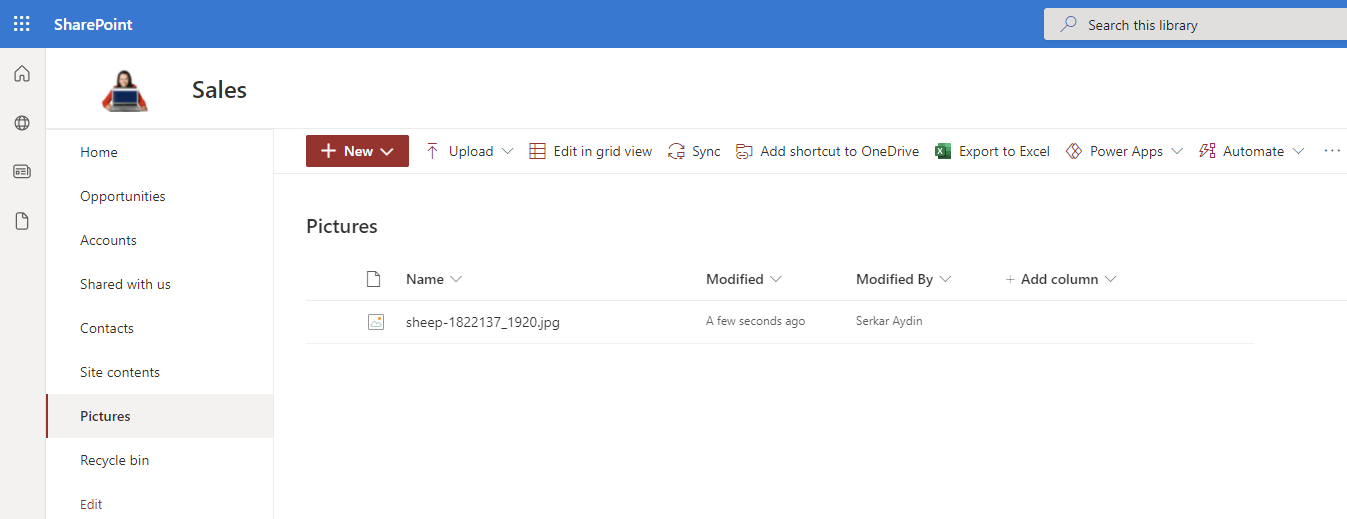
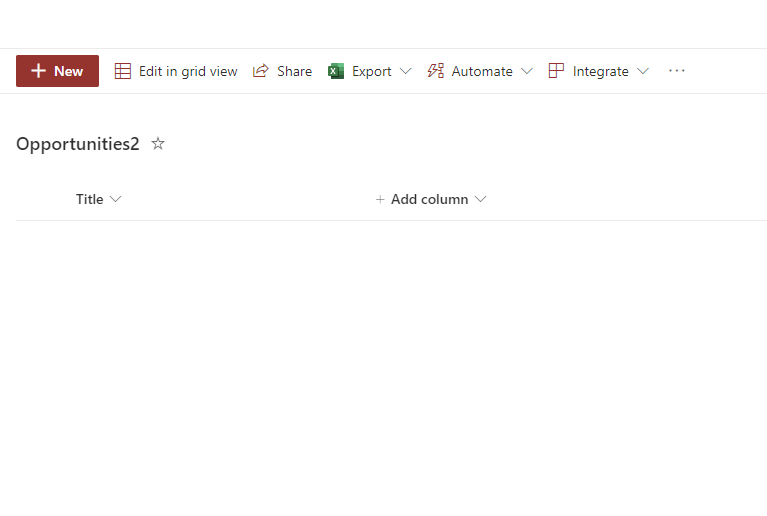
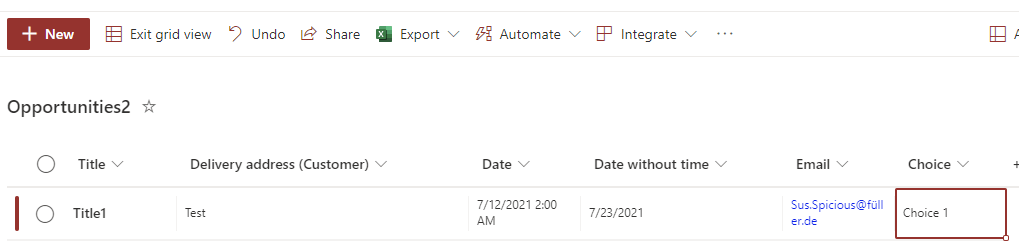
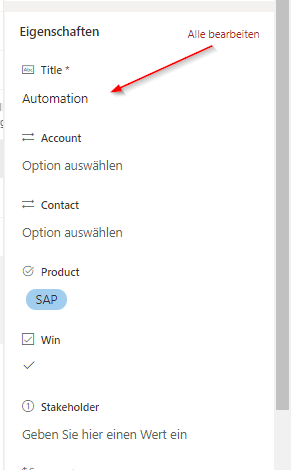
    Let’s assume, that you have a library with two documents in it.

    Screenshot of the document library Opportunitylibrary

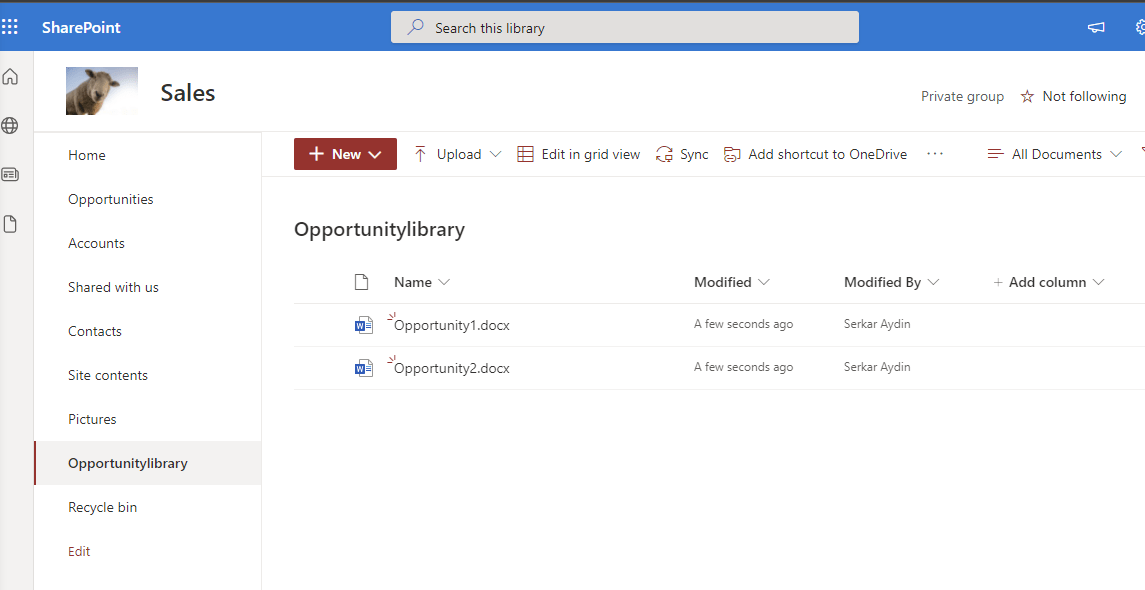
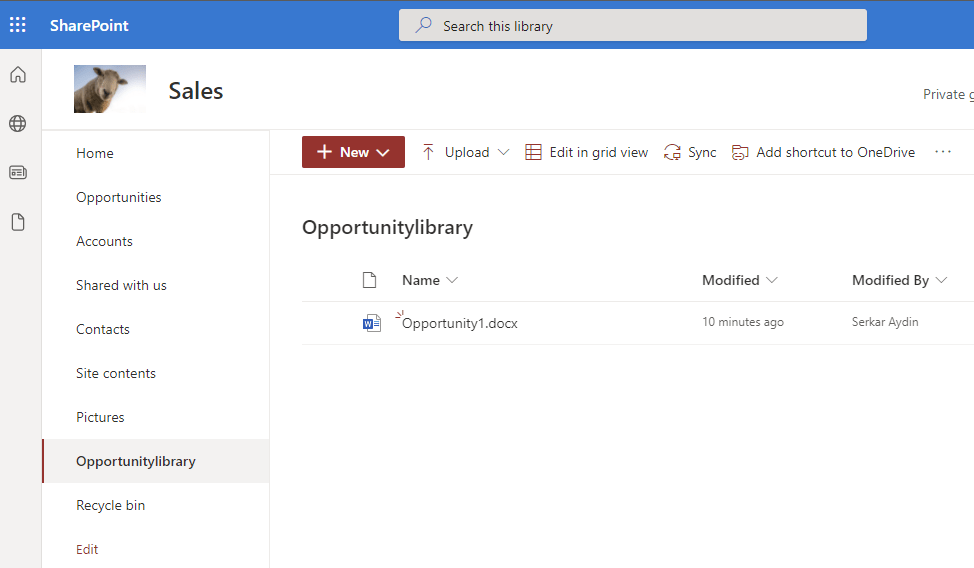
    One unfocused moment, and you have deleted the file Opportunity2.docx without intention.

    Screenshot of SharePoint library, where the document have been removed by accident

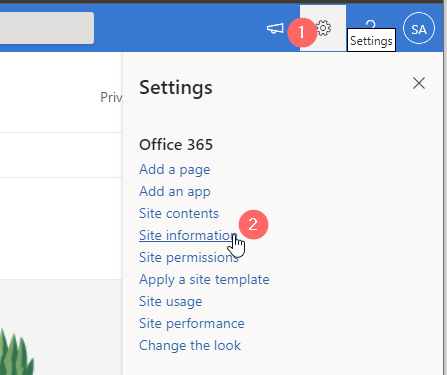
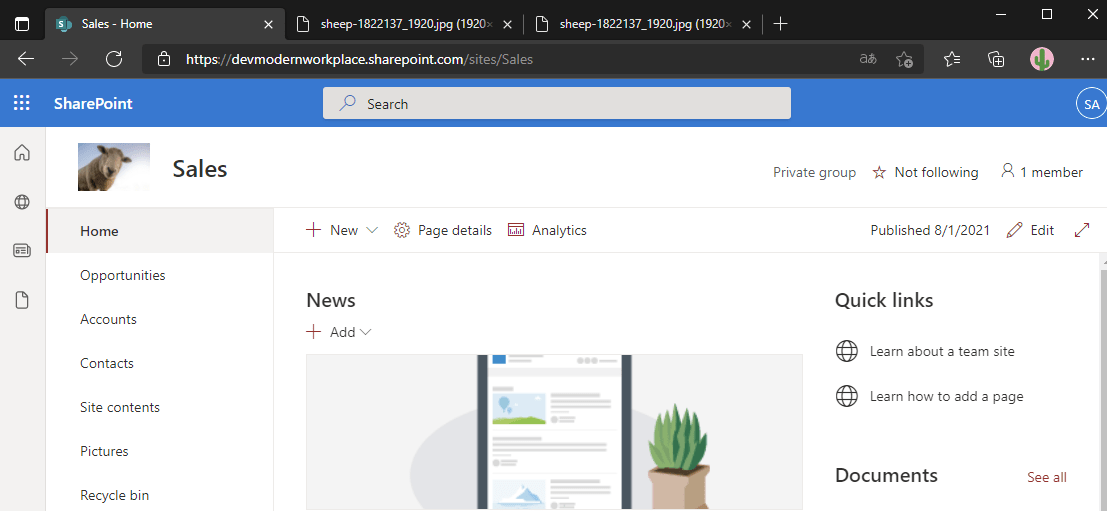
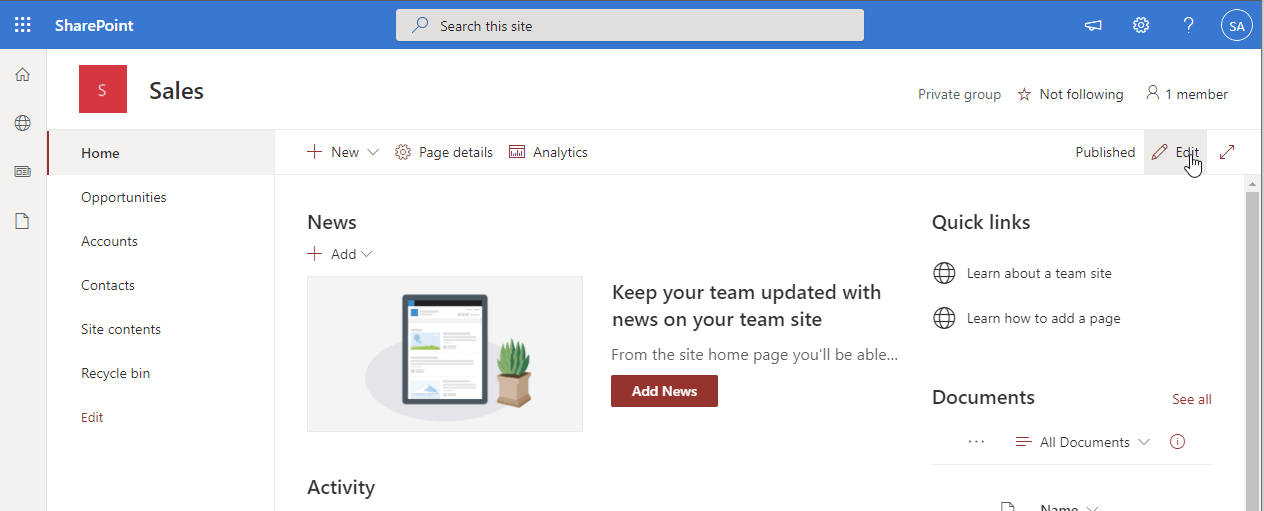
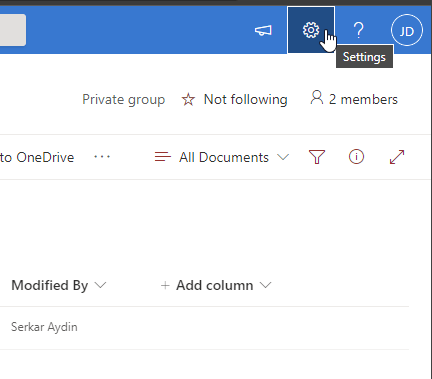
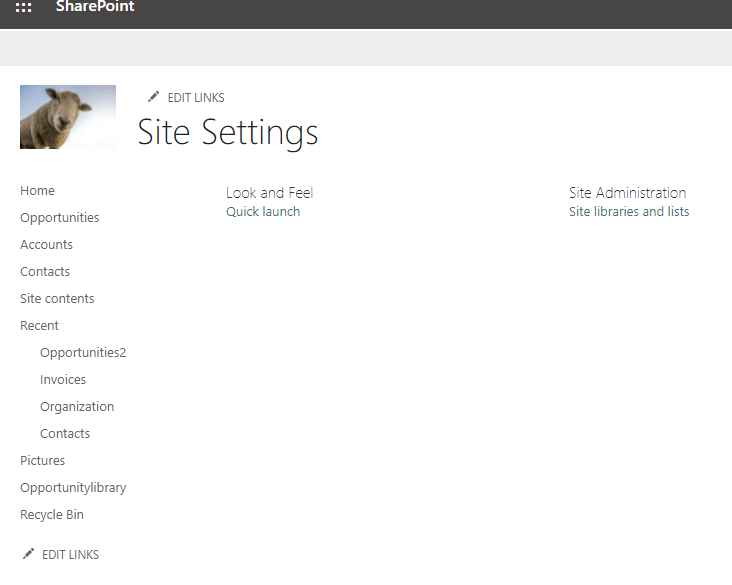
    As a site member, you have in fact the possibility to check your recycle bin to restore the file. In order to do this, click on the settings gear in the upper right corner and click on site contents.

    SharePoint settings gear
    Settings contents setting

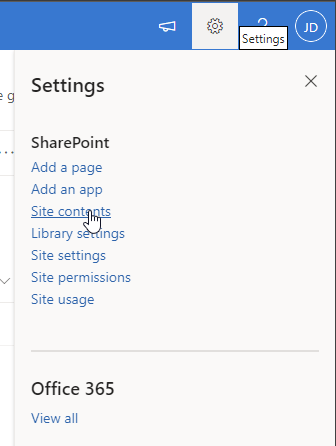
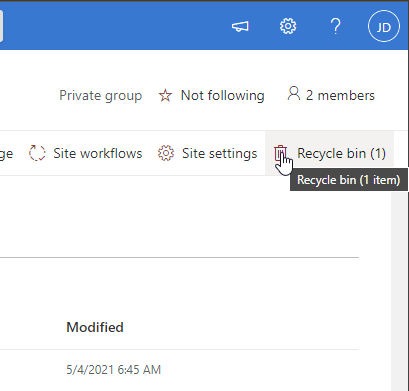
    Now click on Recycle Bin.

    Screenshot of link to the recycle bin

    As you can see, I can see the removed file from John dodo, which is my test user with member access. Now mark the file, you want to restore and click on Restore.

    Screenshot of restoring the file from the SharePoint recycle bin

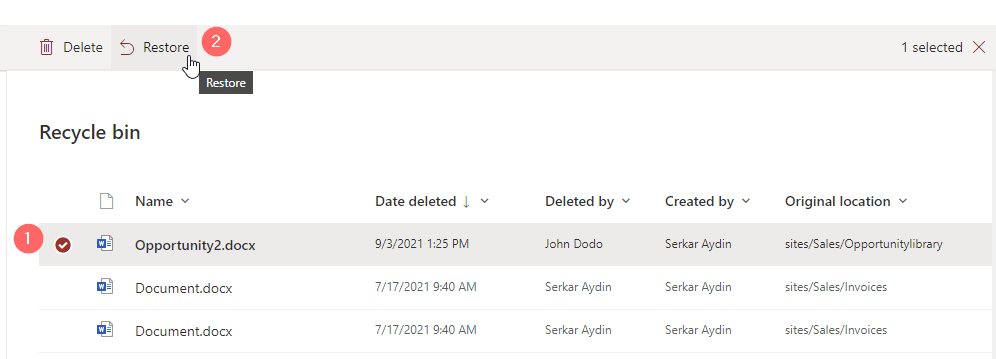
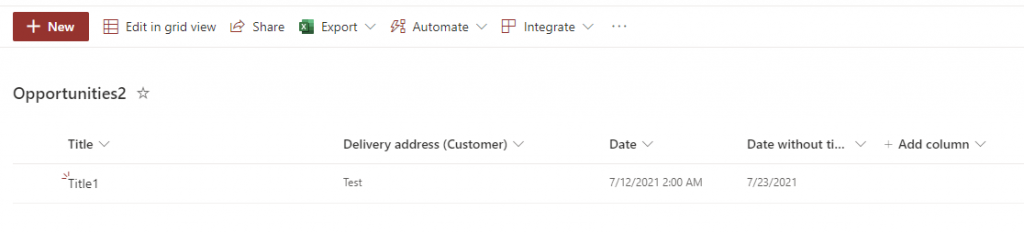
    Thats it, your file is back at the place, where you have deleted it:

    Screenshot of a SharePoint library, where the opportunity2.docx could be restored succesfully

    If you cannot see the file here, ask your Site collection administrator, to check the second-stage recycle bin (site collection recycle bin), which’s content will be retained for 93 days, unless the limit of the site collection storage is not exceeded or the item have not been removed manually by a site collection administrator. In the following, I will describe how to restore from the second-stage recycle bin.

    Restore SharePoint files manually from the second-stage recycle bin

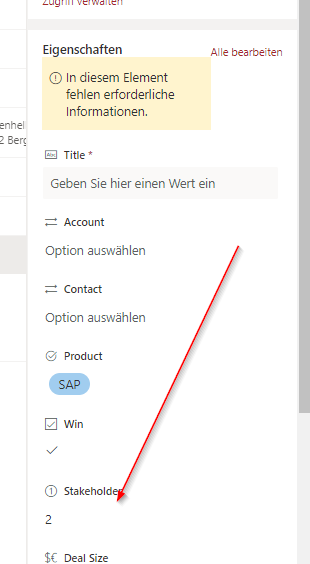
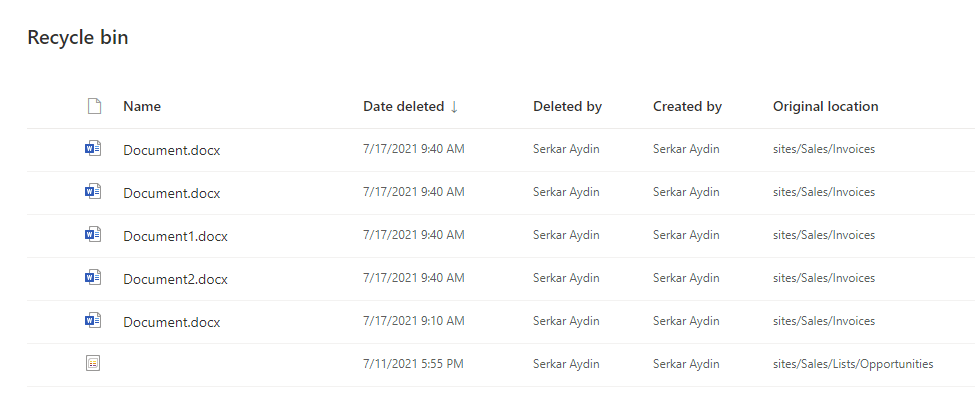
    Now we assume, that we have removed the file opportunity2.docx accidentially, but we need to restore it. We already have checked the site recycle bin, but we could not find the file in it.

    As you see, there is no opportunity2.docx file:

    Screenshot of a SharePoint site recycle bin, where the file opportunit2.docx could not be found.

    In this case, we need someone, who has the site collection administrator role, because we have to check the site collection settings. In the view as a member, the site collection settings look like this — so there is no option to visit the site collection recycle bin and therefore no option to restore SharePoint files.

    Screenshot of the site settings from a user, which has no site owner permission

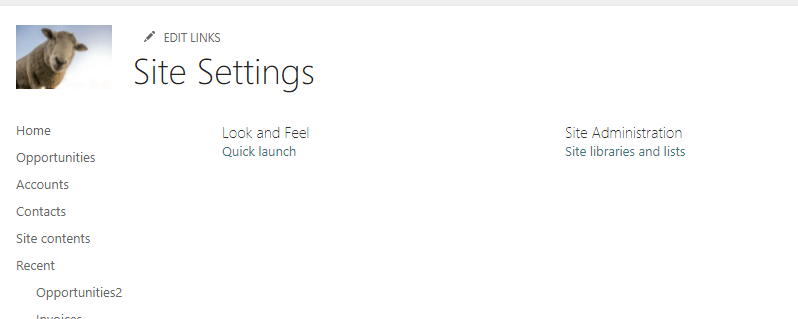
    In order to show you the site settings as an owner, I have promoted John Dodo to Site Owner:

    Screenshot of group membership permissions

    As you can see, I cannot see more as a site owner:

    Screenshot of site settings as a site owner

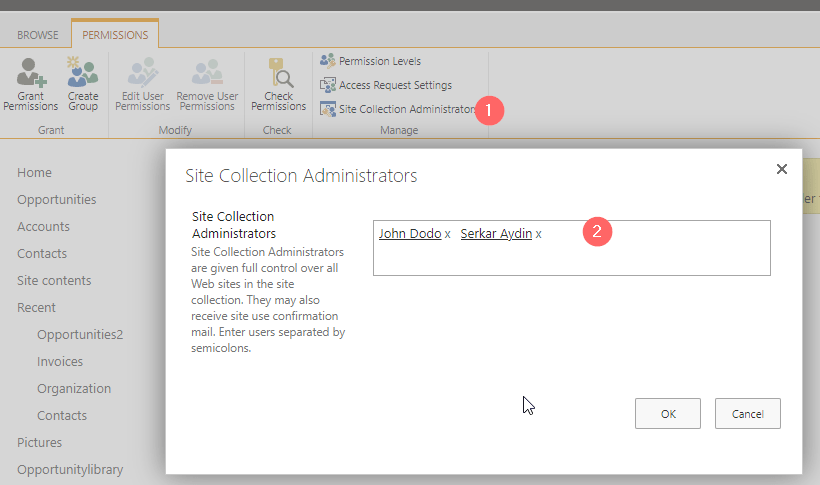
    Therefore, I will switch the user to one with site collection admin rights and we will see way more settings:

    Screenshot of site settings as a site collection admin

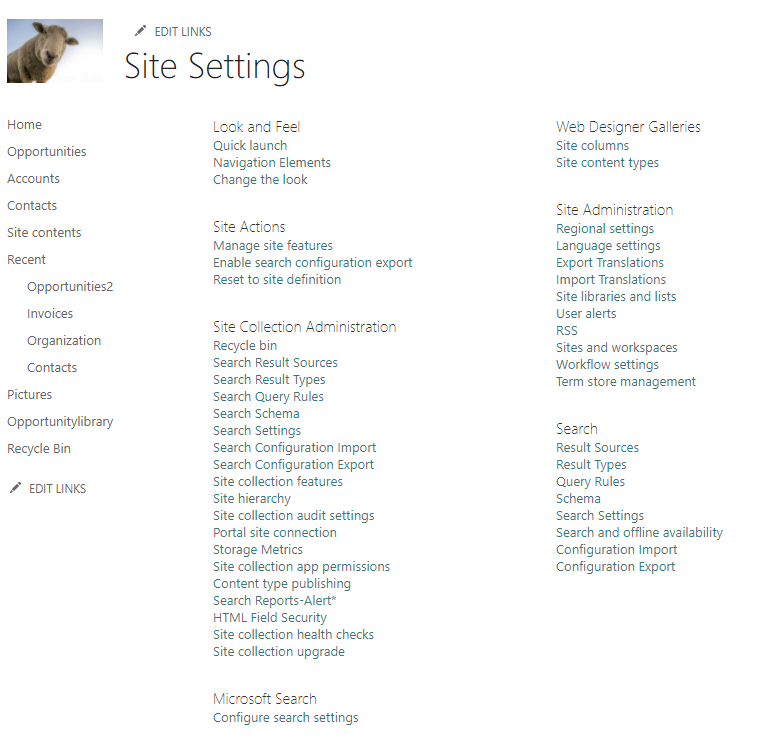
    Maybe you have noticed, that you can see Recycle Bin setting below Site collection Administration

    Screenshot of the recycle bin setting in the site settings

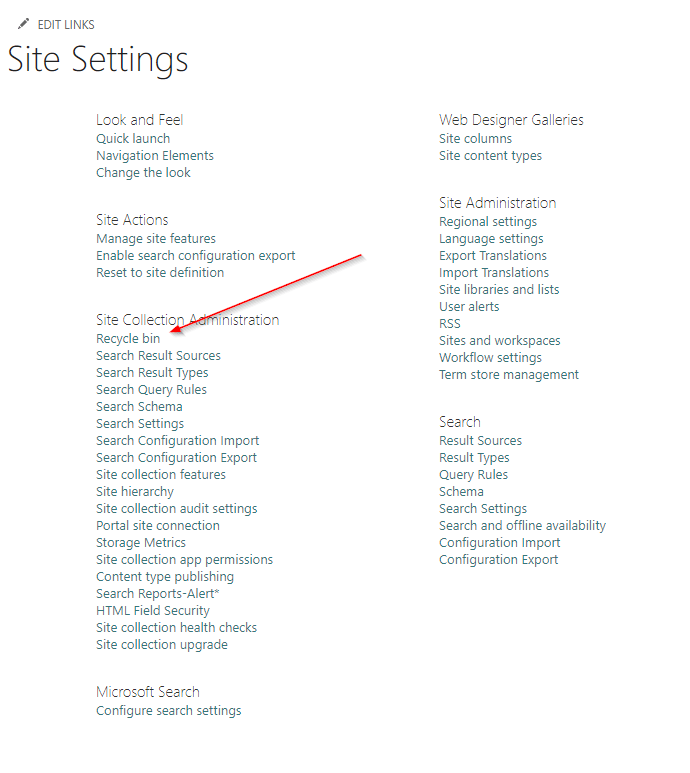
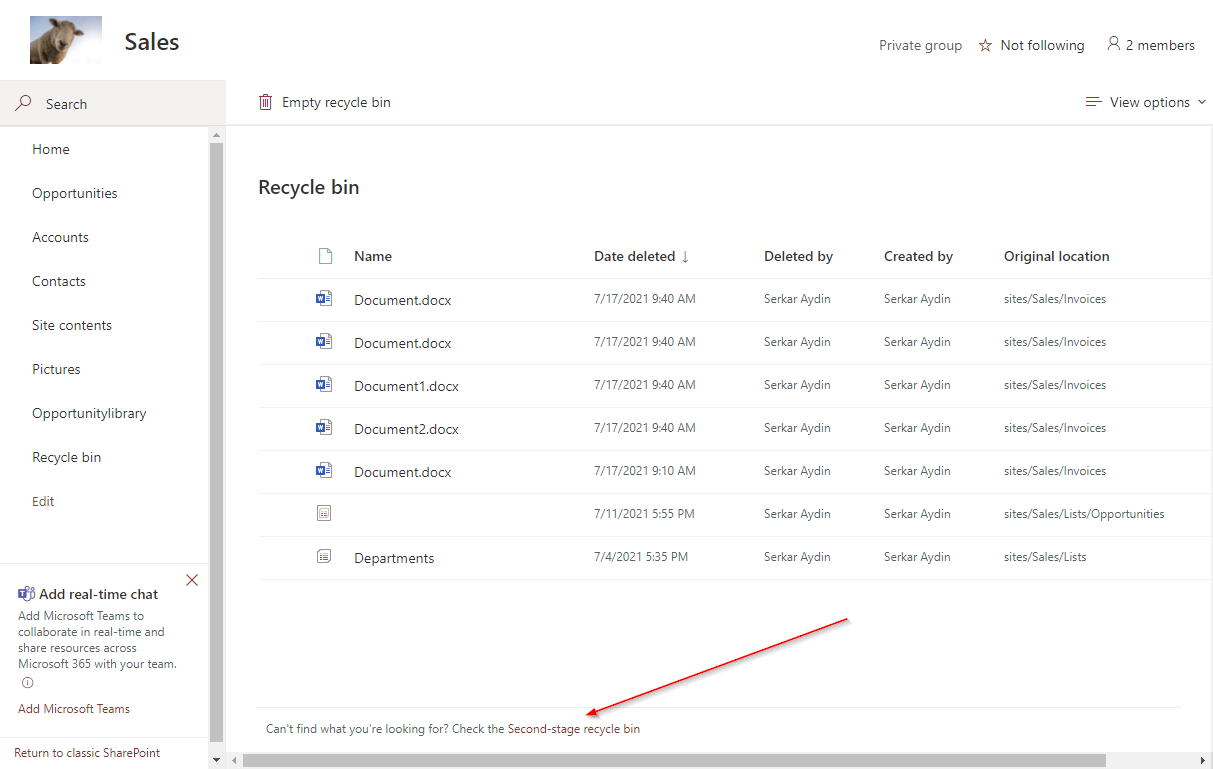
    This is the place, where we can see the files, which are removed, but also can be restored from users without the site collection administrator permission. As you can see, there is a hint to the second-stage recycle bin. Click on the hint.

    Screenshot of first stage recycle bin, with the hint to the second stage recycle bin

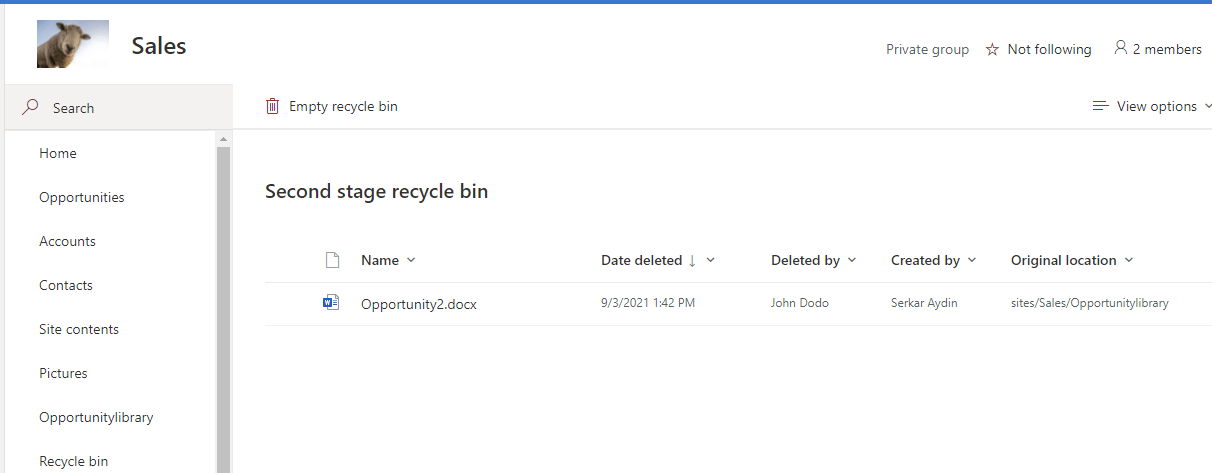
    This is the place, where we can see the files, which are in the second-stage recycle bin. We should see the opportunity2.docx file here:

    Screenshot of the second stage recycle bin

    Restore SharePoint files automatically from the second-stage recycle bin

    Prerequisites

    The prerequisite is, that you have to use a user, which has site collection administrator permissions.

    Screenshot of site collection administrators

    Description

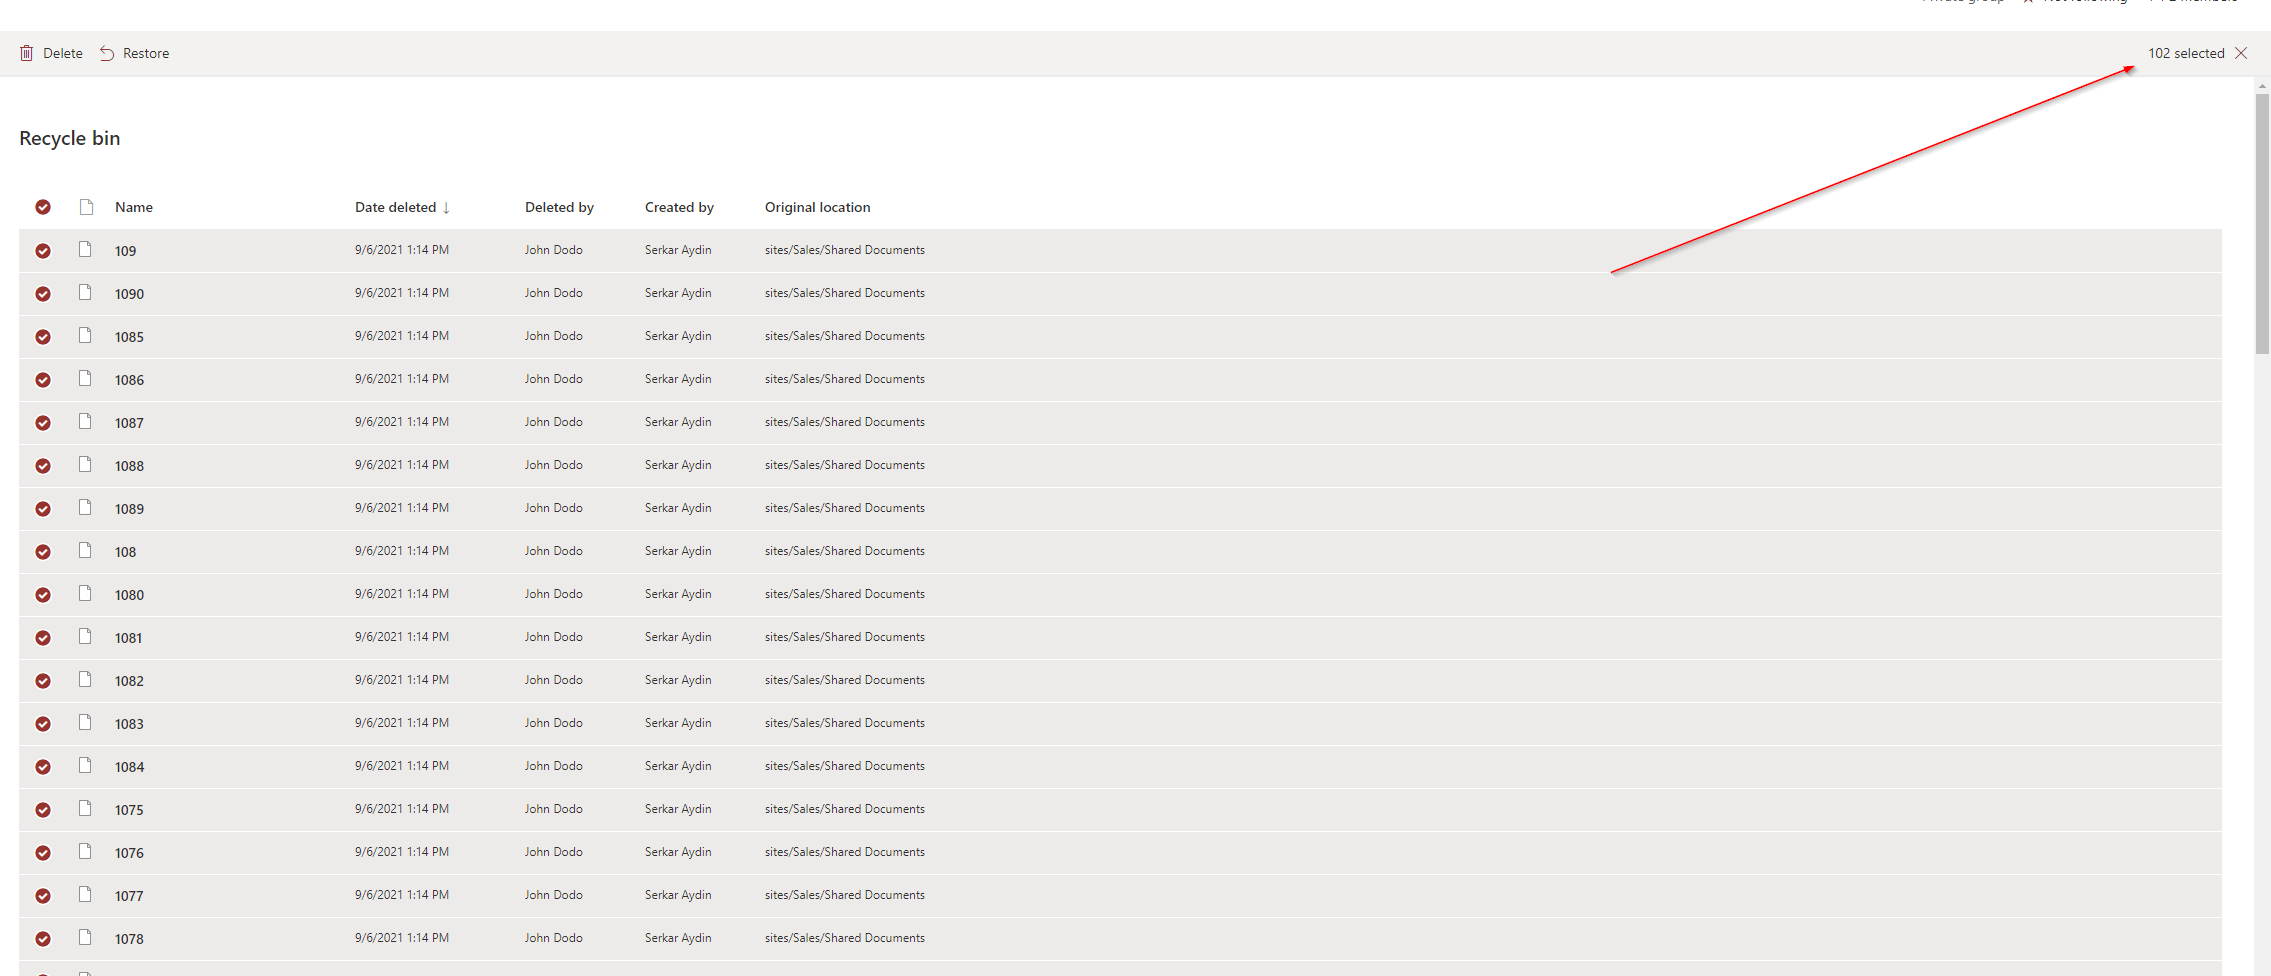
    Previously we saw, that you can restore files easily by hand, but imagine, that you have removed more than 100 files, this might be a bit clicky time-consuming. So let’s check what we can do with PNP PowerShell.

    I am using John Dodo, who is currently a site collection administrator. John Dodo has removed more than 100 files by accident and I want to restore SharePoint files removed by John Dodo. This is currently not possible in GUI.

    Screenshot of removed items in the recycle bin

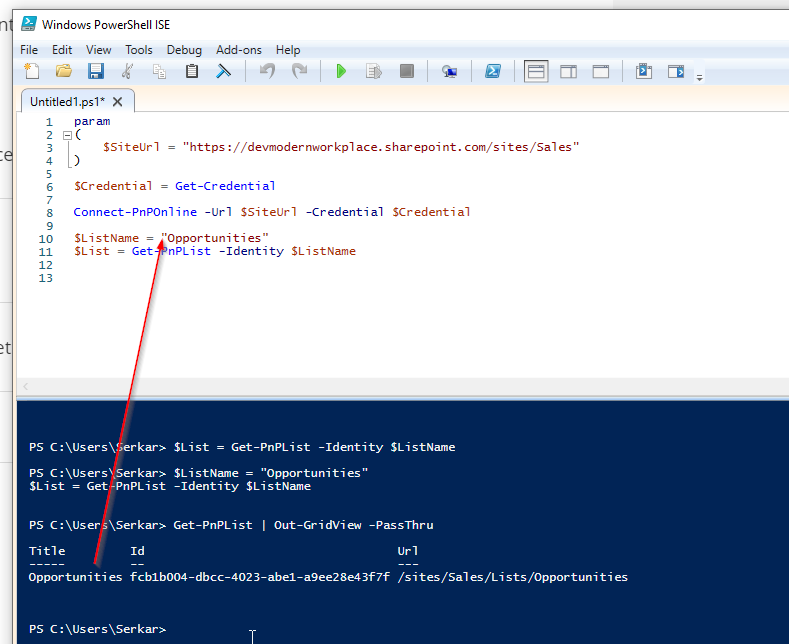
    In order to restore SharePoint files, I am using the PowerShell Module PNP.PowerShell.

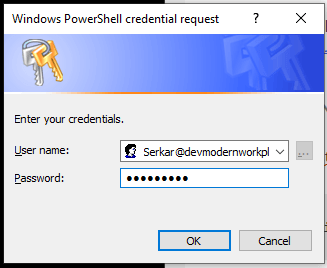
    I am connecting to the sales site. If you feel unsafe with connecting, check out the post Connect to SharePoint with PowerShell | SharePoint Online (workplace-automation.com/)

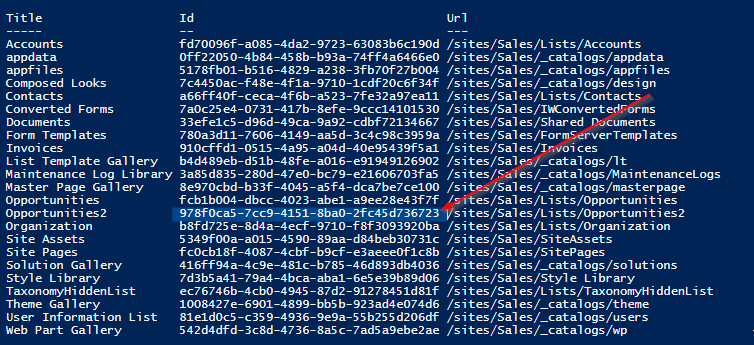
    Connect-PnPOnline https://devmodernworkplace.sharepoint.com/sites/Sales/ -Interactive

    After connecting, I can see the items in the recycle bin. I have removed more than 100 files. You can do it with the cmdlet:

    Get-PNPRecycleBinItem
    Screenshot of the removed files in PowerShell

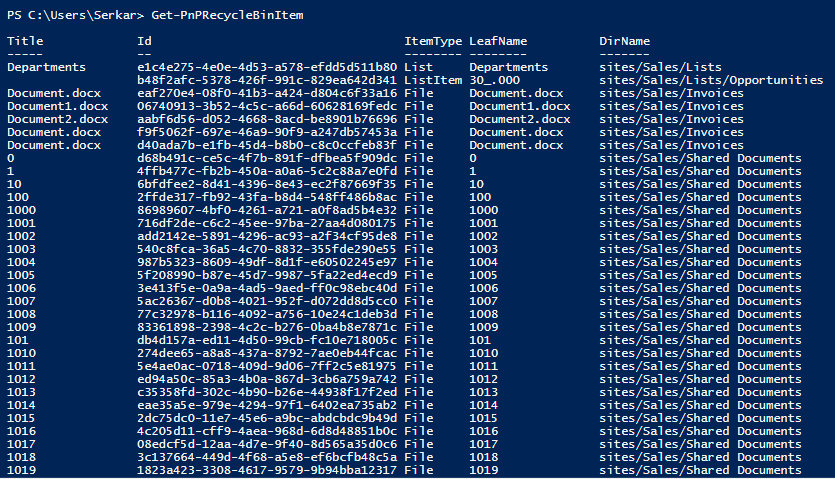
    When you pass the ID, you can also get seperate recycle bin items:

    
    Get-PnPRecycleBinItem -Identity "eaf270e4-08f0-41b3-a424-d804c6f33a16"

    If you pipe the Item, you can directly restore it:

    Get-PnPRecycleBinItem  -Identity "eaf270e4-08f0-41b3-a424-d804c6f33a16" | Restore-PnPRecycleBinItem -Force
    
    Screenshot of a specific item in the recycle bin in PowerShell

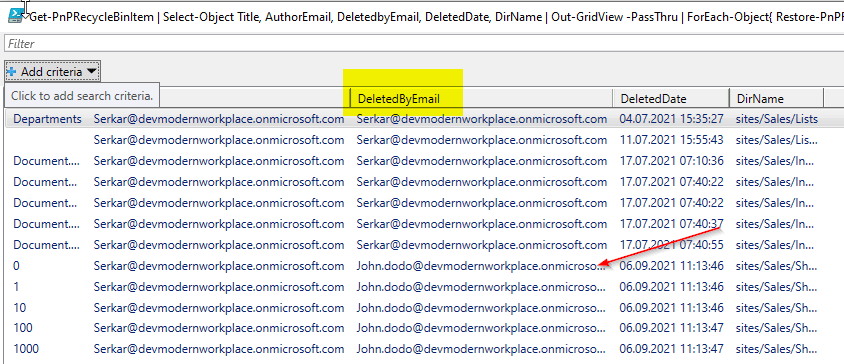
    I want to restore only the files, from John Dodo, so I am doing the restore with the out grid view cmdlet:

    Get-PnPRecycleBinItem  |
        Select-Object Title, ID, AuthorEmail, DeletedbyEmail, DeletedDate, DirName | 
            Out-GridView -PassThru |
                ForEach-Object { Restore-PnPRecycleBinItem -Identity $_.Id.Guid -Force}

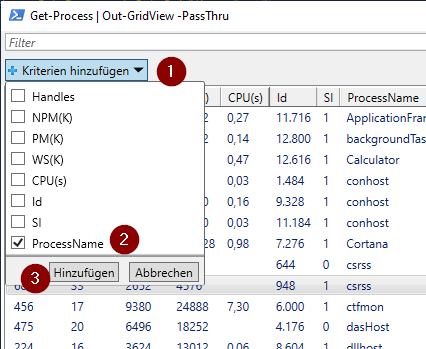
    Now you can see the grid, where you can choose John Dodo as the deletor:

    Screenshot of the out gridview output, which shows all the items in the recycle bin

    I add a filter criteria:

    Screenshot of the out gridview output, which shows the SharePoint files, with filtering options

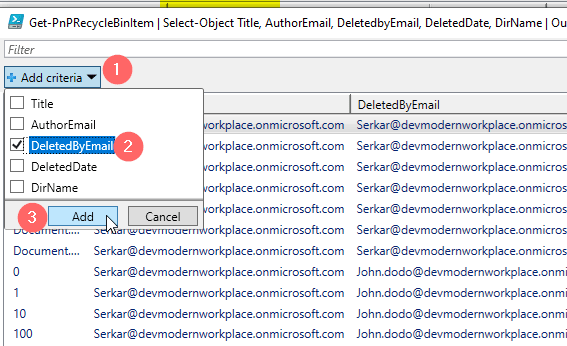
    Now I can add John Dodos mailaddress and with CTRL + A you can mark all entries and confirm with ok

    Screenshot of the out gridview output, which shows the SharePoint files, before the restore filtered on John.Dodo

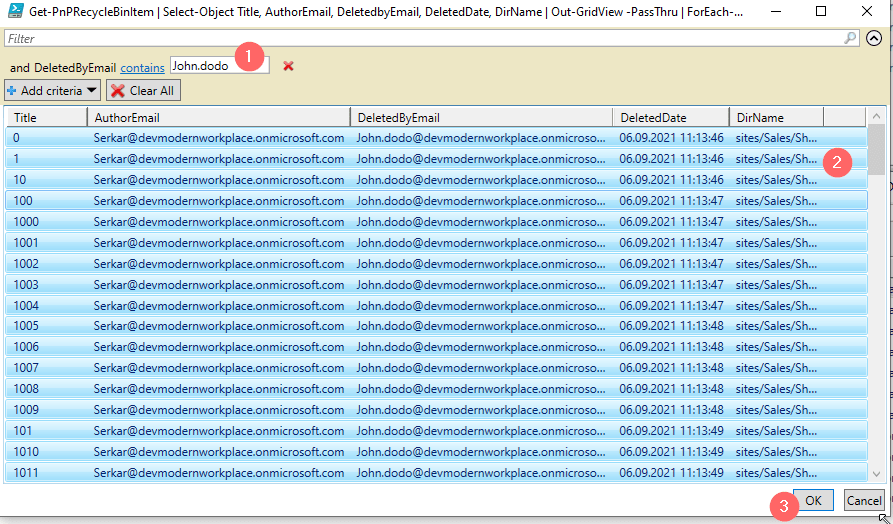
    After doing this, the files, which have been by John Dodo are restored!

    Screenshot of the recycle bin after the restore of SharePoint files

    Troubleshooting

    If you experience this issue, your permission is not sufficient for the site:

    Get-PnPRecycleBinItem : Access is denied. (Exception from HRESULT: 0x80070005 (E_ACCESSDENIED))
    At line:1 char:1
    + Get-PnPRecycleBinItem
    + ~~~~~~~~~~~~~~~~~~~~~
        + CategoryInfo          : WriteError: (:) [Get-PnPRecycleBinItem], ServerUnauthorizedAccessException
        + FullyQualifiedErrorId : EXCEPTION,PnP.PowerShell.Commands.RecycleBin.GetRecycleBinItems

    If you encounter this issue, a file with the name already exists at the location, where it was. Rename the file in the library or remove it, to restore the file.

    Restore-PnPRecycleBinItem : A file with this name "Document.docx" already exists in "sites/Sales/Invoices". To restore the file, rename the existing file and try again.
    At line:17 char:30
    + ... rEach-Object { Restore-PnPRecycleBinItem -Identity $_.Id.Guid -Force}
    +                    ~~~~~~~~~~~~~~~~~~~~~~~~~~~~~~~~~~~~~~~~~~~~~~~~~~~~~
        + CategoryInfo          : WriteError: (:) [Restore-PnPRecycleBinItem], ServerException
        + FullyQualifiedErrorId : EXCEPTION,PnP.PowerShell.Commands.RecycleBin.RestoreRecycleBinItem

    If this error occurs, it is because you have stressed the API.

    Get-PnPRecycleBinItem : The request uses too many resources.
    At line:1 char:1
    + Get-PnPRecycleBinItem | Select-Object Title, ID, AuthorEmail, Deleted ...
    + ~~~~~~~~~~~~~~~~~~~~~
        + CategoryInfo          : WriteError: (:) [Get-PnPRecycleBinItem], ServerException
        + FullyQualifiedErrorId : EXCEPTION,PnP.PowerShell.Commands.RecycleBin.GetRecycleBinItems

    Retry your cmdlet and if it is still problematic, add -rowlimit 5000, so you will see the first 5000 items.

    If you add rowlimit to your code, it will look like this:

    Get-PnPRecycleBinItem -RowLimit 5000 |
        Select-Object Title, ID, AuthorEmail, DeletedbyEmail, DeletedDate, DirName | 
            Out-GridView -PassThru |
                ForEach-Object { Restore-PnPRecycleBinItem -Identity $_.Id.Guid -Force}

    BONUS: Ready-to-run PowerShell script

    param
    (
        [Parameter(Mandatory=$true,
                       ValueFromPipelineByPropertyName=$true,
                       Position=0)]
         $SiteUrl
    )
    
    
    Connect-PnPOnline -Url $SiteUrl -Interactive -ErrorAction Stop
    
    
    Get-PnPRecycleBinItem  |
        Select-Object Title, ID, AuthorEmail, DeletedbyEmail, DeletedDate, DirName | 
            Out-GridView -PassThru |
                ForEach-Object { Restore-PnPRecycleBinItem -Identity $_.Id.Guid -Force}

    Further Reading

    Out-Gridview gives us many possibilities to filter objects interactively, check out the blog post to learn more: How to filter for PowerShell objects easily | SPO Scripts

    Here you can find the official reference of Microsoft regarding the recycle bin: Manage the Recycle bin of a SharePoint site (microsoft.com)

    References

    Cover picture:

    Haus Foto erstellt von kues1 – de.freepik.com
  • 3 of the most important SharePoint PowerShell Modules and Snappins

    In my role as an automation consultant, I encounter several challenges, where you have to think out of the box. Thinking out of the box also means, to reconsider the tools, which you are using. If you start with SharePoint/ M365 automation, you will notice that there are at least three SharePoint PowerShell modules and snappins, with which you can automate your SharePoint environment. All of the SharePoint PowerShell modules/ snappins have indeed a reason for existence. In this article, I will show you where the focus of each module is, so you can get an idea, when to use which module. You will also get a overview, how to use all of them and what pros and cons eacht SharePoint PowerShell module/ snappin has.

    Think out of the box when designing an automation solution

    PNP PowerShell

    The beginning of PNP PowerShell was a community project of several developers, which have developed many client side object model (CSOM) wrappers for SharePoint 2013, 2016 and 2019. In fact PNP stands for Patterns and Practices. The modules are known as SharePointPnPPowerShell20xx or SharePointPnPPowerShellOnline. About the turn of the year all consolidated to PNP.PowerShell. Also the main focus from “catchall” have changed to the cloud version of SharePoint.

    When to use PNP PowerShell

    PNP.PowerShell is developing to one of the overreaching modules in Microsoft 365 cosmos. I would recommend to try everything first with PNP.PowerShell before you try doing it with SharePointOnlinePowerShell, since the development of the module goes on and on and you can do way more things with PNP PowerShell, than with SharePointOnlinePowerShell in terms of business process automation.

    Topics covered by PNP PowerShell

    Currently PNP PowerShell covers following topics and services:

    • SharePoint Online
    • SharePoint Server (on premises)
    • M365 Groups
    • Power Automate
    • Azure AD
    • SharePoint Syntex
    • Microsoft Teams
    • Microsoft Planner

    Pros and Cons of PNP PowerShell

    ProsCons
    ✅ You can use it for on-premises and cloud services❌ Some cmdlets are not working as expected e.g. Set-PNPSite -SitecollectionAdmin
    ✅ You can use it on all servers/ clients, which have access to the tenant/ farm (online or on-premises)❌ With constant development, cmdlets might change, so you have to monitor the changes, when updating the module
    ✅ Constant development of module❌ You have to consent the access with the global admin role
    ✅ Supports many branches of M365 (SharePoint, Teams, Planner etc.)❌ Microsoft Support won’t support if there is a bug in the modules. You have to open a request in github
    ✅ You don’t have to make breaking changes to your scripts if you move from SharePoint Server to SharePoint Online
    ✅ You can change a wide range of content in SharePoint (Sites, Lists, Items)
    ✅ You don’t need SharePoint Admin permission to connect to a site

    How to make use of PNP PowerShell?

    If you want to make use of PNP PowerShell, check out this blog post, which describes every step of it in detail: Connect to SharePoint with PowerShell | SharePoint Online (workplace-automation.com/)

    What can I change with PNP PowerShell?

    In this section, I want to give you an overview of what you can change with PNP Powershell. Indeed there are more objects in SharePoint. I focus in the first place on objects, which I think are mostly changed with PowerShell for business process automation.

    ObjectChanging
    possible
    with
    PNP PowerShell?
    CmdletPrequisitesReference
    TenantSet-PNPTenantSharePoint Admin RoleSet-PnPTenant (PnP.Powershell) | Microsoft Docs
    Hub SiteSet-PNPHubSite Access to SiteSet-PnPHubSite (PnP.Powershell) | Microsoft Docs
    SiteSet-PNPSiteAccess to Site Set-PnPSite (PnP.Powershell) | Microsoft Docs
    Sub SiteSet-PNPWeb Access to Site and SubsiteSet-PnPWeb (PnP.Powershell) | Microsoft Docs
    ListSet-PNPList Access to Site & ListSet-PnPList (PnP.Powershell) | Microsoft Docs
    LibrarySet-PNPSite Access to Site & Library Set-PnPList (PnP.Powershell) | Microsoft Docs
    ItemSet-PNPListItemAccess to Site & List & ItemSet-PnPListItem (PnP.Powershell) | Microsoft Docs
    FileSet-PNPListItem Access to Site & Library & FileSet-PnPListItem (PnP.Powershell) | Microsoft Docs
    PageSet-PNPage Access to Site & Library & Page Set-PnPPage (PnP.Powershell) | Microsoft Docs

    Who is maintaing PNP PowerShell?

    The module is maintained by the PNP Developer Community. At this stage I have to thank you guys for your hard and good work. It was really a game changer, when I didn’t had to use scripts on the SharePoint Server.

    Since it is all open source, you can also check the source code here: Microsoft 365 Community (github.com)

    You can find more about the community here: SharePoint Developer Community (SharePoint PnP) resources | Microsoft Docs

    What if I find a bug in PNP Powershell?

    Be sure to follow their rules, when you open an issue, so they can help you faster. In the first step check the discussions. You have to be patient, since it is a community developed module.

    If you find a bug, you have to open a github issue here: pnp/powershell: PnP PowerShell (github.com)

    SharePointOnlinePowerShell

    SharePointOnlinePowerShell is the official Module, which is published by Microsoft. In comparison to PNP Powershell, SharePointOnlinePowerShell focuses only on the administration of SharePoint Online.

    When to use SharePointOnlinePowerShell

    My strategy is to use SharePointOnlinePowerShell, when I experience a buggy behaviour by PNP.PowerShell. Altough it is the official SharePoint PowerShell module, you cannot change e.g. list items.

    Topics covered by SharePointOnlinePowerShell

    SharePointOnlinePowerShell is only focussing on SharePoint Online. You cannot connect to another service or to SharePoint Server (on premises).

    Pros and Cons of SharePointOnlinePowerShell

    ProsCons
    ✅ I have experienced more stability on this module – It tends to have less bugs❌ You can only administer SharePoint. Business process automation will be hard to cover with this module, because you cannot change webs, lists or items
    ✅ It is supported by Microsoft❌ You can use it only for SharePoint Online
    ✅ Constant development of module – I have not experienced any breaking changes❌ You have to have SharePoint admin role

    How to make use of SharePointOnlinePowerShell?

    I have described how to install and connect with this SharePoint PowerShell Module here: SharePointOnlinePowerShell: How to connect to SharePoint Online (workplace-automation.com/)

    What can I change with SharePointOnlinePowerShell ?

    In this section, I want to give you a overview of what you can change with PNP Powershell.

    ObjectChanging
    possible
    with
    SharePointOnlinePowerShell?
    CmdletPrequisitesReference
    TenantSet-SPOTenantSharePoint Admin RoleSet-SPOTenant (SharePointOnlinePowerShell) | Microsoft Docs
    Hub SiteSet-PNPHubSite SharePoint Admin RoleSet-SPOHubSite (SharePointOnlinePowerShell) | Microsoft Docs
    SiteSet-SPOSiteSharePoint Admin RoleSet-SPOSite (SharePointOnlinePowerShell) | Microsoft Docs
    Sub Site
    List
    Library
    Item
    File
    Page

    Who is maintaing SharePointOnlinePowerShell?

    The module is developed and maintained by Microsoft. You can find the source code is here: Microsoft 365 Community (github.com)

    What if I find a bug in SharePointOnlinePowerShell ?

    You can contact Microsoft Support or try to “Contact Owners” in PowerShellGallery: https://www.powershellgallery.com/packages/Microsoft.Online.SharePoint.PowerShell

    SharePointOnlinePowerShell PowerShell Gallery

    Microsoft.SharePoint.PowerShell

    Microsoft.SharePoint PowerShell is the only type of cmdlets, which is not a SharePoint PowerShell Module, but a PSSnappin. Snapins are considered as the old way to add cmdlets and other resources. It’s focus is SharePoint Server.

    When to use Microsoft.SharePoint.PowerShell

    I recommend to use Microsoft.SharePoint.PowerShell in following situations:

    • You don’t plan to migrate the automation solution to SharePoint Online
    • You have access to the SharePoint Servers
    • You want to administer SharePoint Server

    Topics covered by Microsoft.SharePoint.PowerShell

    With Microsoft.SharePoint.PowerShell you can only connect to SharePoint Server (on premises). You can see all cmdlets here from the Microsoft reference: SharePointServer Module | Microsoft Docs

    Pros and Cons of Microsoft.SharePoint.PowerShell

    ProsCons
    ✅ Microsoft.SharePoint.PowerShell is a established PSSNappin, which tends to have very few bugs❌ You have to readapt the scripts, if you want to migrate to SharePoint Online
    ✅ It is supported by Microsoft❌ You can use it only for SharePoint Server
    ✅ You can change nearly everything with this SharePoint PowerShell Module on your SharePoint Server❌ You need SPShellAdmin rights to access SharePoint Server with this SharePoint PowerShell Module

    How to make use of Microsoft.SharePoint.PowerShell?

    1. Connect to SharePoint Server with a user, which is SPShellAdmin
    2. Start Windows PowerShell
    3. Type Add-PSSnapin Microsoft.SharePoint.Powershell
    4. You are connected!

    What can I change with Microsoft.SharePoint.PowerShell?

    If you work with this SharePoint PowerShell snappin, you will notice, that you have to use mostly the SpWeb classes to change everything below a SpWeb. Check out the Microsoft docs to see, which classes are below SPWeb: SPWeb Class (Microsoft.SharePoint) | Microsoft Docs. If you need help, don’t hesitate to contact me: Serkar@workplace-automation.com

    ObjectChanging
    possible
    with
    PNP PowerShell?
    CmdletPrequisitesReference
    FarmSet-SPFarmConfigSPShellAdminAcessSet-SPFarmConfig (SharePointServer) | Microsoft Docs
    SiteSet-SPSite SPShellAdminAcess Set-SPSite (SharePointServer) | Microsoft Docs
    Sub SiteSet-SPWeb SPShellAdminAcess Set-SPWeb (SharePointServer) | Microsoft Docs
    ListNo dedicated cmdlet. You have to call lists from web object
    (get-spweb "url").lists
    SPShellAdminAcess
    Library No dedicated cmdlet. You have to call libraries from web object

    (get-spweb "url").lists
    SPShellAdminAcess
    ItemNo dedicated cmdlet. You have to call libraries from list object

    (get-spweb "url").lists.items
    SPShellAdminAcess
    FileNo dedicated cmdlet -You have to call the file from the item object

    (get-spweb "url").lists.items[0].file
    SPShellAdminAcess
    PageNo dedicated cmdlet – You have to call it from the sitepages library. SPShellAdminAcess

    Who is maintaing Microsoft.SharePoint.PowerShell?

    The module is maintained by Microsoft.

    What if I find a bug in Microsoft.SharePoint.PowerShell?

    You can contact Microsoft Support and report the bug there.

    Conclusio

    As you saw each of the SharePoint PowerShell module / snappin got its pros and cons. PNP PowerShell is the number one choice, if you want to automate processes in Microsoft Cloud. Beside this SharePointOnlinePowerShell is the second tool recommended, If you only seek to administer SharePoint Online. As a final point Microsoft.SharePoint.PowerShell should be mentioned as a powerful tool if you want to administer SharePoint Server (on-premises). If I missed a point, I would appreciate, if you contact me: serkar@workplace-automation.com.

    Further Documentation

    This is the direct link to PNP documentation: http://aka.ms/m365pnp

    PNP provide code samples, which you can find here: PnP | Microsoft 365

    You can check out the PNP repro on github here. GitHub – pnp/powershell: PnP PowerShell

  • Multi value arrays in PowerShell: How to create them really easy

    Hello together, in my latest activity as an consutlant I encountered following issue: I got a objects with two meta data. In my example it was a milestone with an link to the milestone activity. Since it were more than 30 items, I didn’t want to work with PSObjects. I was searching for a solution to create multi value arrays in PowerShell with little code as possible. If I would work with PSObjects, it would blow up my code. In this article, I will show you how you can create “normal” arrays and also how you can enhance this arrays, to multi value arrays in PowerShell.

    Create Standard PowerShell Arrays in PowerShell

    A standard array is set up like this:

    $array = @("Value1","Value2")

    You can also write it like this:

    $Array = @( 
        "Value1"
        "Value2"
    )

    So you can get the single values, by putting in the index number of it in square brackets – like $Array[0] for the first value and $Array[1] for the second value. With [-1] you can get the last value of the array.

    PowerShell standard arrays

    Add Value to Standard PowerShell Arrays

    You can add new lines in the array like this:

    $Array.Add("Value3")

    Remove Value from Standard PowerShell Arrays

    You can remove the lines of an array like this:

    $Array.Remove("Value2")
    Removed array

    Create multi value arrays in PowerShell

    DisplaynameLink
    Microsofthttps://microsoft.com
    SPOScriptshttps://workplace-automation.com/
    Azure Portalhttps://portal.azure.com
    ZMYLERhttps://zmyler.com

    For creating a multi value arrays in PowerShell, we have to inject a hashtable to each array line.

    A hashtable looks like this:

    @{KEY="VALUE"; KEY2 = "VALUE2"; KEYn = "VALUEn"}

    So your multi value arrays will look like this:

    $Array = @( 
        @{ Key1=("Value1"); Key2=("Value2")}
        @{ Key1=("Value3") ;Key2=("Value4")}
    )

    For my example it looks like this:

    $Array = @( 
        @{ Displayname=("Microsoft"); Link=("https://microsoft.com")}
        @{ Displayname=("Google"); Link=("https://google.com")}
        @{ Displayname=("Azure Portal"); Link=("https://portal.azure.com")}
        @{ Displayname=("ZMYLER"); Link=("https://zmyler.com")}
    )

    As you can see, you can also get the single values of each line in array:

    Single value of array

    Add Value to mutli value Arrays in PowerShell

    You can add a value to a multi value array in PowerShell like this:

    $Array.Add( @{ Displayname=("Ad-equum"); Link=("https://www.ad-equum.de/")} )
    Add value to mutli value arrays in PowerShell

    Remove Value from multi value arrays in PowerShell

    Removing a value from a multi value arrays in PowerShell is more complicated. You have to redefine the array, by filtering out the value, which you don’t want in your array:

    $Array = $Array | Where-Object {$_.displayname -ne "Ad-equum"}

    Conclusio

    If you want to create a multi value arrays in PowerShell, the only thing you have to do is to inject a hashtable to each line. I hope, that I have saved you a ton of work 🙂

    Further Reading

    Here is the official reference of Microsoft to arrays: Everything you wanted to know about arrays – PowerShell | Microsoft Docs

    If you are interested in hasthables, check Microsofts docs: Everything you wanted to know about hashtables – PowerShell | Microsoft Docs

  • How to filter for PowerShell objects easily

    If you are working interactively with PowerShell, It might be unhandy to define all the filtering options with Where-Object. I will show you how to filter for PowerShell objects the traditional way and doing it with Out-Gridview.

    Filter for PowerShell objects – the traditional way with Where-Object

    If we are looking forward to filter in PowerShell, we normaly make use of Where-Object this. In my example I am looking forward for all proccesses, which contain the name msedge and the value for Handles is greater than 292. My query would look like this:

    #traditional way
    Get-Process  | Where-Object {$_.processname -contains "msedge" -and $_.Handles -gt 292}
    Output of all processes in PowerShell
    Get-Process the traditional way with Where-Object

    Filter for PowerShell objects – Out-Gridview

    I want to show you how to filter for Powershell objects easily by using following cmdlet:

    Out-GridView -PassThru

    Example:

    Get-Process | Out-GridView -PassThru

    Doing that results in a grid popping up.

    output of processes as a grid in PowerShell

    Now you have multiple options.

    You can make use of the filter of the out of the box filtering options. Let’s say I just want to find the msedge processes.

    So I am adding the Processname as a filter criteria:

    filtering options in the grid in PowerShell

    Adding ProcessName eligibles setting filtering following operators:

    contains
    does not contains
    beginns with
    is equal to
    is not equal to
    ends with
    is empty
    is not empty

    Entering msedge to the contains field, shows only process entries, which contain msedge

    filtered results in PowerShell grid
    filtering for processes which contain msedge in the name

    Now you can add additional filters.

    Additional filters in PowerShell
    I do add NPM(K) for the value 19
    Filter for npmk equals 19

    We can even now sort all the stuff by clicking on the column, which we want to sort for.

    Sort for CPU in GUI
    Sorting for highest CPU usage

    Export objects to Excel

    If you mark everything with CTRL + A, you can copy all the stuff and put it e.g. straigth to Excel

    Exporting objects to Excel
    Easy way to export to excel

    If you want to process further with powershell, you can mark the entities needed and click on OK. I selected the first and the thridh entity.

    Picture selecting only two entities
    selecting only two entities

    As you see, PowerShell returns my selection

    PowerShell return

    Conclusio

    As you can see you can save time and coding lines, when use are working inteactively on PowerShell by filter forPowerShell objects with Out-Gridview.

    You might find intersting

    Filtering items with CAML. For further learnings check out the post: Filtering for SharePoint items with CAML Queries | SPO Scripts

    Official documentation of Microsoft for the cmdlet Out-Gridview: Out-GridView (Microsoft.PowerShell.Utility) – PowerShell | Microsoft Docs

  • How to connect to SharePoint Online with SharePointOnlinePowerShell

    Besides the possibility to manage your SharePoint Online in the SharePoint admin center, you have the option to do it with PowerShell. For this tasks Microsoft has published the PowerShell module SharePointOnlinePowerShell. It’s focus is more administrative tasks, than process automation. You can e.g. change the SharePoints Tenants policies, but you cannot create list items with this PowerShell module. The module is constantly developed by Microsoft it bears 223 cmdlets (16.08.2021).

    Scope of SharePointOnlinePowerShell

    I recommend checking the scope with following cmdlet:

    Get-Command -Module Microsoft.Online.SharePoint.PowerShell | out-gridview -passthru

    Prerequisites

    • If you want to connect to SharePoint Online with SharePointOnlinePowerShell, you need a user with the SharePoint Administrator role.
    • You need Windows PowerShell 2.0 or higher to run the module

    Installation of SharePointOnlinePowerShell

    The name for the installation is different then in the documentation. The technical name is Microsoft.Online.SharePoint.PowerShell. You can install the module Microsoft.Online.SharePoint.PowerShell with following PowerShell cmdlet:

    Install-Module -Name Microsoft.Online.SharePoint.PowerShell

    If you have not trusted PSGallery yet, you will be prompted if you trust this repository. You can confirm it with “y”.

    Screenshot of the installation of SharePointOnlinePowerShell

    If you encounter this issue, start the PowerShell Session as an administrator:

    PS C:\Users\Serkar> Install-Module -Name Microsoft.Online.SharePoint.PowerShell
    Install-Module : Administrator rights are required to install modules in 'C:\Program Files\WindowsPowerShell\Modules'.
    Log on to the computer with an account that has Administrator rights, and then try again, or install
    'C:\Users\Serkar\Documents\WindowsPowerShell\Modules' by adding "-Scope CurrentUser" to your command. You can also try
    running the Windows PowerShell session with elevated rights (Run as Administrator).
    At line:1 char:1
    + Install-Module -Name Microsoft.Online.SharePoint.PowerShell
    + ~~~~~~~~~~~~~~~~~~~~~~~~~~~~~~~~~~~~~~~~~~~~~~~~~~~~~~~~~~~
        + CategoryInfo          : InvalidArgument: (:) [Install-Module], ArgumentException
        + FullyQualifiedErrorId : InstallModuleNeedsCurrentUserScopeParameterForNonAdminUser,Install-Module

    You can start PowerShell as an administrator like this:

    Start-Process powershell -Verb runAs

    You can also download it manually from PSGallery: PowerShell Gallery | Microsoft.Online.SharePoint.PowerShell 16.0.21513.12000

    Connect to SharePoint Online with SharePointOnlinePowerShell

    You can connect to SharePoint Online with an credential object or interactively. In this post I am describing both scenarios. Currently there is now way to do it with an Azure enterprise application, so you need a user. If you want to automate processes, I highly recommend a service user for this, since you don’t want your automation to crash, when you leave the company.

    Connect to SharePoint Online with SharePointOnlinePowerShell with Credential

    Note: You can only connect with an user with the SharePoint administrator role. It also won’t function, if you have multi factor authentication (MFA) enabled. For MFA check out the interactive instruction of this post.

    In the first step create an credential object:

    $Credential = Get-Credential
    credential object for connecting to SharePoint Online

    After doing this, replace the adminurl and connect to SharePoint Online:

    Connect-SPOService -Url "ADMINURL" -Credential $Credential

    In my case it looks like this:

    Connect-SPOService -Url "https://devmodernworkplace-admin.sharepoint.com/" -Credential $Credential

    If you got no error, you have established the connection successfully.

    Connect to SharePoint Online with SharePointOnlinePowerShell interactively

    You can connect interactively with following cmdlet:

    Connect-SPOService -Url "ADMINNURL"

    In my case it is:

    Connect-SPOService -Url "https://devmodernworkplace-admin.sharepoint.com/"

    You will see, that a login prompt will pop up:

    Login prompt, when logging in interactively

    Disconnect from SharePoint Online

    Disconnecting from SharePoint Online can be done like this. If you close your PowerShell Sesssion, you don’t have to do it. The connection is dropping automatically.

    Disconnect-SPOService

    Conclusio

    As you can see, there are at least two PowerShell modules – PNP.PowerShell and SharePointOnlinePowerShell to manage and automate your SharePoint tenant. With this module you can approach your Sharepoint Tenant more on as an administrator, than as somebody, who wants to automate business processes. I would not miss this module out of sight, when automating processes, because some cmdlets might be missing in the PNP PowerShell module or they might not work as expected.

    Further Reading

    If you want to focus more on automating processes, than on administering SharePoint, you should definitely check out how to connect with PNP.Powershell: Connect to SharePoint with PowerShell | SharePoint Online (workplace-automation.com/)

    If you want to see the original docs of Microsoft check out this article: Erste Schritte mit der SharePoint Online-Verwaltungsshell. | Microsoft Docs

  • How I easily add Webparts to SharePoint Pages by PowerShell

    How I easily add Webparts to SharePoint Pages by PowerShell

    A page consists of multiple webparts. With the webparts you can refer to other lists, libraries and apps within a page. You can add webparts SharePoint Pages manually and programmatically to a page. Adding webparts to single sites, can be done straight forwards in the edit section of the pages. If you want to do it in multiple sites and want to ensure, that the pages do look identical in terms of the structure, add webparts to SharePoint Pages with PowerShell! In this post I will show you how to do add webparts to pages manually and with PowerShell.

    Add Webparts to SharePoint Pages manually

    If you want to add webparts to SharePoint pages manually, you have to edit the page by clicking on edit.

    webpart page edit

    Now you can add the webpart to areas, where you get displayed a red line with a plus:

    Like here

    Add webpart to homepage

    or here:

    Add webpart to homepage

    After clicing on the red cross, you have to choose the webpart and can add. In my example, I want to display a user.

    Add people webpart
    Add the webpart name and set a person.
    set webpart properties

    If you want to display the changes to all users, click on publish (1) , otherwise click save as draft (2), so only you can see the changes.

    save or publish the page

    I have published the page, so every user can now see my change:

    published webpart page

    Add Webparts to SharePoint pages with PowerShell

    Recommendations

    • Use a code editor, which can format JSON properly – otherwise your code will look like a mess. I would recommend Visual Studio Code
    • Refresh the $Page variable fore each change you make on your page – Otherwise you will experience, that the homepage will be messed up

    Building webpart Components

    In the first step, I would recommend to design the webpart in the worbench page. You can find the workbench page of your site, by calling following URL:

    https://DOMAIN.sharepoint.com/sites/SITE/_layouts/15/workbench.aspx

    For my demo page it is:

    https://devmodernworkplace.sharepoint.com/sites/Sales/_layouts/15/workbench.aspx

    You can ignore the warning:

    warning, which you can ignore in workbench

    Now add the webpart, which you want manually.

    demo webpart in workbench

    Now click on “Web part data” and copy the yellow marked contents

    webpart code from web part data

    Put it in an editor like visual studio code and I would recommend changing to language to JSON.

    visual studio code changing language

    After doing that, make a right click and click on format document.

    Formatting document in visual studio code

    Now copy the content of WebPartData into a new tab (CTRL + N).

    Add { as the first character and } as the last character. After doing this, format the document.

    formatting document in visual studio code

    Your JSON should look like this:

    {
        "webPartData": {
            "id": "7f718435-ee4d-431c-bdbf-9c4ff326f46e",
            "instanceId": "ad75d0d7-81be-4271-b809-405a30d161d2",
            "title": "People",
            "description": "Display selected people and their profiles",
            "audiences": [],
            "serverProcessedContent": {
                "htmlStrings": {},
                "searchablePlainTexts": {
                    "title": "Added by PowerShell",
                    "persons[0].name": "Serkar Aydin",
                    "persons[0].email": "Serkar@devmodernworkplace.onmicrosoft.com"
                },
                "imageSources": {},
                "links": {}
            },
            "dataVersion": "1.3",
            "properties": {
                "layout": 1,
                "persons": [
                    {
                        "id": "Serkar@devmodernworkplace.onmicrosoft.com",
                        "upn": "",
                        "role": "",
                        "department": "",
                        "phone": "",
                        "sip": ""
                    }
                ]
            }
        }
    }

    Adding Webpart to Page with PowerShell

    In order to add webparts to SharePoint pages with PowerShell, we have to connect to SharePoint. If you are doing this the first time, check out the post: Connect to SharePoint Online with PowerShell (workplace-automation.com/)

    $Credential = Get-Credential
    $SiteUrl = "https://devmodernworkplace.sharepoint.com/sites/sales"
    Connect-PnPOnline -Url $SiteUrl -Credential $Credential

    Get the page, where you want to add the webparts to:

    $Page = Get-PnPPage -Identity "Home"

    After connecting, you can add the webpart by the previously created JSON content:

    $PersonJSON = @"
    {
        "webPartData": {
            "id": "7f718435-ee4d-431c-bdbf-9c4ff326f46e",
            "instanceId": "ad75d0d7-81be-4271-b809-405a30d161d2",
            "title": "People",
            "description": "Display selected people and their profiles",
            "audiences": [],
            "serverProcessedContent": {
                "htmlStrings": {},
                "searchablePlainTexts": {
                    "title": "Added by PowerShell",
                    "persons[0].name": "Serkar Aydin",
                    "persons[0].email": "Serkar@devmodernworkplace.onmicrosoft.com"
                },
                "imageSources": {},
                "links": {}
            },
            "dataVersion": "1.3",
            "properties": {
                "layout": 1,
                "persons": [
                    {
                        "id": "Serkar@devmodernworkplace.onmicrosoft.com",
                        "upn": "",
                        "role": "",
                        "department": "",
                        "phone": "",
                        "sip": ""
                    }
                ]
            }
        }
    }
    "@
    
    Add-PnPPageWebPart -Page $Page -DefaultWebPartType People -WebPartProperties $PersonJSON -Section 1 -Column 1 -Order 3

    The result of the added webpart looks like this:

    added webpart with powershell

    Bonus: Ready-to-use script

    The ready to use script looks like this:

    $Credential = Get-Credential
    $SiteUrl = "https://devmodernworkplace.sharepoint.com/sites/sales"
    Connect-PnPOnline -Url $SiteUrl -Credential $Credential
    
    
    $Page = Get-PnPPage -Identity "Home"
    
    $PersonJSON = @"
    {
        "webPartData": {
            "id": "7f718435-ee4d-431c-bdbf-9c4ff326f46e",
            "instanceId": "ad75d0d7-81be-4271-b809-405a30d161d2",
            "title": "People",
            "description": "Display selected people and their profiles",
            "audiences": [],
            "serverProcessedContent": {
                "htmlStrings": {},
                "searchablePlainTexts": {
                    "title": "Added by PowerShell",
                    "persons[0].name": "Serkar Aydin",
                    "persons[0].email": "Serkar@devmodernworkplace.onmicrosoft.com"
                },
                "imageSources": {},
                "links": {}
            },
            "dataVersion": "1.3",
            "properties": {
                "layout": 1,
                "persons": [
                    {
                        "id": "Serkar@devmodernworkplace.onmicrosoft.com",
                        "upn": "",
                        "role": "",
                        "department": "",
                        "phone": "",
                        "sip": ""
                    }
                ]
            }
        }
    }
    "@
    
    Add-PnPPageWebPart -Page $Page -DefaultWebPartType People -WebPartProperties $PersonJSON -Section 1 -Column 1 -Order 3

    Further Documentation

    If you are curious about webpart development and the workbench page check: Build your first SharePoint client-side web part (Hello World part 1) | Microsoft Docs

    Alternative to Visual Studio Code, you can use following link: JSON Formatter & Validator (curiousconcept.com)

  • Access SharePoint via Graph API in PowerShell

    Access SharePoint via Graph API in PowerShell

    Sometimes the use of PNP.PowerShell might not be sufficient. I encountered this experience, when I wanted to find out the usage of all sites. The Graph API provides methods, which you can use in your PowerShell Scripts. So in my example I wanted to get unused Sites with PowerShell. If you want to make use of it, you have to register an enterprise application and afterwards you can retrieve the information with an HTTP-Webrequest. In the following I will show you step by step how to access your SharePoint tenant with Graph API in PowerShell.


    Considerations – Find the right Graph API Method

    The Graph API has multiple methods, which we can use to analyze and change the content of our M365 services. In order to find the right method for your plan, check folllowing resources to see what the Graph API is capable of Microsoft Graph REST API v1.0 reference – Microsoft Graph v1.0 | Microsoft Docs. Based on the needed methods, you have to set up your enterprise application.

    Let’s assume, that you want to see the site usage of all sites in your tenant. In order to do this, you have to make use of following API method:

    GET /reports/getSharePointSiteUsageDetail(period='{period_value}’)
    GET /reports/getSharePointSiteUsageDetail(date={date_value})

    This API requires following permissions. We will consider them in this article. I want to analyze the sharepoint usage and want to update it to a list afterwards, that’s why I will make use of Application – Reports.Read.All

    Permission typePermissions (from least to most privileged)
    Delegated (work or school account)Reports.Read.All
    Delegated (personal Microsoft account)Not supported.
    ApplicationReports.Read.All
    SharePointSiteUsage Method Screenshot Graph API
    reportRoot: getSharePointSiteUsageDetail – Microsoft Graph v1.0 | Microsoft Docs

    Register the Enterprise Application

    After we figured out what permissions we need, we register the app.

    Prerequisites

    You have to have the role ‘Global Administrator’ to grant the permissions for an Enterprise Application.

    Registration

    Visit the Azure Portal URL and switdh to the app registrations sites. Directlink: App registrations – Microsoft Azure

    Click on new registration

    Register New App for Graph Api

    Give your application a name, click on Accounts in this organizational directory only, select mobile as platform, after that click on register.

    Application Registration for Graph Api

    Take a note of the Application (client) ID, you will need it to authenticate against the Graph API.

    Enterprise Application

    Grant API Permissions for App Registration

    After creating the app, we have to give it the permissions, which we have defined in the first step.

    Enterprise Application API permission

    Click on Microsoft Graph.

    Graph API screenshot

    Grant it Application permissions

    Application Permissions

    Now you have to select the permissions, for which you want to use the Graph API. I just need the information for Reports.Read.All. If you don’t know which permission to take, check the considerations part of this post.

    reports.read.all permission for Graph API

    As you can see, the permission is not granted for this tenant.

    not granted permissions screenshot for Graph API

    Create Client Secret for App Registration

    In order to authenticate to the Graph API in PowerShell, you have to create a client secret.

    Click on Certificates & secrets and then on New client secret

    Create client secret for Graph API enterprise application

    Set a Description and define when it will be expiring. I would recommend to give it a description, which you can recognize, for what it will be used in future. I have set 24 months, because I want to make use it in an automation, which should run for a long term. When finished, click Add.

    Usage Scripts client secret for Graph API

    Take Note of the value! You wont see it again, if you leave the site.

    Client Secret for Graph API obfuscated

    Consent the Requested permissions for App Registration

    Caution: You have to consent the created application with the global administrator role.

    https://login.microsoftonline.com/TENANTDomain/adminconsent?client_id=CLIENTID
    

    The URL for my dev tenant is like:

    https://login.microsoftonline.com/devmodernworkplace.onmicrosoft.com/adminconsent?client_id=949710fd-8d80-48ee-8c1b-a6f5e9e32be3

    Choose an account with global administrator role.

    Global administrator account login to grant permission for Graph API

    As you can see the permissions, which we have configured, are showing up:

    permission grant for created app for Graph API

    Since you have not set a redirect url, you will encounter this issue, which you can ignore.

    this ocurs, since we have not configured a redirect url

    Check Permission consent

    You can check that the permission is granted, if you see the green check marks.

    granted permission for enterprise application for Graph API

    Script To Acess SharePoint via the Graph API (PowerShell)

    The script contains two parts. The first part is about authentication and the second is about getting the data provided.

    Authentication

    I am making use of a credential export to be sure, that nobody steals the credentials, when it is in plain text. If you don’t know how to, check out: Use credentials in PowerShell – SPO Scripts

    Function Export-CredentialFile 
    {
        param(
        [Parameter(Mandatory=$true,Position=0)]
        $Username,
        [Parameter(Mandatory=$true,Position=1)] 
        $Path
        )
        
        
        While ($Path -eq "")
        {
            $Path = Read-Host "The path does not exist. Where should the credentials be exported to?"
        }
        $ParentPath = Split-Path $Path
        If ((Test-Path $ParentPath) -eq $false)
        {
            New-Item -ItemType Directory -Path $ParentPath
        }
        $Credential = Get-Credential($Username)
        $Credential | Export-Clixml -Path $Path
        Return $Credential
    }
    Function Import-CredentialFile ($Path)
    {
        if (! (Test-Path $Path))
        {
            Write-Host "Could not find the credential object at $Path. Please export your credentials first"
            Export-CredentialFile
        }
        Import-Clixml -Path $Path
    }
    $AppId = '949710fd-8d80-48ee-8c1b-a6f5e9e32be3'
    $CredentialPath = "C:\temp\$AppId.key"
    Export-CredentialFile -Username $AppId -Path $CredentialPath

    After doing this, we notice, that the file with the app id as name, has an encrypted password. So we splitted credentials from script to increase the security. This credential file can only be used on the machine and with the user, who has created it.

    PowerShell credential object

    If we run follwing script afterwards, we will notice, that the $AuthorizationRequest will show us a token with an bearer token.

    $AppId = '949710fd-8d80-48ee-8c1b-a6f5e9e32be3'
    $CredentialPath = "C:\temp\$AppId.key"
    $AppCredential = Import-CredentialFile -Path $CredentialPath
    
    $Scope = "https://graph.microsoft.com/.default"
    $Url = "https://login.microsoftonline.com/devmodernworkplace.onmicrosoft.com/oauth2/v2.0/token"
    
    $Body = @{
        client_id = $AppCredential.UserName
        client_secret = $AppCredential.GetNetworkCredential().password
        scope = $Scope
        grant_type = 'client_credentials'
    }
    
    $AuthorizationRequest = Invoke-RestMethod -Uri $Url -Method 'post' -Body $Body
    $AuthorizationRequest
    
    answer to the authorization request

    Access SharePoint Online with Authorization Token

    Now that we got the access token, we can connect to SharePoint Online with following script. You can use the uris (methods), defined in Microsoft docs.

    $Uri = "YOURURI"
    
    $Header = @{Authorization = "$($AuthorizationRequest.token_type) $($AuthorizationRequest.access_token)"}
    $SitesRequest = Invoke-RestMethod -Uri $Uri -Method 'Get'  -Headers $Header

    Get Site Usage Details

    You can get the site usage with following uri “https://graph.microsoft.com/beta/reports/getSharePointSiteUsageDetail(period='{D90}’)?`$format=application/json”. The number next to the D means the amount of days. So for my example it shows the usage of all sites for the last 90 days. You can replace D90 with D7, D30, and D180.

    With this script you can get the site usage for the last 90 days:

    $Uri = "https://graph.microsoft.com/beta/reports/getSharePointSiteUsageDetail(period='{D90}')?`$format=application/json"
    
    $Header = @{Authorization = "$($AuthorizationRequest.token_type) $($AuthorizationRequest.access_token)"}
    $SitesRequest = Invoke-RestMethod -Uri $Uri -Method 'get'  -Headers $Header 
    
    $Sites.value | Out-GridView -PassThru

    Bonus: Ready-to-Use Script

    If you want to make use of the script, you have to change the parameters $GraphUrl and $AppID.

    Param(
        $AppId = '949710fd-8d80-48ee-8c1b-a6f5e9e32be3',
        $GraphUrl = "https://login.microsoftonline.com/devmodernworkplace.onmicrosoft.com/oauth2/v2.0/token",
        $Scope = "https://graph.microsoft.com/.default",
        $Uri = "https://graph.microsoft.com/beta/reports/getOffice365GroupsActivityDetail`(`period=`'`D90`'`)?`$format=application/json",
    )
    
    Function Export-CredentialFile 
    {
        param(
        [Parameter(Mandatory=$true,Position=0)]
        $Username,
        [Parameter(Mandatory=$true,Position=1)] 
        $Path
        )
        
        
        While ($Path -eq "")
        {
            $Path = Read-Host "The path does not exist. Where should the credentials be exported to?"
        }
        $ParentPath = Split-Path $Path
        If ((Test-Path $ParentPath) -eq $false)
        {
            New-Item -ItemType Directory -Path $ParentPath
        }
        $Credential = Get-Credential($Username)
        $Credential | Export-Clixml -Path $Path
        Return $Credential
    }
    Function Import-CredentialFile ($Path)
    {
        if (! (Test-Path $Path))
        {
            Write-Host "Could not find the credential object at $Path. Please export your credentials first"
            Export-CredentialFile
        }
        Import-Clixml -Path $Path
    }
    
    $CredentialPath = "C:\temp\$AppId.key"
    Export-CredentialFile -Username $AppId -Path $CredentialPath
    
    $AppCredential = Import-CredentialFile -Path $CredentialPath
    
    $Body = @{
        client_id = $AppCredential.UserName
        client_secret = $AppCredential.GetNetworkCredential().password
        scope = $Scope
        grant_type = 'client_credentials'
    }
    
    $AuthorizationRequest = Invoke-RestMethod -Uri $GraphUrl -Method 'post' -Body $Body
    
    $Header = @{Authorization = "$($AuthorizationRequest.token_type) $($AuthorizationRequest.access_token)"}
    $SitesRequest = Invoke-RestMethod -Uri $Uri -Method 'get'  -Headers $Header 
    
    $SitesRequest.value | Out-GridView -PassThru

    Conclusio

    In this article you saw how to find the right permission for the enterprise application, which you need to access the SharePoint via the Graph API with PowerShell. After doing this, you can authenticate and analyze the data.

    Further Docs

    reportRoot: getSharePointSiteUsageDetail – Microsoft Graph v1.0 | Microsoft Docs

  • Add-PNPField: Add SharePoint columns with PowerShell

    Add-PNPField: Add SharePoint columns with PowerShell

    Sometimes it’s hard enough to map the exact business requirements on the intranet. Implementing them manually afterwards can lead to the requirements not being implemented exactly in the further course. Also doing it manually is very time consuming and frustrating, when mistakes are made. This is where automation comes in handy. If you are looking forward to automate your intranet, it is crucial to design lists by adding them programtically. When you add SharePoint columns with PowerShell, you can be sure, that mistakes are not made like choosing the wrong column type or wrong internal name. You basically ensure that your intranet follows the standards, which have been defined in the beginning by your stakeholders. Thus I thought it might be interesting to share my experiences with you. All my descriptions have been tested and can be used on lists and libraries.

    Prerequisites

    You have to have access to the sites, where you want to add the SharePoint columns with PowerShell. Check out the article of Microsoft, if you are not sure, how to customize the permissions: Customize permissions for a SharePoint list or library – SharePoint (microsoft.com).

    To have a understanding, how lists / libraries can be designed, will help you to automate the procedures. If you are not familiar with this, try out creating and defining a list manually, to know what options are available.

    Scenario

    Lets assume, we are looking forward, to create a list with various column types.

    List scenario

    The beginning will be this plank list:

    Plank list

    Description

    In the following, I will show you step by step how to add the SharePoint columns with PowerShell.


    Step 1 – Connect to SharePoint

    In order to add SharePoint Columns with PowerShell, you have to connect to SharePoint Online with PNP. PowerShell. If you are not sure about how to, check out: Connect to SharePoint Online with PowerShell (workplace-automation.com/)

    $Credential = Get-Credential
    Connect-PnPOnline -Url "https://devmodernworkplace.sharepoint.com/sites/sales" -Credential $Credential

    Step 2 – Get the List

    Get the SharePoint list or library with Get-PNPList

    $List = Get-PnPList -Identity "ID of the list"
    $List = Get-PnPList -Identity "978f0ca5-7cc9-4151-8ba0-2fc45d736723"

    You can find the internal name of the list by running Get-PNPList.

    Internal Name of Opportunities2

    Step 3 – Add SharePoint Columns

    After we have connected to the site and got the list/ library, we can add the desired fields. If you don’t want to add the fields to the default view, remove the paramter -AddToDefaultView.

    I have used $DisplayName also for the paremter InternalName, since we cannot ensure, that the name for the internal name will be set, as you can see in the screenshot:

    Screenshot of differing internal name

    Add String Column

    $DisplayName = "Delivery address (Customer)"
    
    Add-PnPField -List $List -DisplayName $DisplayName -InternalName $DisplayName -Type Text -AddToDefaultView

    The result of the string column looks like this:

    added string column

    Add Date Colum with Time

    If you want to add the date column, without time, you can do it like this:

    $DisplayName = "Date"
    Add-PnPField -List $List -DisplayName $DisplayName -InternalName $DisplayName -Type DateTime -AddToDefaultView

    The result of the date column with time looks like this:

    Result of Date column with time

    Add Date Column without Time

    If you want to add the date column without time, you can do it like this:

    $DisplayName = "Date without time"
    $PNPField = Add-PnPField -List $List -DisplayName $DisplayName -InternalName $DisplayName -Type DateTime -AddToDefaultView
    [XML]$SchemaXml = $PNPField.SchemaXml
    $SchemaXml.Field.SetAttribute("Format","DateOnly")
    
    Set-PnPField -List $List -Identity $PNPField.Id -Values @{SchemaXml =$SchemaXml.OuterXml} -UpdateExistingLists

    The result of the date column looks like this:

    Result of Date Column without TIme

    Add Lookup Column

    If you want to add lookup columns, you have to know the ID of the list and the Internal Name of the column, which you want to look up.

    Let’s assume, that we will lookup the email address from the list Contacts.

    Lookup column of contacts

    The ID of the list contact is: a66ff40f-ceca-4f6b-a523-7fe32a97ea11

    ID of contacts list

    For the email column, you other can do it with GUI: Determine internal name of SharePoint Columns with GUI – SPO Scripts or with PowerShell:

    Get-PnPField -List $List
    
    #Or
    
    Get-PNPField -List "INTERNALNAME OFLIST"
    Lookup Field of Email

    Now you can add the column email address to the opportunity list.

    $DisplayName = "Email"
    $PNPField = Add-PnPField -List $List -DisplayName $DisplayName -InternalName $DisplayName -Type Lookup  -AddToDefaultView
    Set-PnPField -List $List -Identity $PNPField.Id -Values @{LookupList= "a66ff40f-ceca-4f6b-a523-7fe32a97ea11"; LookupField="Email"}

    The result of the lookup column looks like this:

    Result of lookup field

    Add Choice Column

    First you define the choices, than you add the column.

    $Choices = (
    "Choice 1",
    "Choice 2",
    "Choice 3"
    )
    
    $DisplayName = "Choice"
    $PNPField = Add-PnPField -List $List -DisplayName $DisplayName -InternalName $DisplayName -Type Choice -AddToDefaultView -Choices $Choices

    Result:

    Result of choice column

    Add Boolean Column

    $DisplayName = "Win"
    $PNPField = Add-PnPField -List $List -DisplayName $DisplayName -InternalName $DisplayName -Type Boolean -AddToDefaultView

    The result of the boolean column looks like this:

    Result of boolean value

    Add Number Value

    $DisplayName = "Number of Stakeholder"
    $PNPField = Add-PnPField -List $List -DisplayName $DisplayName -InternalName $DisplayName -Type Number -AddToDefaultView

    The result of the number column looks like this:

    Result of number column

    Add Currency Column

    $DisplayName = "Deal Size"
    $PNPField = Add-PnPField -List $List -DisplayName $DisplayName -InternalName $DisplayName -Type Currency -AddToDefaultView

    The result of the currency column looks like this:

    Result of currency column

    Add Notes Column

    $DisplayName = "Notes"
    $PNPField = Add-PnPField -List $List -DisplayName $DisplayName -InternalName $DisplayName -Type Note -AddToDefaultView

    Result:

    Result of note columns

    Add Location Column

    $DisplayName = "Location"
    $PNPField = Add-PnPField -List $List -DisplayName $DisplayName -InternalName $DisplayName -Type Location -AddToDefaultView

    The result of the location column looks like this:

    Result of location column

    Add Person / User Column (single person)

    $DisplayName = "Sales Manager"
    $PNPField = Add-PnPField -List $List -DisplayName $DisplayName -InternalName $DisplayName -Type User -AddToDefaultView

    The result of the single people column looks like this:

    Result of Person Column

    Add Person / User Column (multiple persons)

    $DisplayName = "MultiPerson"
    $PNPField = Add-PnPField -List $List -InternalName $DisplayName -DisplayName $DisplayName -Type User -AddToDefaultView 
    [XML]$SchemaXml = $PNPField.SchemaXml
    
    $SchemaXml.Field.SetAttribute("Mult","TRUE")
    $OuterXML = $SchemaXml.OuterXml.Replace('Field Type="User"','Field Type="UserMulti"')
    Set-PnPField -List $List -Identity $PNPField.Id -Values @{SchemaXml =$OuterXML} -UpdateExistingLists
    

    The result of the multi people column looks like this:

    multi user column

    Add Hyperlink Column

    $DisplayName = "Url to Invoice"
    $PNPField = Add-PnPField -List $List -DisplayName $DisplayName -InternalName $DisplayName -Type  -AddToDefaultView

    The result of the hyperlink column looks like this:

    Result of URL Column

    Add Managed Metadata Column

    Retrieve the Unique Identifier of the term set, which you want to add as a metadata column.

    Visit admin center url and follow the numbers in the screenshot:

    https://tenant-admin.sharepoint.com

    TaxonomyItemID

    Now add it to TaxononmyItemID and run the cmdlets

    $DisplayName = "Departments"
    Add-PnPTaxonomyField -List $List -DisplayName $DisplayName -InternalName $DisplayName -TaxonomyItemId f076462d-bde7-4fa4-aa7b-4409a769fcd1

    The result is, that the department column, pops up as a managed metadata column.

    result of managed metadata column

    Add Calculated Column

    You can add a calculated column by defining a formular per each column. Check the reference, which shows you, how to define a formular: Examples of common formulas in lists – SharePoint (microsoft.com)

    Note: When you define the formular, you have to take the displayname. Internal names do not work currently.

    Otherwise, you see this error:

    Error when using internal name of column
    $DisplayName = "Revenue per stakeholder"
    $PNPField = Add-PnPField -List $List -DisplayName $DisplayName -InternalName $DisplayName -Type Calculated -AddToDefaultView -Formula ="[Deal Size]/[Number of Stakeholder]"
    

    The result of the calculated column looks like this:

    Result of calculated column

    Add Image Column

    $DisplayName = "Logo of customer"
    $PNPField = Add-PnPField -List $List -DisplayName $DisplayName -InternalName $DisplayName -Type Thumbnail -AddToDefaultView

    The result of the image column, looks like this:

    Result of image column

    Add Task Outcome Column

    The task outcome column is designed to define the outcome of tasks like approvals. So basically it is a choice column, but you cannot allow fill-in choices and it is a single selection choice.

    I will define following choices:

    approved
    rejected
    to be reviewed by supervisor

    The default is empty. I want the people to make conscious decisions.

    [array]$Choices = (
    "approved",
    "rejected",
    "to be reviewed by supervisor"
    )
    $DefaultChoice = ""
    
    $Choices = $Choices |ConvertTo-Xml -NoTypeInformation
    $Choices = $Choices.Objects.OuterXml
    $Choices =  $Choices -replace "Objects", "CHOICES"
    $Choices =  $Choices -replace "Object", "CHOICE"


    $FieldXML = @"
    <Field RowOrdinal="0" ColName="nvarchar15" Name="$DisplayName" StaticName="$DisplayName" SourceID="{$($List.Id)}" ID="{$([guid]::NewGuid())}" Indexed="FALSE" Viewable="TRUE" EnforceUniqueValues="FALSE" Required="FALSE" DisplayName="$DisplayName" Type="OutcomeChoice">
        <Default>$DefaultChoice</Default>
        $($Choices)
    </Field>
    "@
    $PNPField = Add-PnPFieldFromXml -List $List -FieldXml $FieldXML 

    If you want to make the field visible in the default view, you have to run following cmdlets:

    $PNPView = Get-PnPView -List $List | Where-Object {$_.DefaultView -eq $true}
    $PNPView.ViewFields.Add($PNPField.InternalName)
    $PNPView.Update()

    The result of our task outcome column looks like this:

    result of task outcome column

    Bonus: Complete Script

    Like everytime, I have provided you the whole script to add a column:

    $Credential = Get-Credential
    Connect-PnPOnline -Url "https://devmodernworkplace.sharepoint.com/sites/sales" -Credential $Credential
    $List = Get-PnPList -Identity 978f0ca5-7cc9-4151-8ba0-2fc45d736723
    
    
    $DisplayName = "Departments"
    $PNPField = Add-PnPField -List $List -DisplayName $DisplayName -InternalName $DisplayName -Type  -AddToDefaultView

    Conclusio

    As you can see, adding SharePoint Columns with PowerShell can save you a lot time, especially if you have to do it on multiple lists/ libraries and sites. I hope to save you a ton of work with this cheat sheet.

    References

    GitHub – pnp/powershell: PnP PowerShell

    FieldCollection.AddFieldAsXml-Methode (Microsoft.SharePoint.Client) | Microsoft Docs

    Image by StartupStockPhotos from Pixabay