Besides the possibility to manage your SharePoint Online in the SharePoint admin center, you have the option to do it with PowerShell. For this tasks Microsoft has published the PowerShell module SharePointOnlinePowerShell. It’s focus is more administrative tasks, than process automation. You can e.g. change the SharePoints Tenants policies, but you cannot create list items with this PowerShell module. The module is constantly developed by Microsoft it bears 223 cmdlets (16.08.2021).
Scope of SharePointOnlinePowerShell
I recommend checking the scope with following cmdlet:
If you want to connect to SharePoint Online with SharePointOnlinePowerShell, you need a user with the SharePoint Administrator role.
You need Windows PowerShell 2.0 or higher to run the module
Installation of SharePointOnlinePowerShell
The name for the installation is different then in the documentation. The technical name is Microsoft.Online.SharePoint.PowerShell. You can install the module Microsoft.Online.SharePoint.PowerShell with following PowerShell cmdlet:
If you have not trusted PSGallery yet, you will be prompted if you trust this repository. You can confirm it with “y”.
If you encounter this issue, start the PowerShell Session as an administrator:
PS C:\Users\Serkar> Install-Module -Name Microsoft.Online.SharePoint.PowerShell
Install-Module : Administrator rights are required to install modules in 'C:\Program Files\WindowsPowerShell\Modules'.
Log on to the computer with an account that has Administrator rights, and then try again, or install
'C:\Users\Serkar\Documents\WindowsPowerShell\Modules' by adding "-Scope CurrentUser" to your command. You can also try
running the Windows PowerShell session with elevated rights (Run as Administrator).
At line:1 char:1
+ Install-Module -Name Microsoft.Online.SharePoint.PowerShell
+ ~~~~~~~~~~~~~~~~~~~~~~~~~~~~~~~~~~~~~~~~~~~~~~~~~~~~~~~~~~~
    + CategoryInfo          : InvalidArgument: (:) [Install-Module], ArgumentException
    + FullyQualifiedErrorId : InstallModuleNeedsCurrentUserScopeParameterForNonAdminUser,Install-Module
You can start PowerShell as an administrator like this:
Connect to SharePoint Online with SharePointOnlinePowerShell
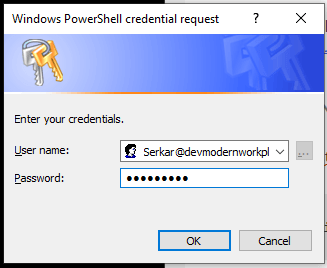
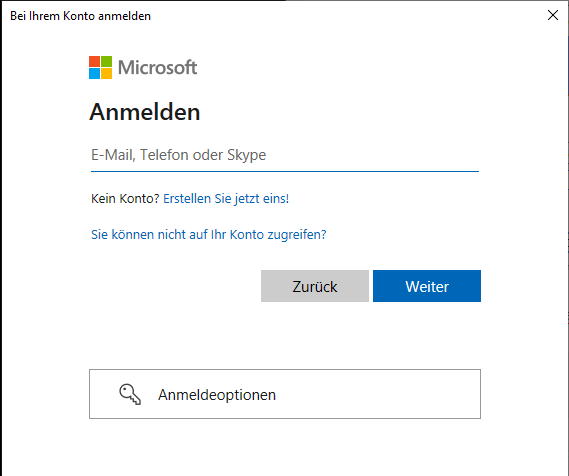
You can connect to SharePoint Online with an credential object or interactively. In this post I am describing both scenarios. Currently there is now way to do it with an Azure enterprise application, so you need a user. If you want to automate processes, I highly recommend a service user for this, since you don’t want your automation to crash, when you leave the company.
Connect to SharePoint Online with SharePointOnlinePowerShell with Credential
Note: You can only connect with an user with the SharePoint administrator role.It also won’t function, if you have multi factor authentication (MFA) enabled. For MFA check out the interactive instruction of this post.
In the first step create an credential object:
$Credential = Get-Credential
After doing this, replace the adminurl and connect to SharePoint Online:
Disconnecting from SharePoint Online can be done like this. If you close your PowerShell Sesssion, you don’t have to do it. The connection is dropping automatically.
Disconnect-SPOService
Conclusio
As you can see, there are at least two PowerShell modules – PNP.PowerShell and SharePointOnlinePowerShell to manage and automate your SharePoint tenant. With this module you can approach your Sharepoint Tenant more on as an administrator, than as somebody, who wants to automate business processes. I would not miss this module out of sight, when automating processes, because some cmdlets might be missing in the PNP PowerShell module or they might not work as expected.
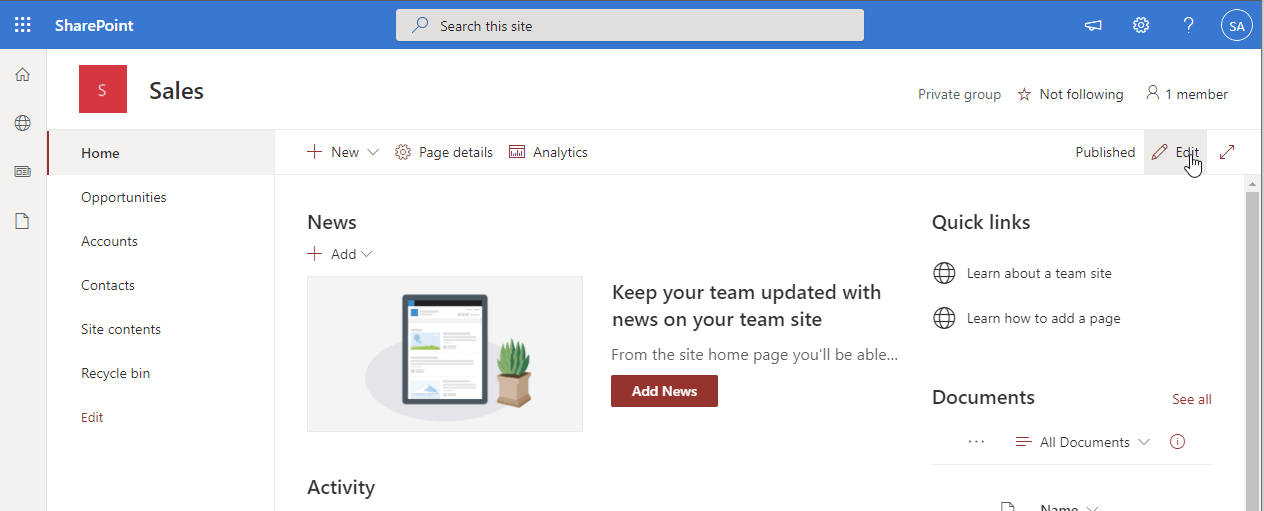
A page consists of multiple webparts. With the webparts you can refer to other lists, libraries and apps within a page. You can add webparts SharePoint Pages manually and programmatically to a page. Adding webparts to single sites, can be done straight forwards in the edit section of the pages. If you want to do it in multiple sites and want to ensure, that the pages do look identical in terms of the structure, add webparts to SharePoint Pages with PowerShell! In this post I will show you how to do add webparts to pages manually and with PowerShell.
Add Webparts to SharePoint Pages manually
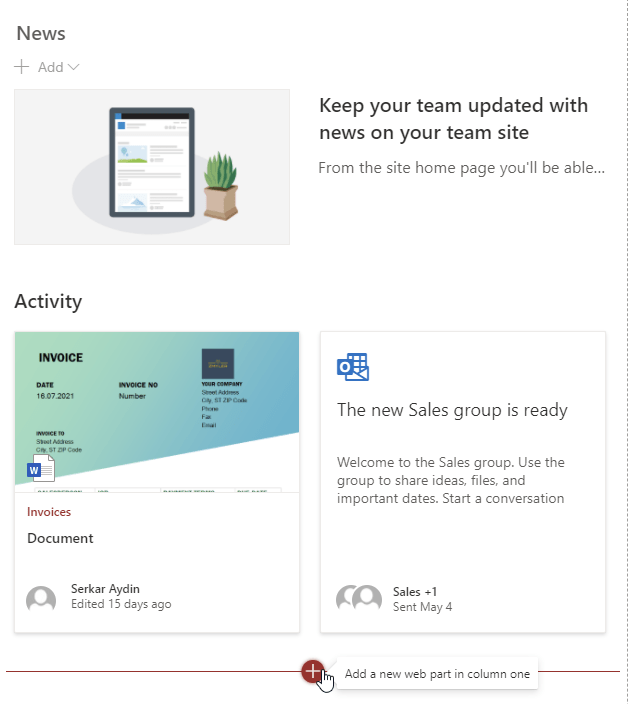
If you want to add webparts to SharePoint pages manually, you have to edit the page by clicking on edit.
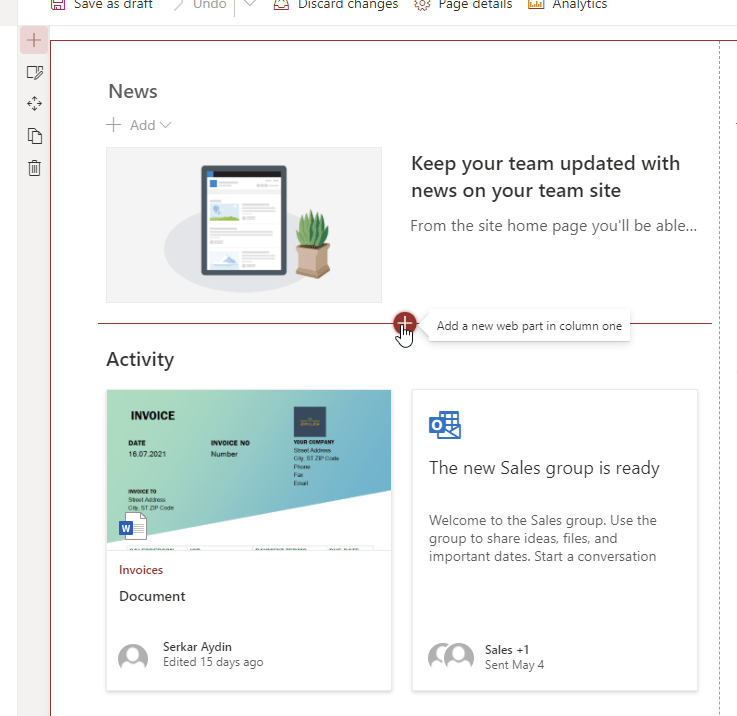
Now you can add the webpart to areas, where you get displayed a red line with a plus:
Like here
or here:
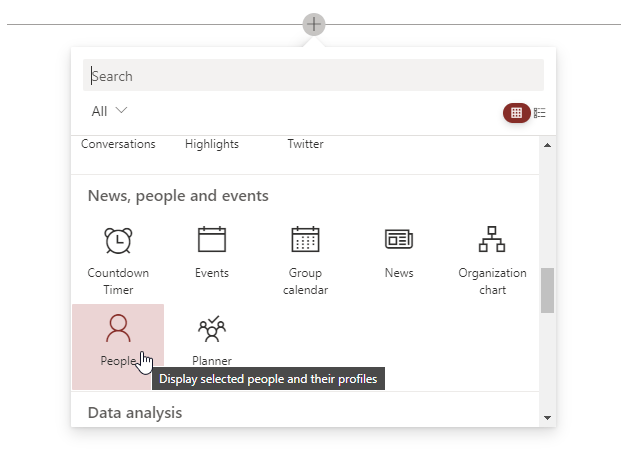
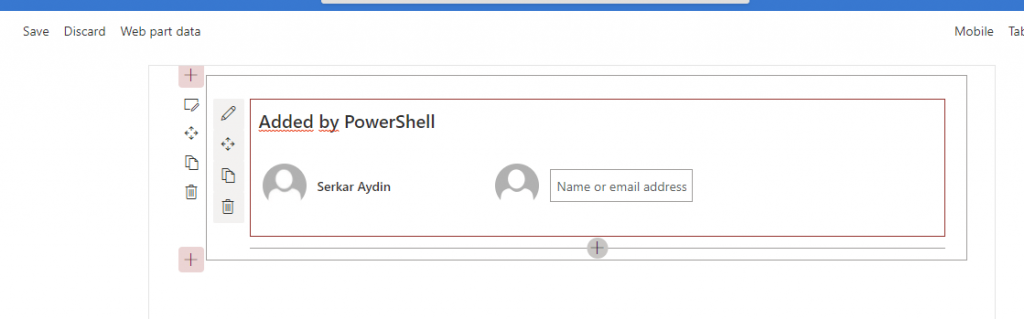
After clicing on the red cross, you have to choose the webpart and can add. In my example, I want to display a user.
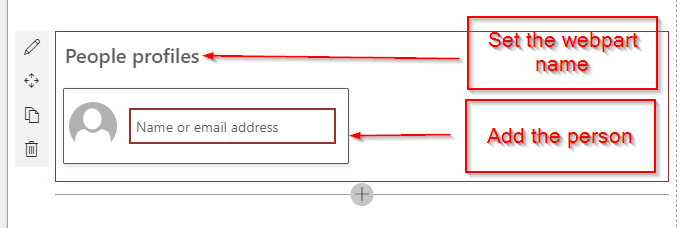
Add the webpart name and set a person.
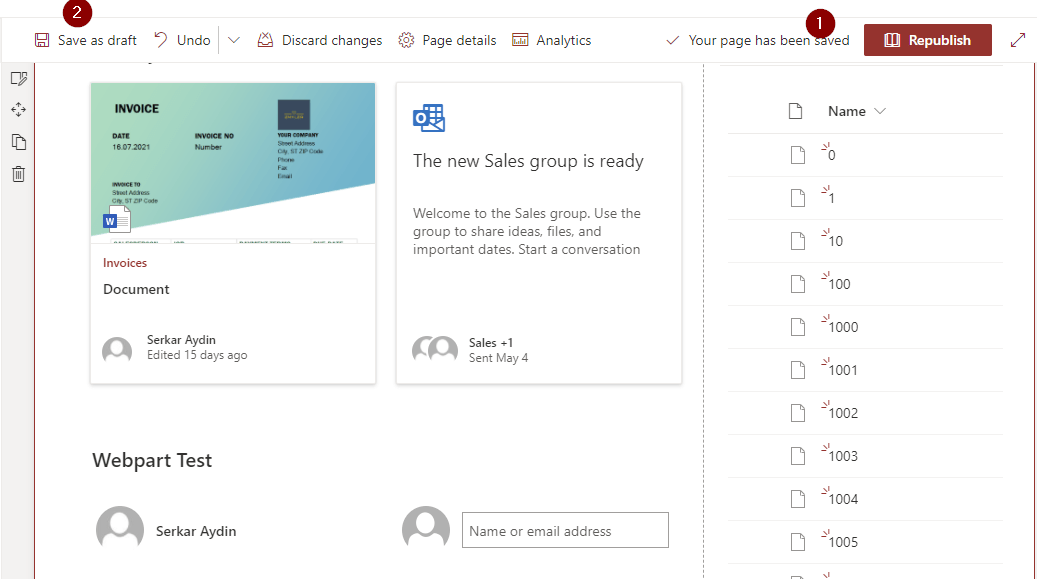
If you want to display the changes to all users, click on publish (1) , otherwise click save as draft (2), so only you can see the changes.
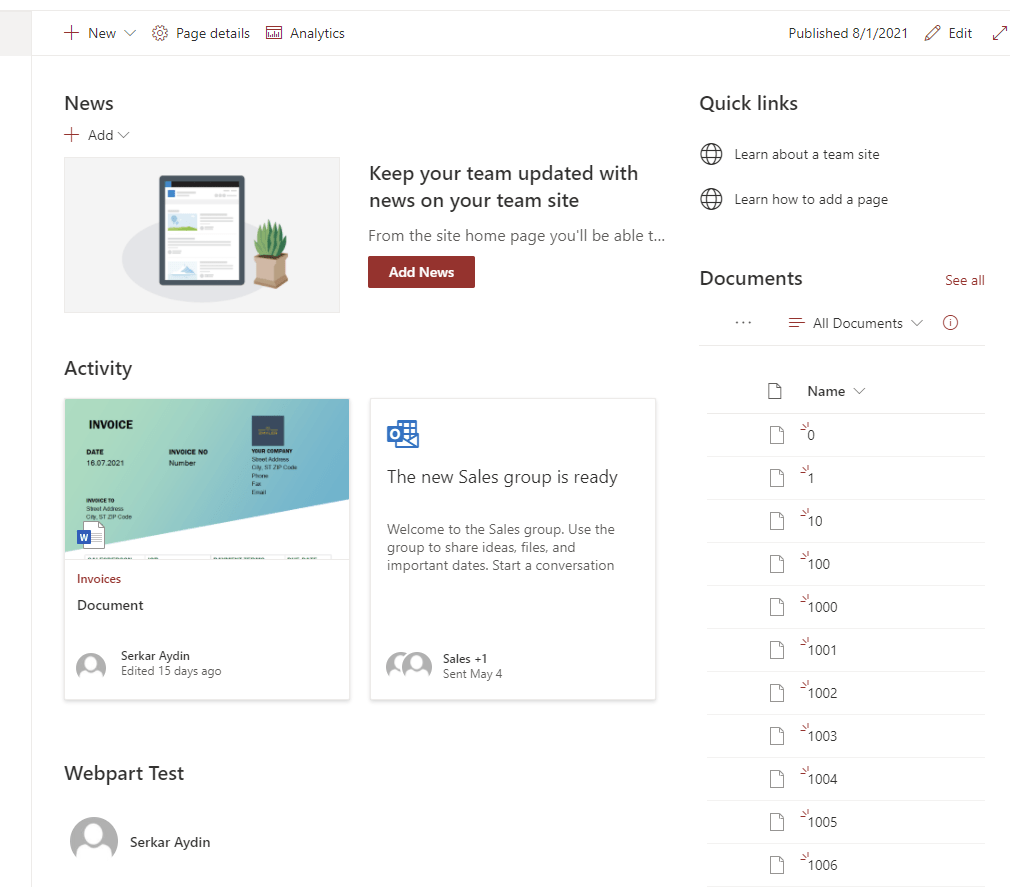
I have published the page, so every user can now see my change:
Add Webparts to SharePoint pages with PowerShell
Recommendations
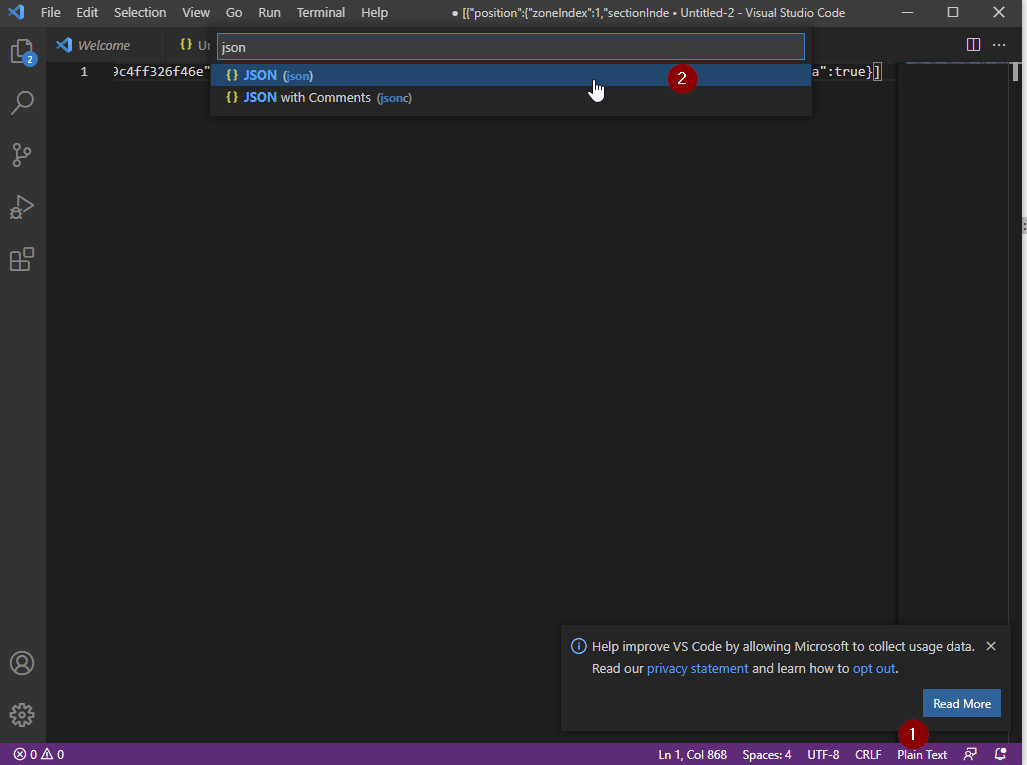
Use a code editor, which can format JSON properly – otherwise your code will look like a mess. I would recommend Visual Studio Code
Refresh the $Page variable fore each change you make on your page – Otherwise you will experience, that the homepage will be messed up
Building webpart Components
In the first step, I would recommend to design the webpart in the worbench page. You can find the workbench page of your site, by calling following URL:
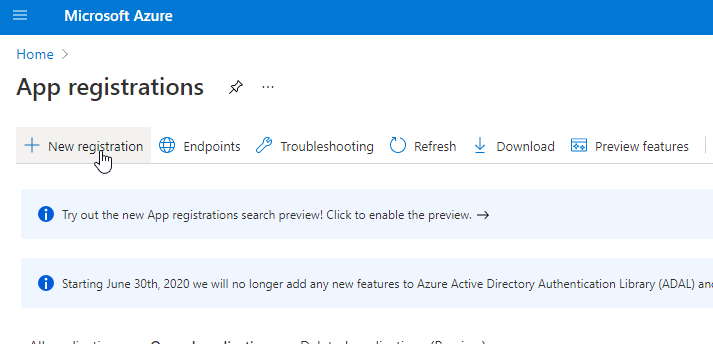
Sometimes the use of PNP.PowerShell might not be sufficient. I encountered this experience, when I wanted to find out the usage of all sites. The Graph API provides methods, which you can use in your PowerShell Scripts. So in my example I wanted to get unused Sites with PowerShell. If you want to make use of it, you have to register an enterprise application and afterwards you can retrieve the information with an HTTP-Webrequest. In the following I will show you step by step how to access your SharePoint tenant with Graph API in PowerShell.
Considerations – Find the right Graph API Method
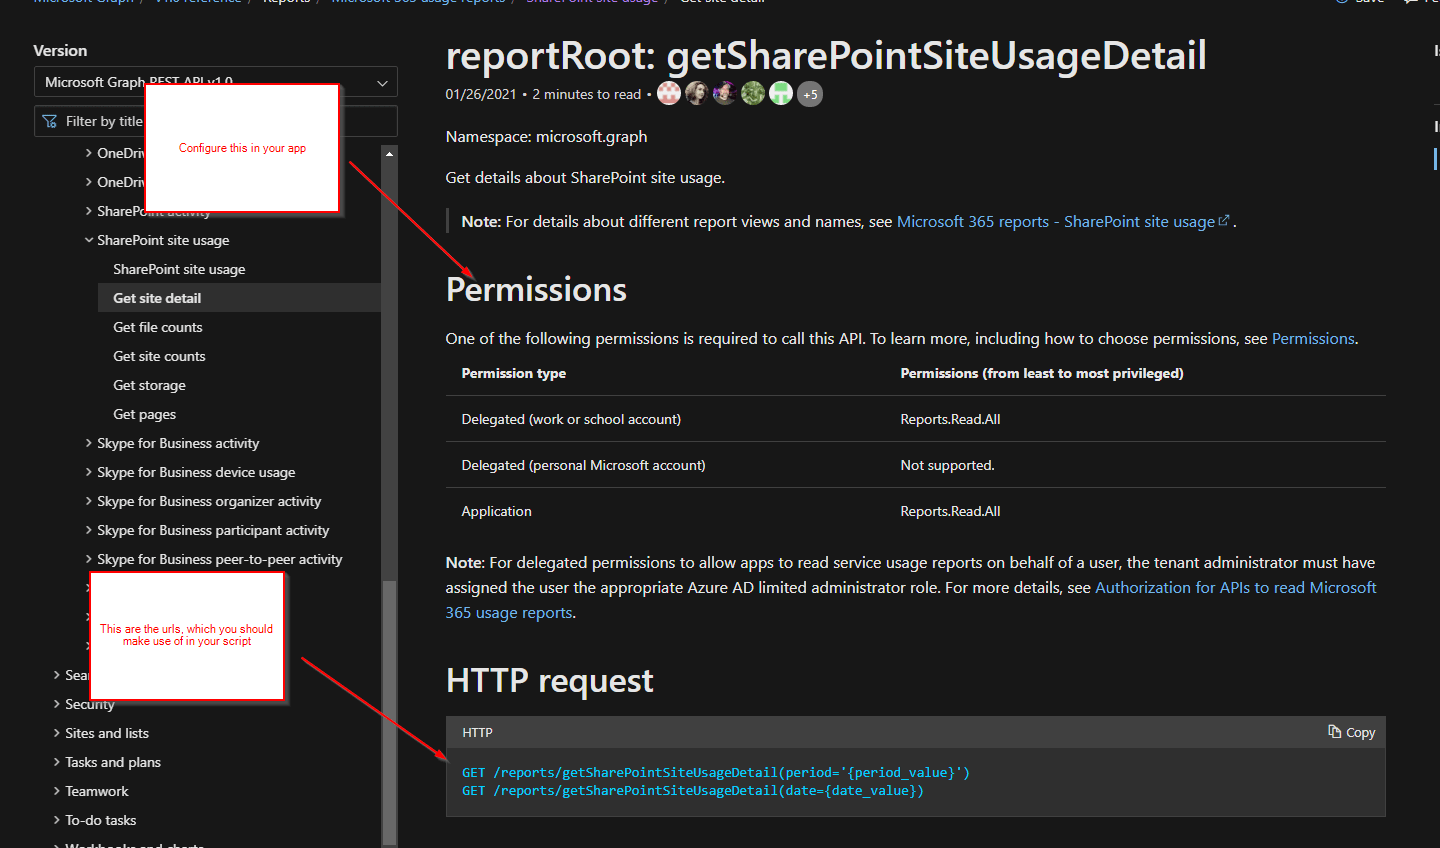
The Graph API has multiple methods, which we can use to analyze and change the content of our M365 services. In order to find the right method for your plan, check folllowing resources to see what the Graph API is capable of Microsoft Graph REST API v1.0 reference – Microsoft Graph v1.0 | Microsoft Docs. Based on the needed methods, you have to set up your enterprise application.
Let’s assume, that you want to see the site usage of all sites in your tenant. In order to do this, you have to make use of following API method:
GET /reports/getSharePointSiteUsageDetail(period='{period_value}’) GET /reports/getSharePointSiteUsageDetail(date={date_value})
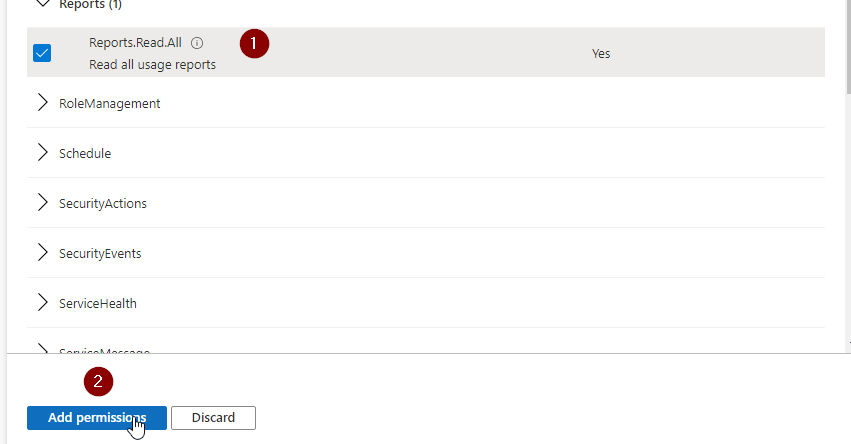
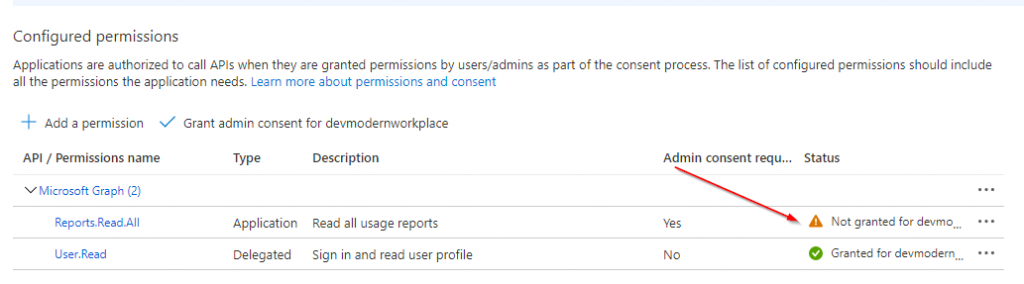
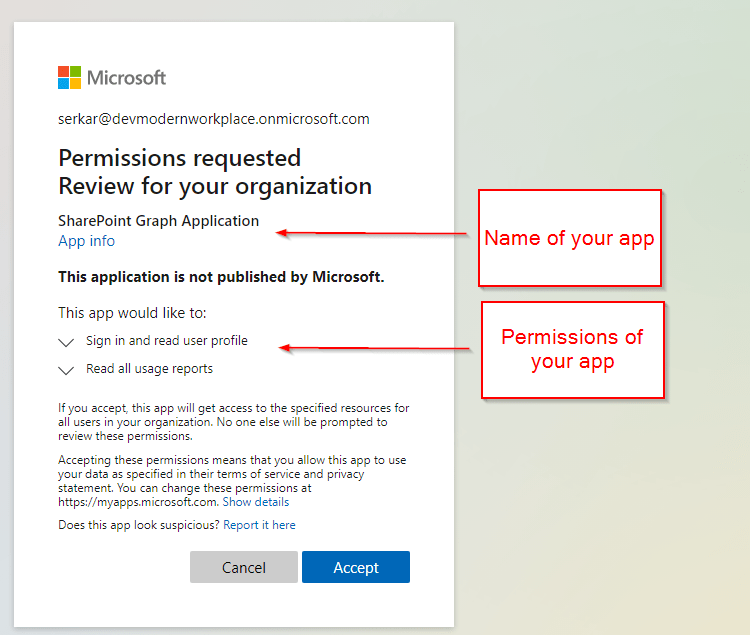
This API requires following permissions. We will consider them in this article. I want to analyze the sharepoint usage and want to update it to a list afterwards, that’s why I will make use of Application – Reports.Read.All
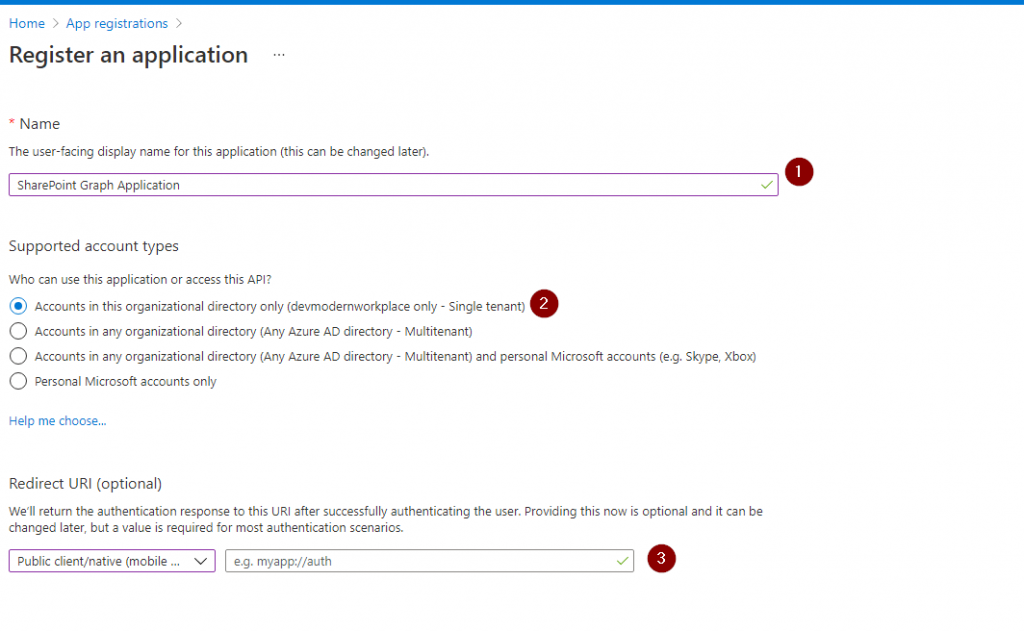
Give your application a name, click on Accounts in this organizational directory only, select mobile as platform, after that click on register.
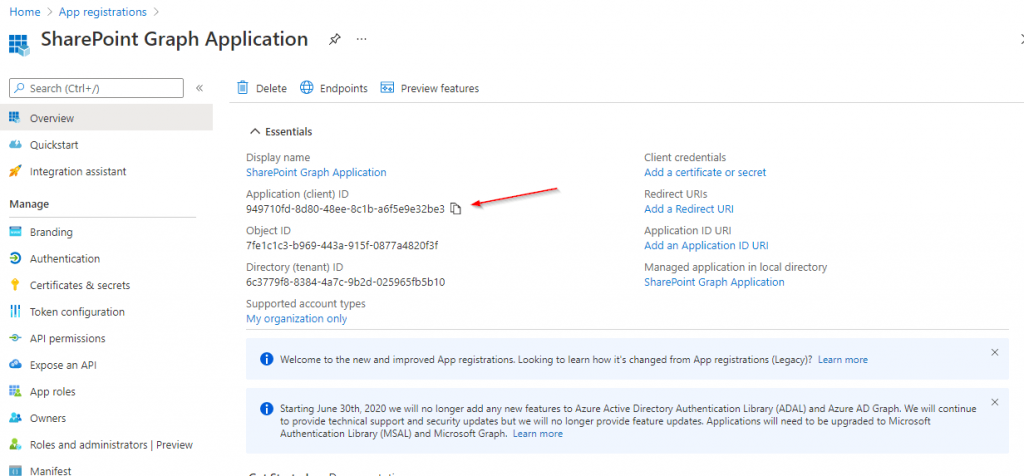
Take a note of the Application (client) ID, you will need it to authenticate against the Graph API.
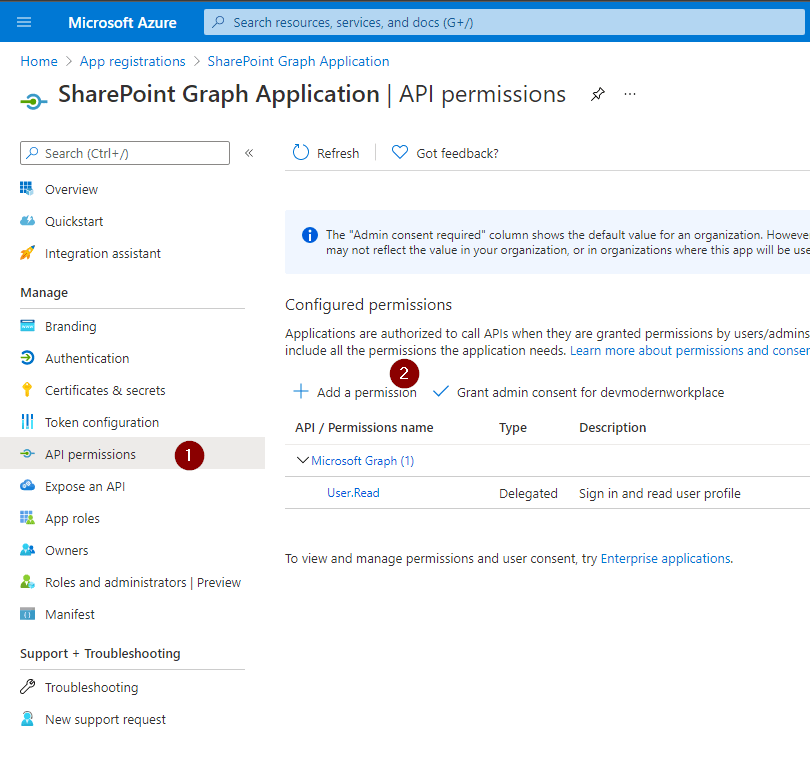
Grant API Permissions for App Registration
After creating the app, we have to give it the permissions, which we have defined in the first step.
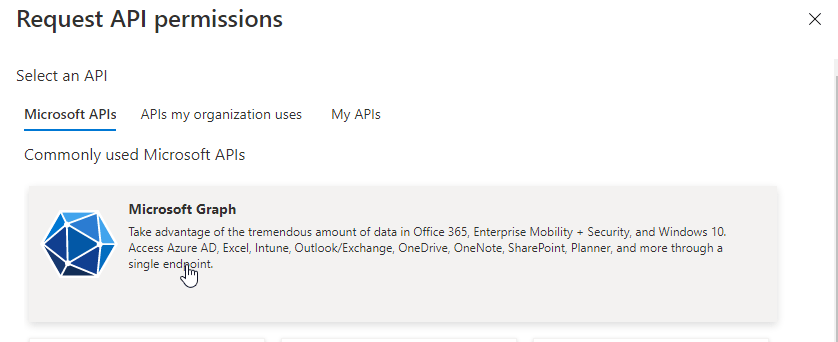
Click on Microsoft Graph.
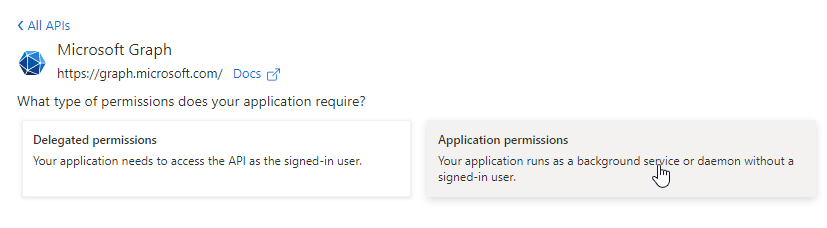
Grant it Application permissions
Now you have to select the permissions, for which you want to use the Graph API. I just need the information for Reports.Read.All. If you don’t know which permission to take, check the considerations part of this post.
As you can see, the permission is not granted for this tenant.
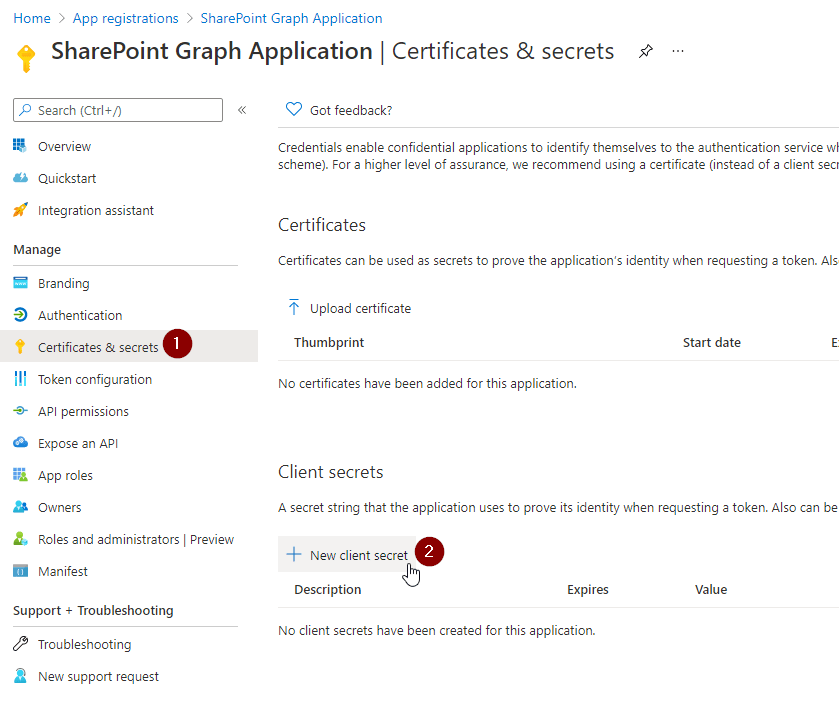
Create Client Secret for App Registration
In order to authenticate to the Graph API in PowerShell, you have to create a client secret.
Click on Certificates & secrets and then on New client secret
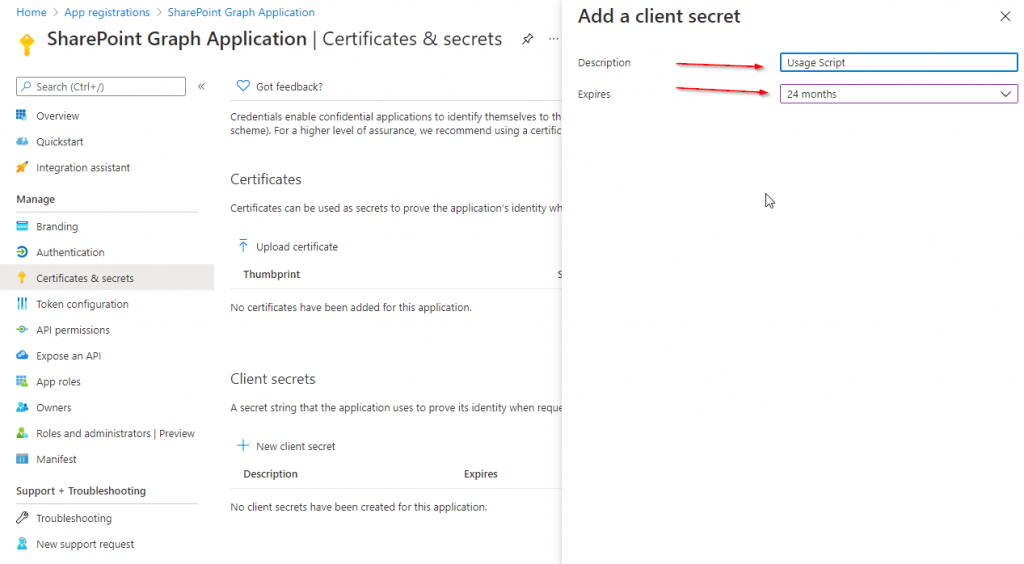
Set a Description and define when it will be expiring. I would recommend to give it a description, which you can recognize, for what it will be used in future. I have set 24 months, because I want to make use it in an automation, which should run for a long term. When finished, click Add.
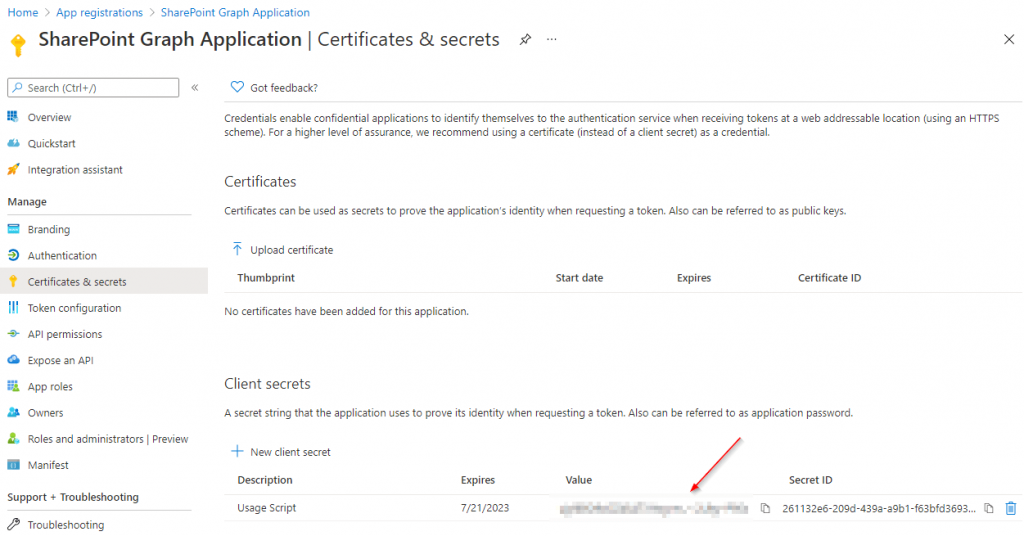
Take Note of the value! You wont see it again, if you leave the site.
Consent the Requested permissions for App Registration
Caution: You have to consent the created application with the global administrator role.
As you can see the permissions, which we have configured, are showing up:
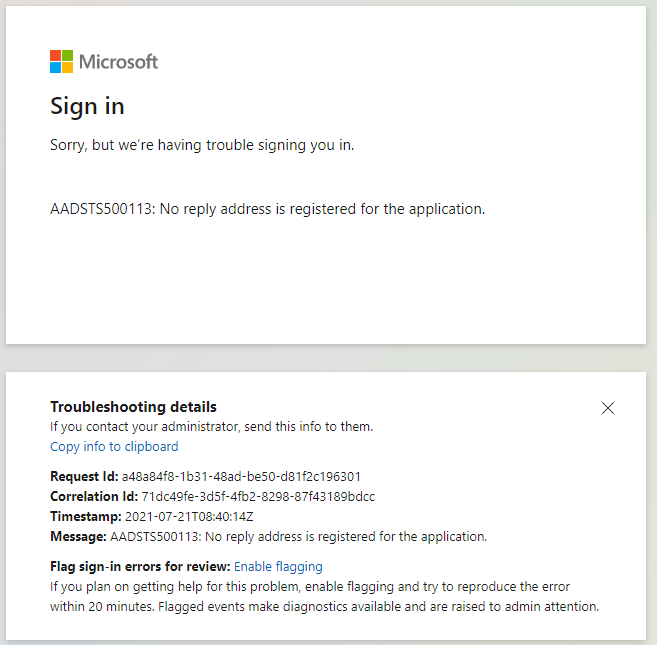
Since you have not set a redirect url, you will encounter this issue, which you can ignore.
Check Permission consent
You can check that the permission is granted, if you see the green check marks.
Script To Acess SharePoint via the Graph API (PowerShell)
The script contains two parts. The first part is about authentication and the second is about getting the data provided.
Authentication
I am making use of a credential export to be sure, that nobody steals the credentials, when it is in plain text. If you don’t know how to, check out: Use credentials in PowerShell – SPO Scripts
Function Export-CredentialFile
{
param(
[Parameter(Mandatory=$true,Position=0)]
$Username,
[Parameter(Mandatory=$true,Position=1)]
$Path
)
While ($Path -eq "")
{
$Path = Read-Host "The path does not exist. Where should the credentials be exported to?"
}
$ParentPath = Split-Path $Path
If ((Test-Path $ParentPath) -eq $false)
{
New-Item -ItemType Directory -Path $ParentPath
}
$Credential = Get-Credential($Username)
$Credential | Export-Clixml -Path $Path
Return $Credential
}
Function Import-CredentialFile ($Path)
{
if (! (Test-Path $Path))
{
Write-Host "Could not find the credential object at $Path. Please export your credentials first"
Export-CredentialFile
}
Import-Clixml -Path $Path
}
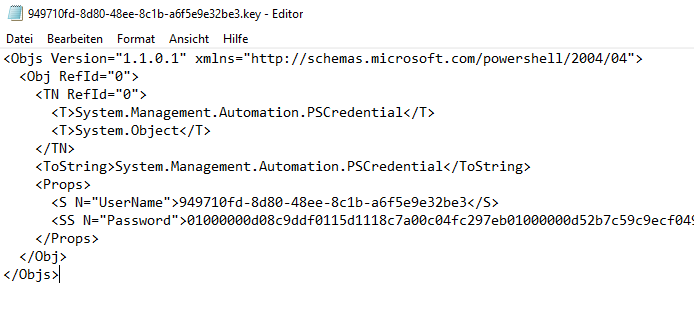
$AppId = '949710fd-8d80-48ee-8c1b-a6f5e9e32be3'
$CredentialPath = "C:\temp\$AppId.key"
Export-CredentialFile -Username $AppId -Path $CredentialPath
After doing this, we notice, that the file with the app id as name, has an encrypted password. So we splitted credentials from script to increase the security. This credential file can only be used on the machine and with the user, who has created it.
If we run follwing script afterwards, we will notice, that the $AuthorizationRequest will show us a token with an bearer token.
Now that we got the access token, we can connect to SharePoint Online with following script. You can use the uris (methods), defined in Microsoft docs.
You can get the site usage with following uri “https://graph.microsoft.com/beta/reports/getSharePointSiteUsageDetail(period='{D90}’)?`$format=application/json”. The number next to the D means the amount of days. So for my example it shows the usage of all sites for the last 90 days. You can replace D90 with D7, D30, and D180.
With this script you can get the site usage for the last 90 days:
If you want to make use of the script, you have to change the parameters $GraphUrl and $AppID.
Param(
    $AppId = '949710fd-8d80-48ee-8c1b-a6f5e9e32be3',
    $GraphUrl = "https://login.microsoftonline.com/devmodernworkplace.onmicrosoft.com/oauth2/v2.0/token",
    $Scope = "https://graph.microsoft.com/.default",
    $Uri = "https://graph.microsoft.com/beta/reports/getOffice365GroupsActivityDetail`(`period=`'`D90`'`)?`$format=application/json",
)

Function Export-CredentialFile
{
    param(
    [Parameter(Mandatory=$true,Position=0)]
    $Username,
    [Parameter(Mandatory=$true,Position=1)]
    $Path
    )


    While ($Path -eq "")
    {
        $Path = Read-Host "The path does not exist. Where should the credentials be exported to?"
    }
    $ParentPath = Split-Path $Path
    If ((Test-Path $ParentPath) -eq $false)
    {
        New-Item -ItemType Directory -Path $ParentPath
    }
    $Credential = Get-Credential($Username)
    $Credential | Export-Clixml -Path $Path
    Return $Credential
}
Function Import-CredentialFile ($Path)
{
    if (! (Test-Path $Path))
    {
        Write-Host "Could not find the credential object at $Path. Please export your credentials first"
        Export-CredentialFile
    }
    Import-Clixml -Path $Path
}

$CredentialPath = "C:\temp\$AppId.key"
Export-CredentialFile -Username $AppId -Path $CredentialPath

$AppCredential = Import-CredentialFile -Path $CredentialPath

$Body = @{
    client_id = $AppCredential.UserName
    client_secret = $AppCredential.GetNetworkCredential().password
    scope = $Scope
    grant_type = 'client_credentials'
}

$AuthorizationRequest = Invoke-RestMethod -Uri $GraphUrl -Method 'post' -Body $Body

$Header = @{Authorization = "$($AuthorizationRequest.token_type) $($AuthorizationRequest.access_token)"}
$SitesRequest = Invoke-RestMethod -Uri $Uri -Method 'get'  -Headers $Header

$SitesRequest.value | Out-GridView -PassThru
Conclusio
In this article you saw how to find the right permission for the enterprise application, which you need to access the SharePoint via the Graph API with PowerShell. After doing this, you can authenticate and analyze the data.
Sometimes it’s hard enough to map the exact business requirements on the intranet. Implementing them manually afterwards can lead to the requirements not being implemented exactly in the further course. Also doing it manually is very time consuming and frustrating, when mistakes are made. This is where automation comes in handy. If you are looking forward to automate your intranet, it is crucial to design lists by adding them programtically. When you add SharePoint columns with PowerShell, you can be sure, that mistakes are not made like choosing the wrong column type or wrong internal name. You basically ensure that your intranet follows the standards, which have been defined in the beginning by your stakeholders. Thus I thought it might be interesting to share my experiences with you. All my descriptions have been tested and can be used on lists and libraries.
To have a understanding, how lists / libraries can be designed, will help you to automate the procedures. If you are not familiar with this, try out creating and defining a list manually, to know what options are available.
Scenario
Lets assume, we are looking forward, to create a list with various column types.
The beginning will be this plank list:
Description
In the following, I will show you step by step how to add the SharePoint columns with PowerShell.
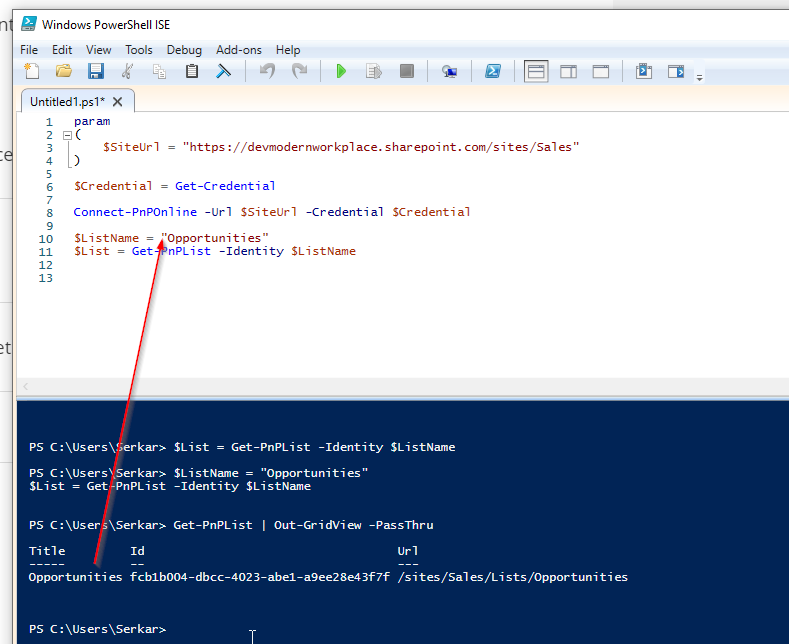
You can find the internal name of the list by running Get-PNPList.
Step 3 – Add SharePoint Columns
After we have connected to the site and got the list/ library, we can add the desired fields. If you don’t want to add the fields to the default view, remove the paramter -AddToDefaultView.
I have used $DisplayName also for the paremter InternalName, since we cannot ensure, that the name for the internal name will be set, as you can see in the screenshot:
The task outcome column is designed to define the outcome of tasks like approvals. So basically it is a choice column, but you cannot allow fill-in choices and it is a single selection choice.
I will define following choices:
approved rejected to be reviewed by supervisor
The default is empty. I want the people to make conscious decisions.
As you can see, adding SharePoint Columns with PowerShell can save you a lot time, especially if you have to do it on multiple lists/ libraries and sites. I hope to save you a ton of work with this cheat sheet.
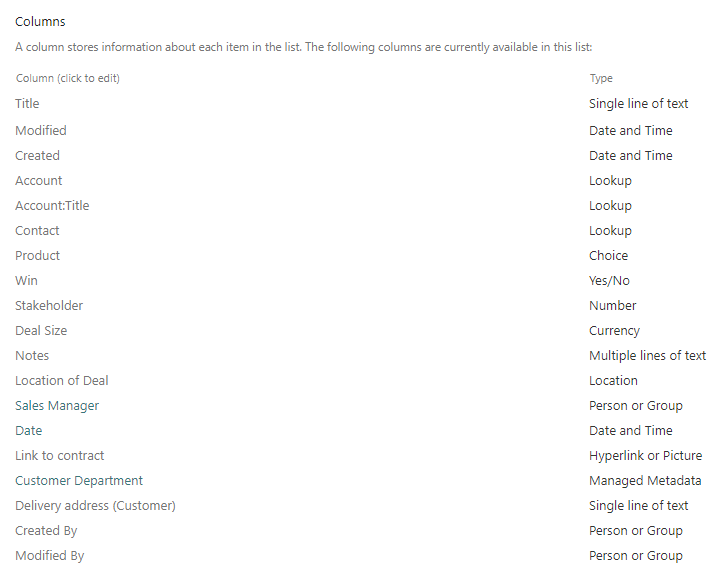
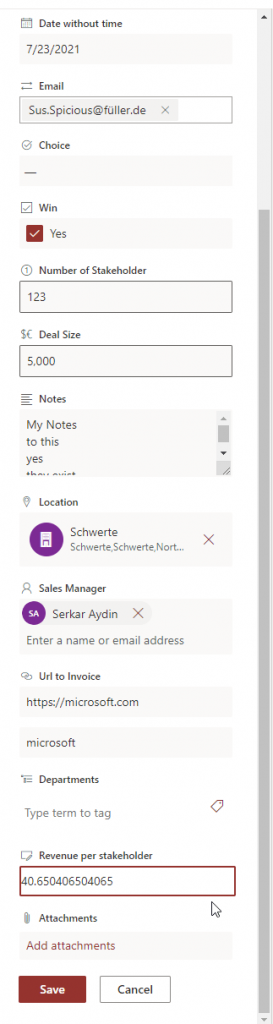
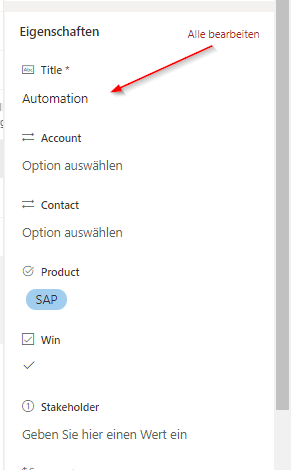
When you want to integrate 3rd party systems to SharePoint, you might need to add items to SharePoint Online lists with PowerShell. In this article, you learn, how to do it for each data type.
Use Case
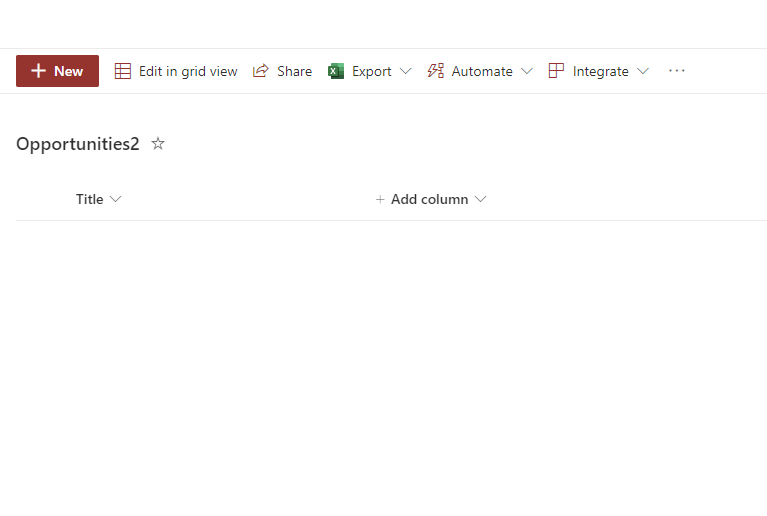
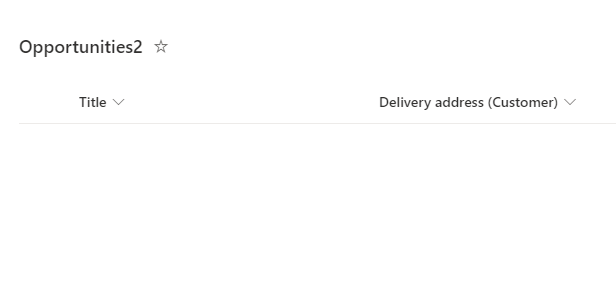
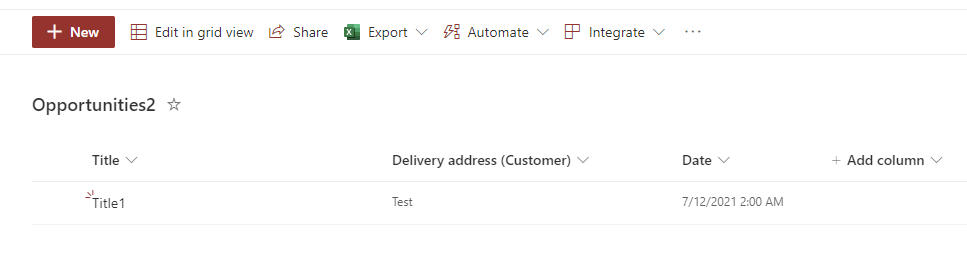
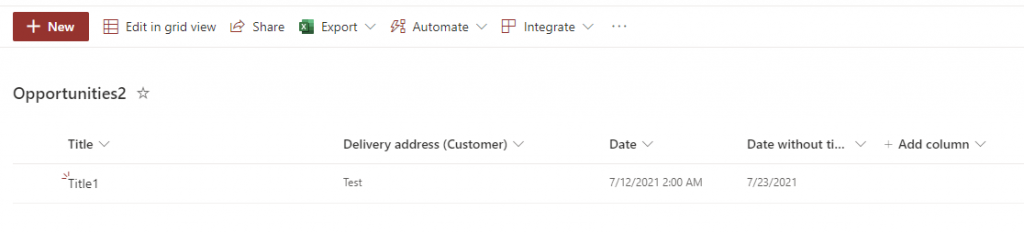
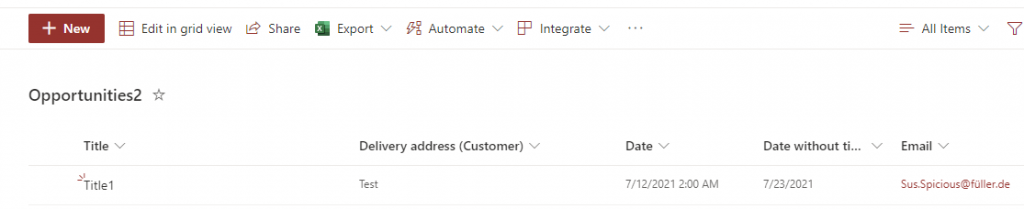
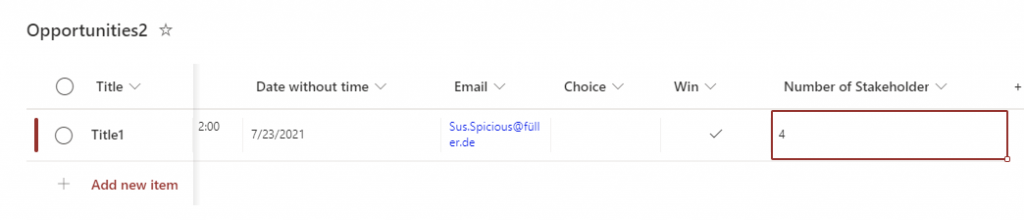
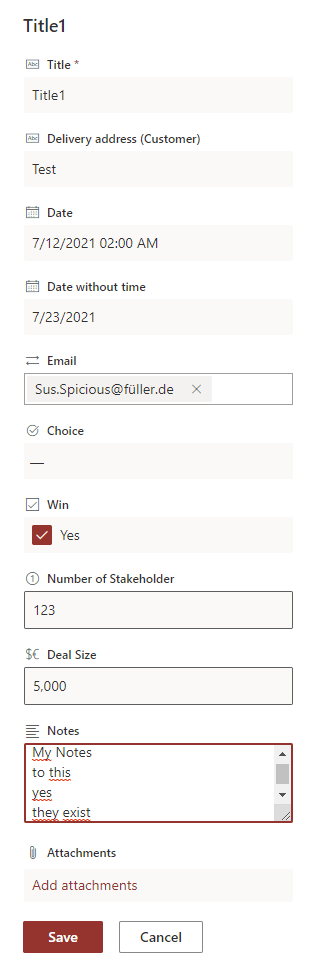
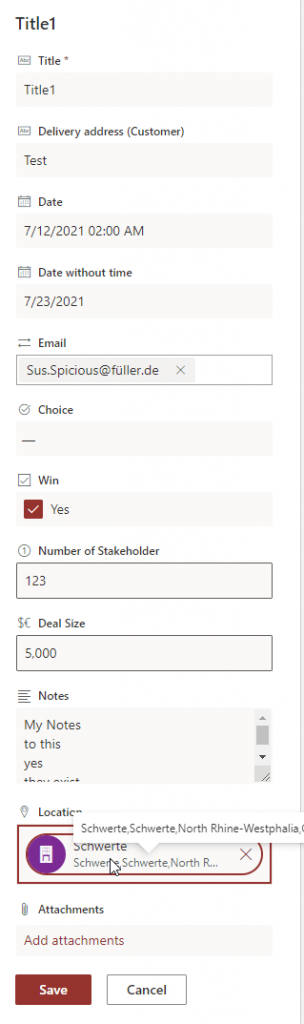
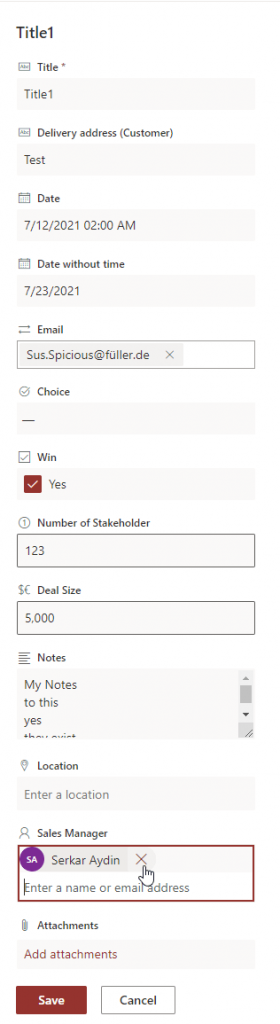
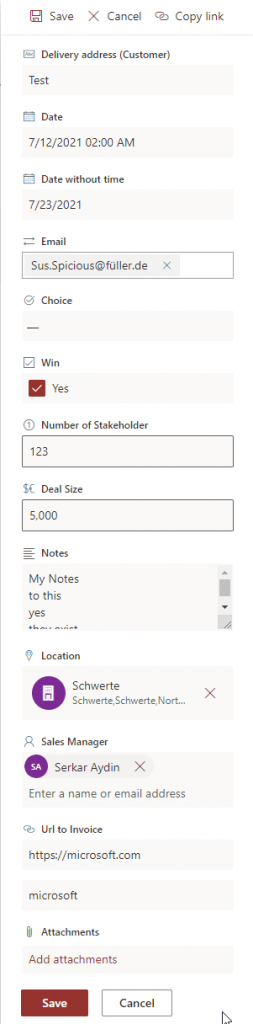
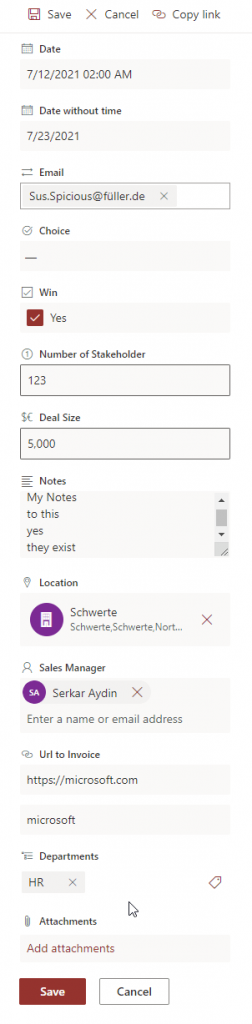
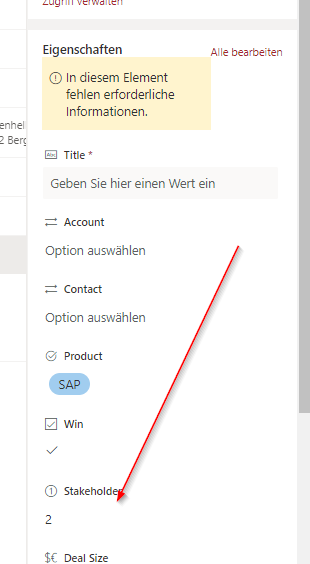
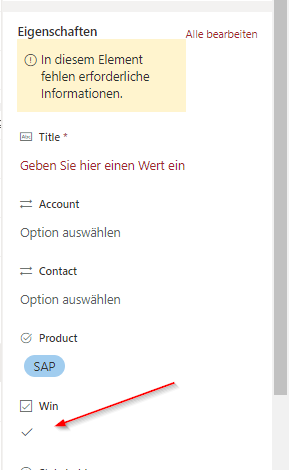
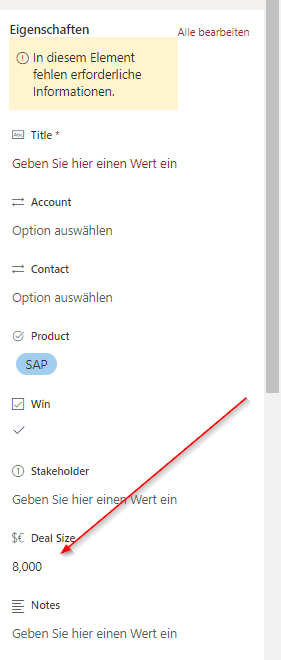
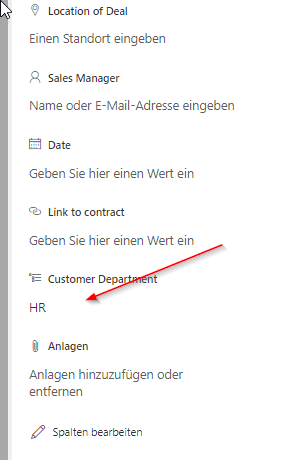
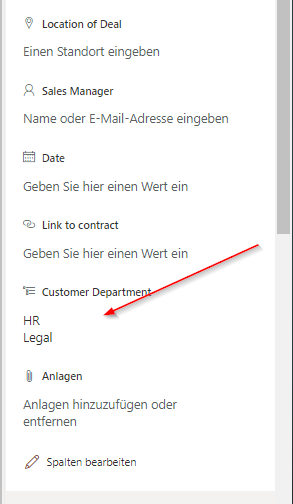
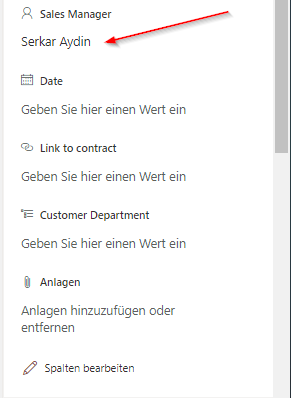
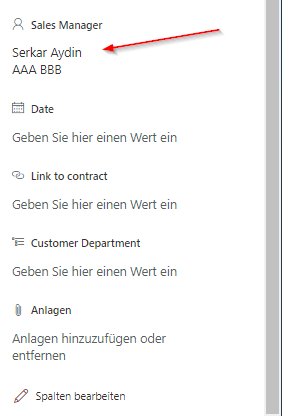
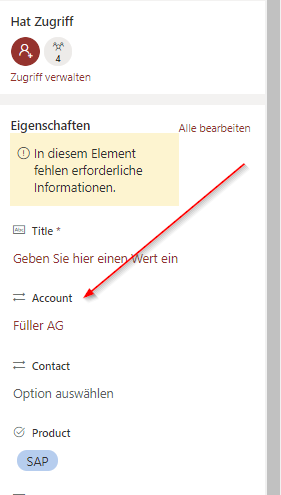
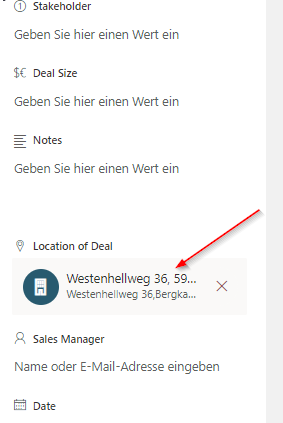
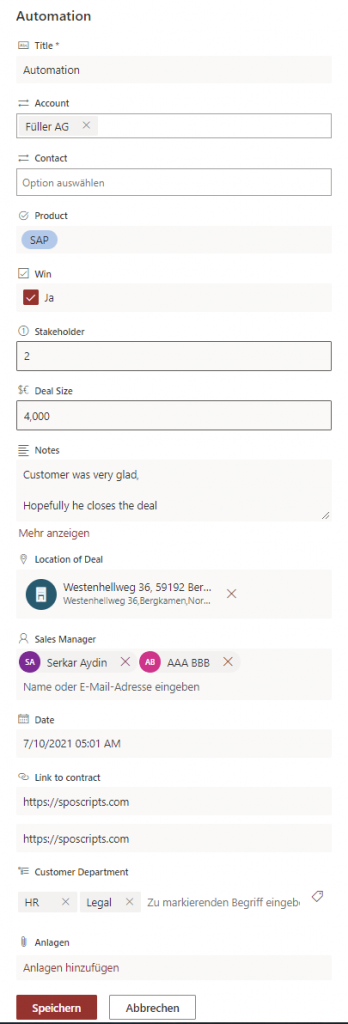
I want to add new oppurtunities as items to my sales list. The aim is to add all values for this various items.
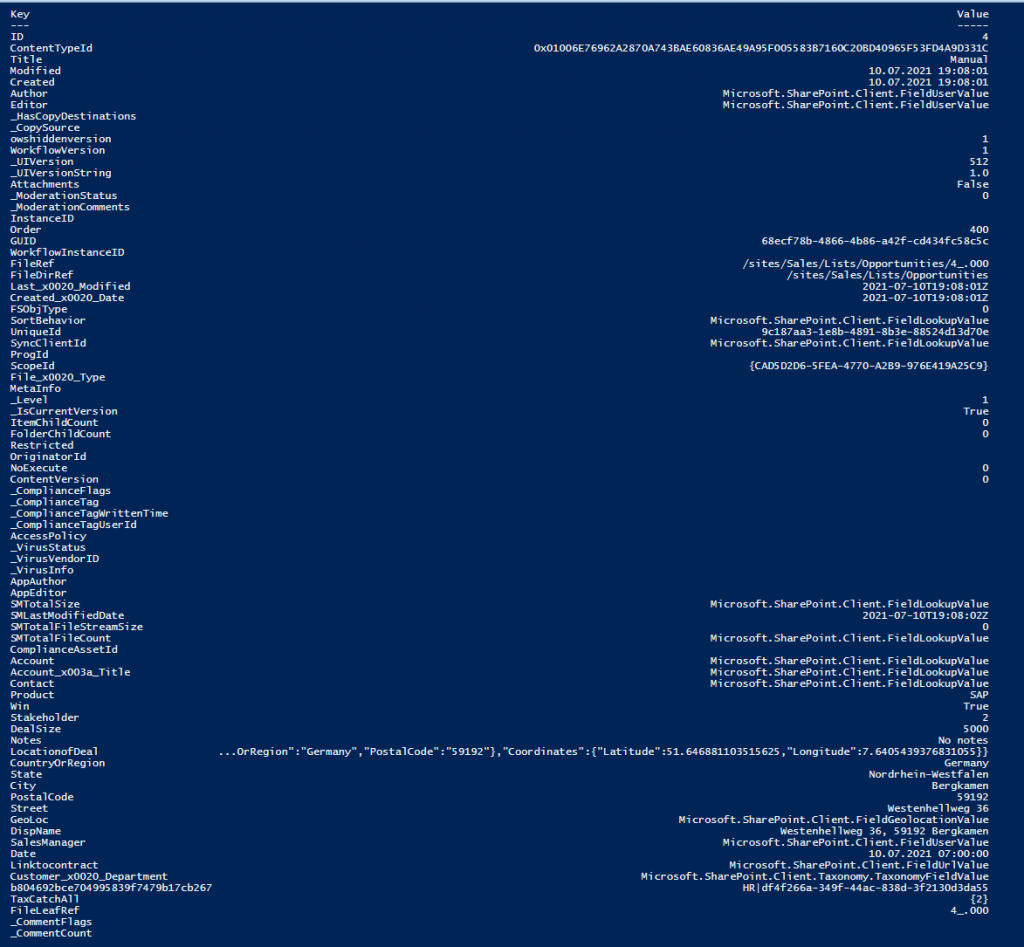
Step 3 – Get the internal field values of your list
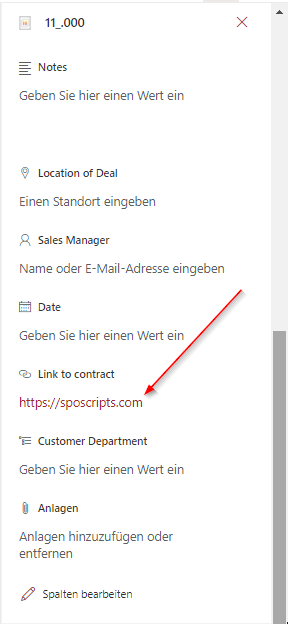
In order to code according to the right syntax, you have to know the internal name of the columns. To do this, checkout the post: Getting FieldValues of Items – SPO Scripts
So in this case I am getting the last item and retrieving the field values.
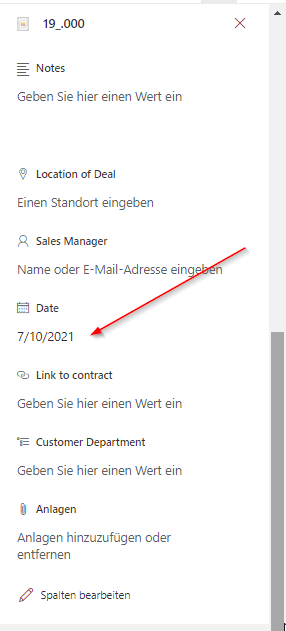
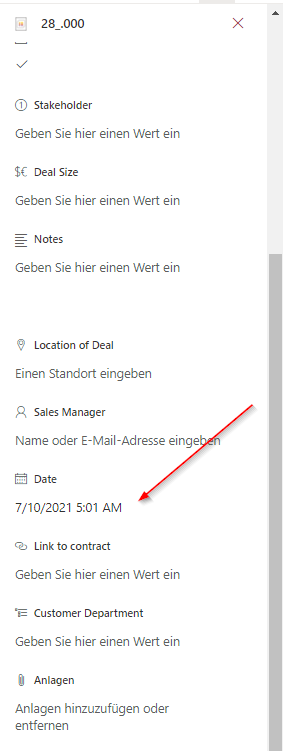
Caution: You have to consider that the date, you have entered is your timezone. The date will be parsed and transfered to universal time. If you want it in your time, you have to add the amount of hours depending on your timezone offset.
I live in Germany, so I add a offset of 2 hours (summer time).
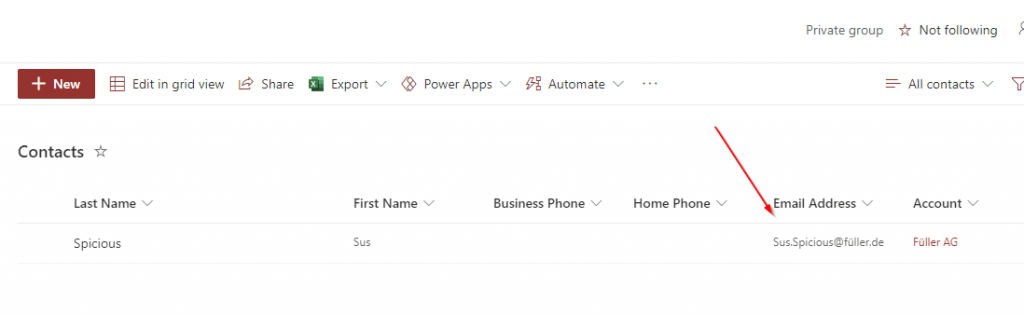
First you got to determine the ID of the value, which you want to lookup in the other list. After determining it, you can add the looked up attribute to your item.
If you are using SharePoint and want to ensure, that your end users make use of your templates in SharePoint, you can make use of content types, to use word and excel templates in SharePoint.
Prerequisites
If you want to create use templates in your across multiple SharePoint sites, you need access to the SharePoint Admin center otherwise you just can create it for single sites.
You can use templates for word and excel files, which don’t have macros. If you have macros in your templates, you cannot use them as template for your content type.
What are content types?
You can imagine a content type as an object with meta data, which describes an object.
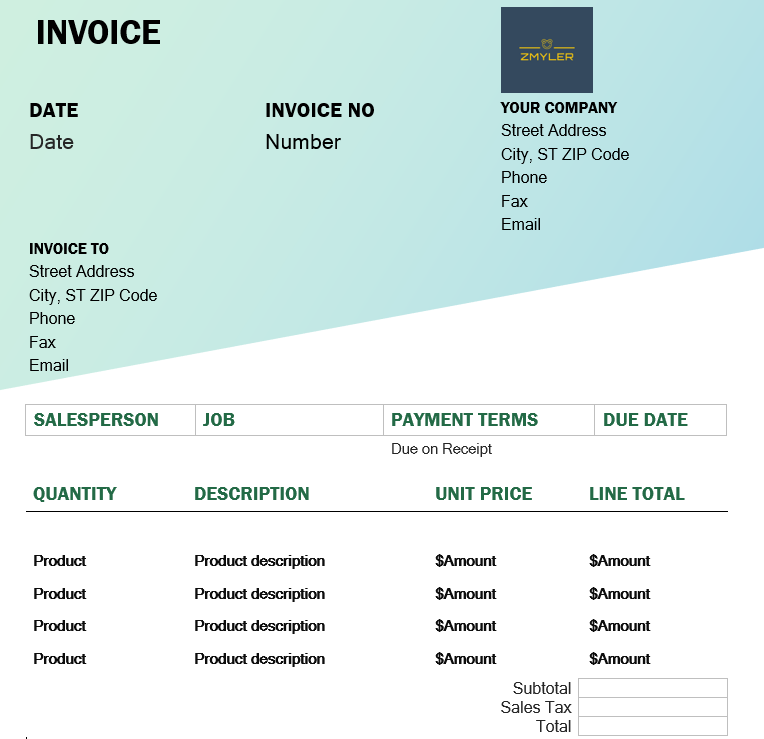
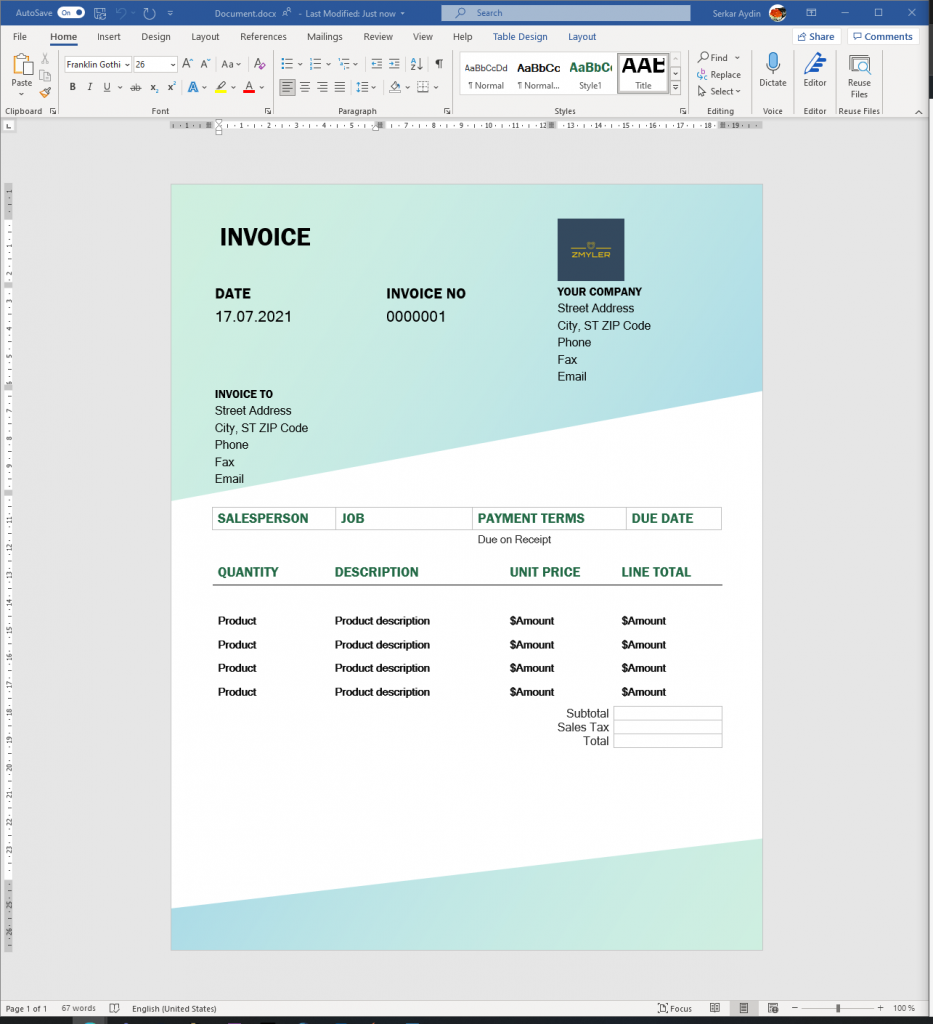
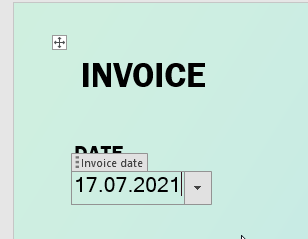
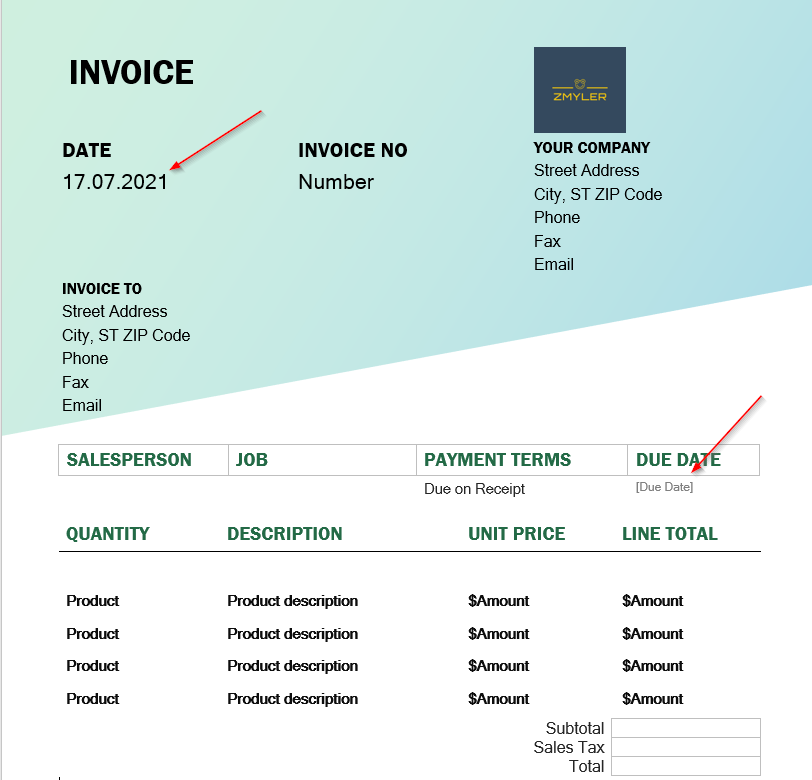
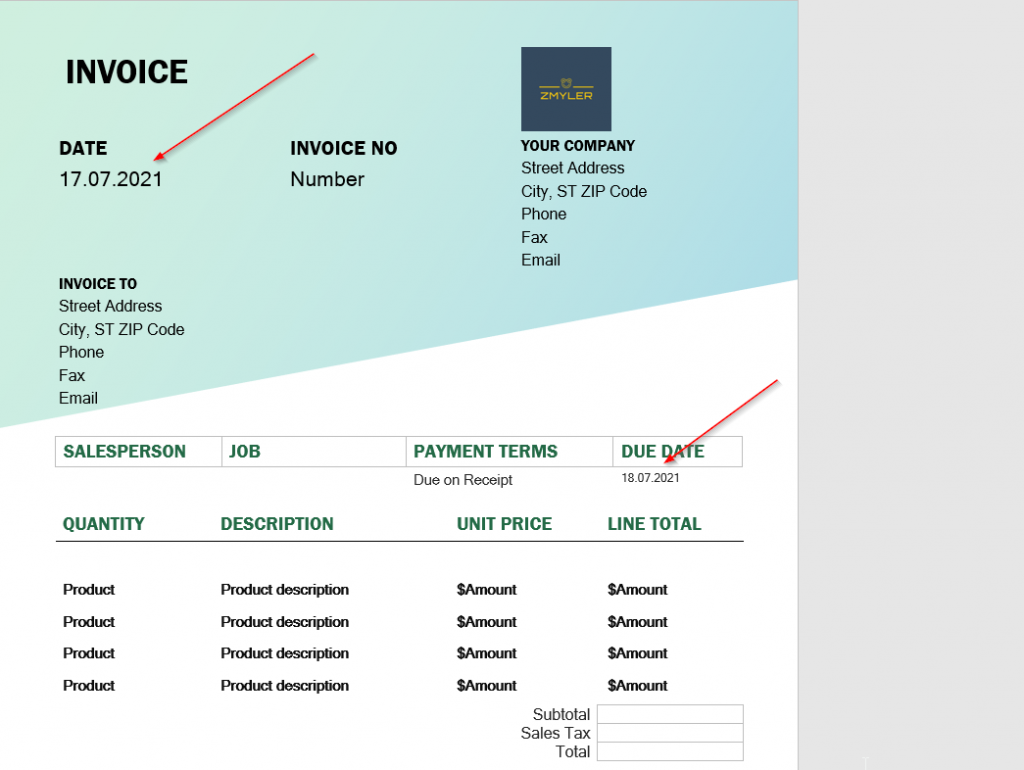
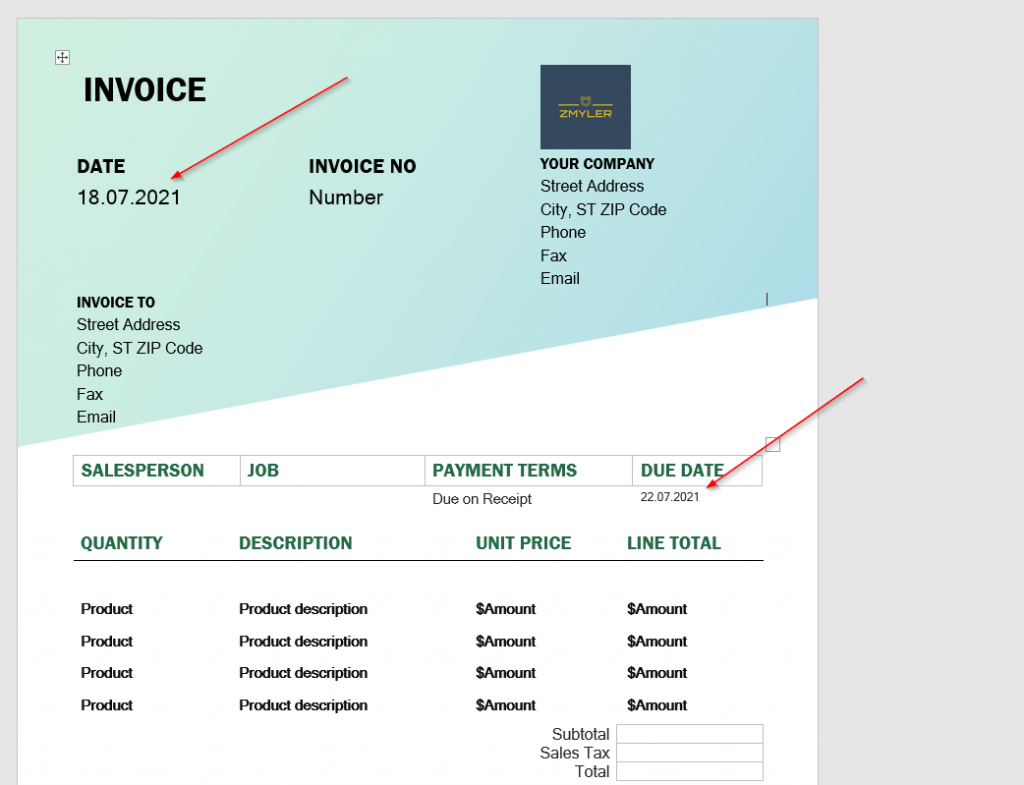
Example: invoice.
Meta data for an invoice are e.g. invoice date and due date.
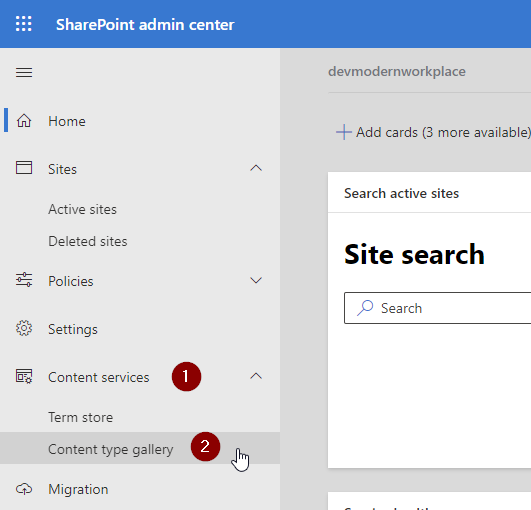
I will show you how to configure content types in your content type hub, so you can make use of word and excel templates in SharePoint!
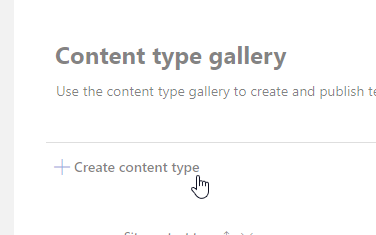
Create a template
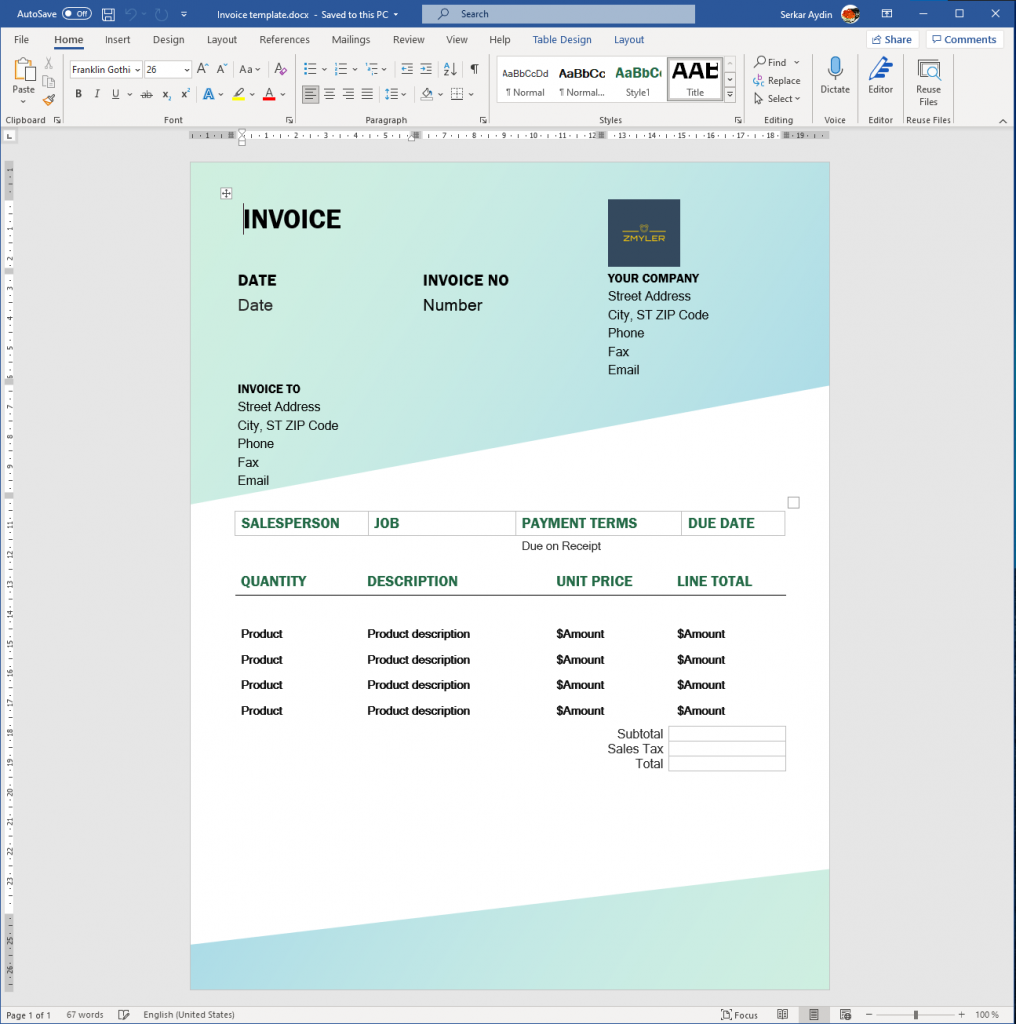
Before we start to use templates in SharePoint, we have to define a template. For our invoice, I took a template of Microsoft.
Give it a name, optionally a description define a category and set document content types as parent category and document as content type.
I chose to locate my content type invoice in the new category “DevModernWorkplace” category. You can also use the exisiting category document content types category. I would recommend a new category, so you see all your custom content types at one place.
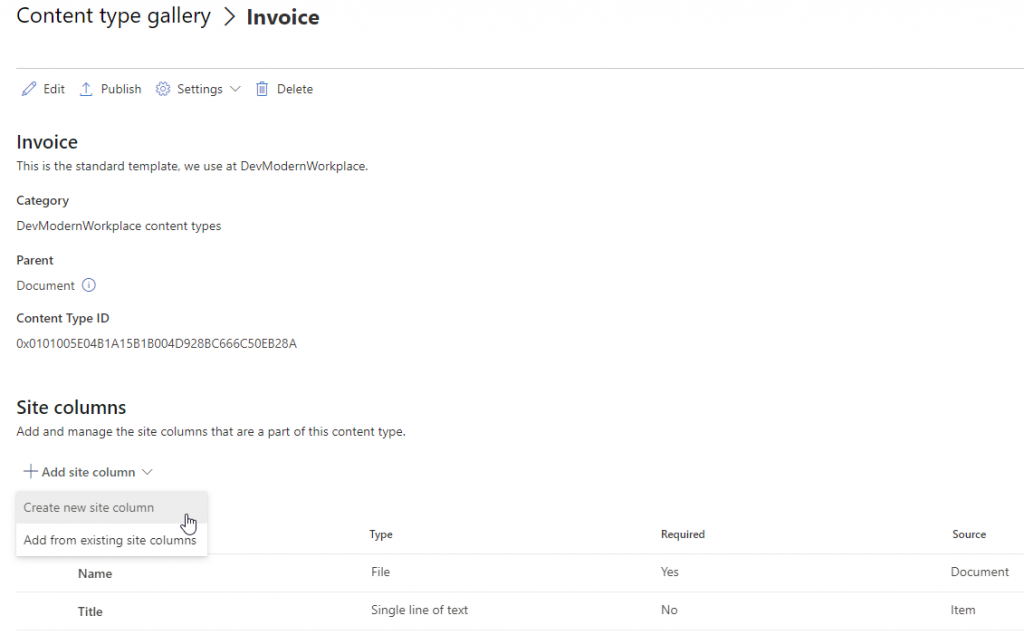
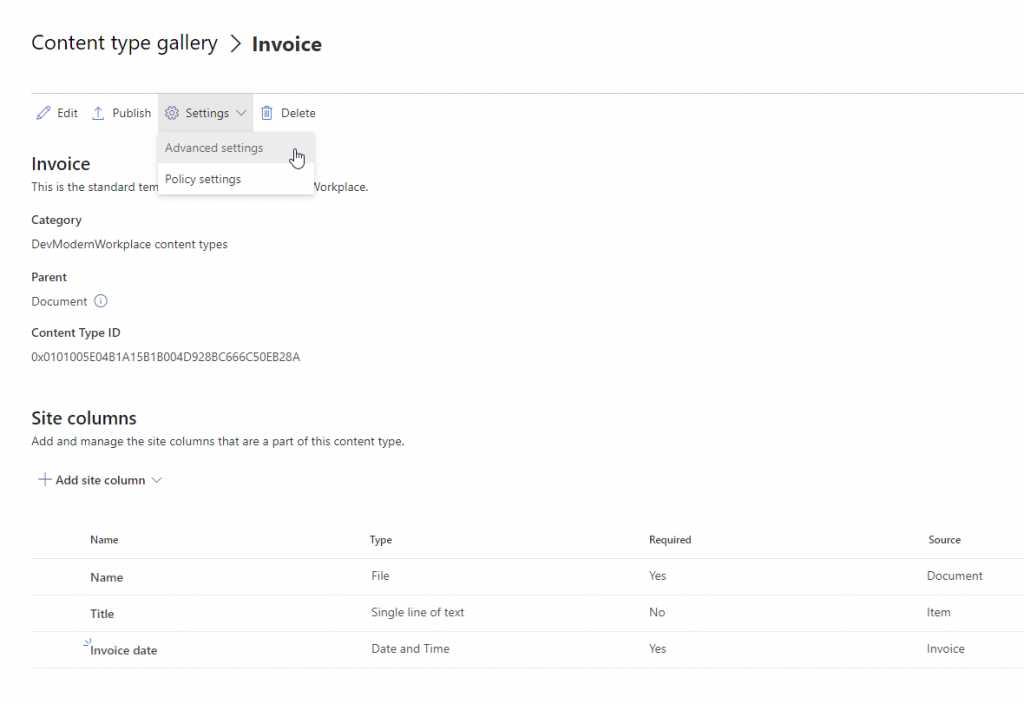
After your content type is created, I would recommend to add site columns. These site columns will show up in the library, where you will use this content type.
Add site columns to content type
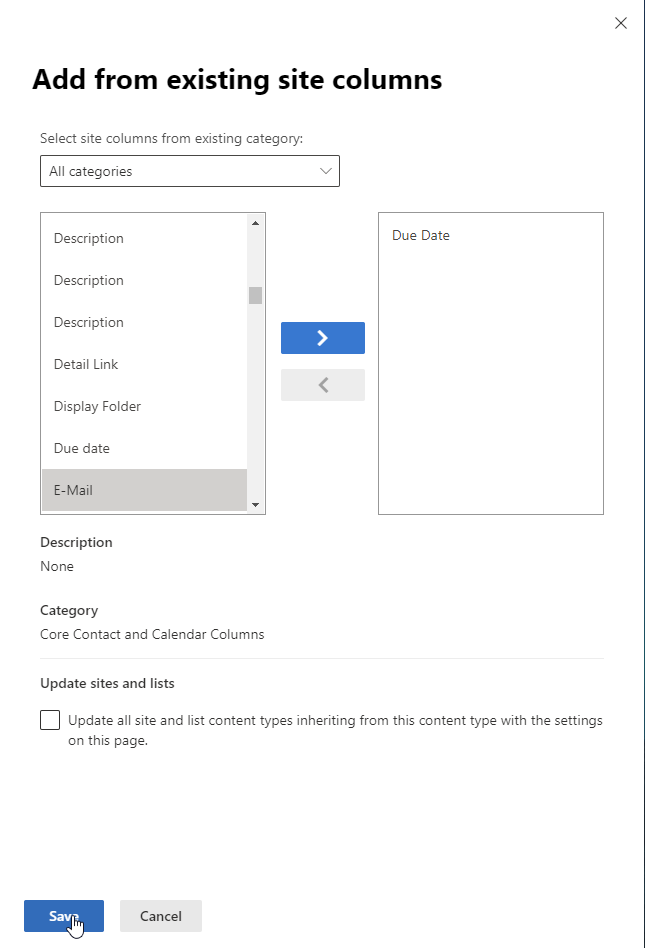
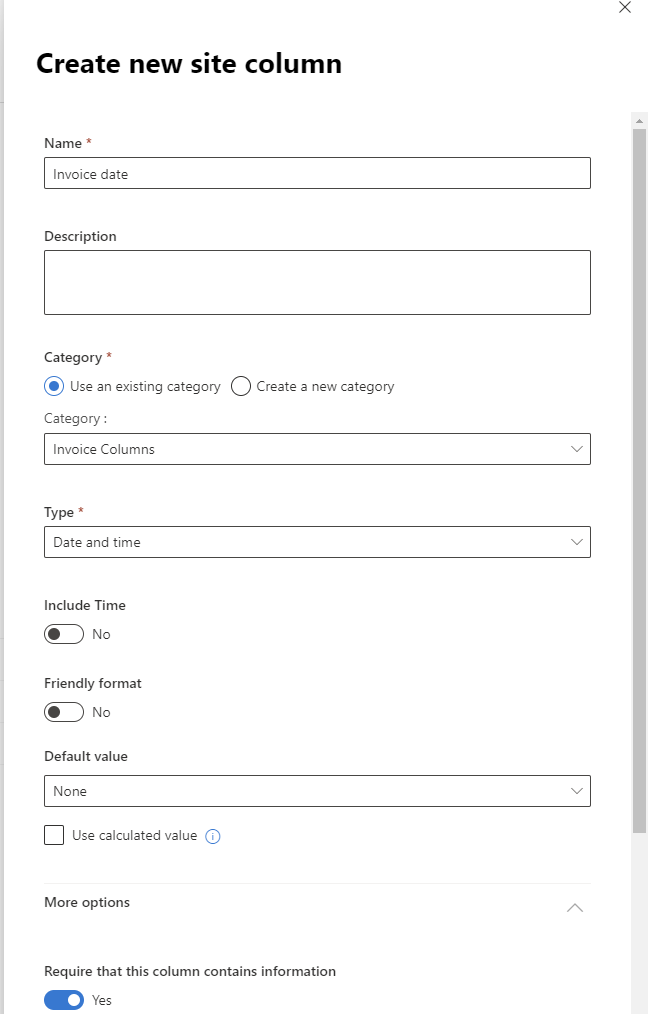
I have added the meta data due date from the existing site columns and added invoice date as new site columns and added the new site column to the new dedicated category “Invoice Columns”.
Add existing columnCreate new site column
Add template to content type
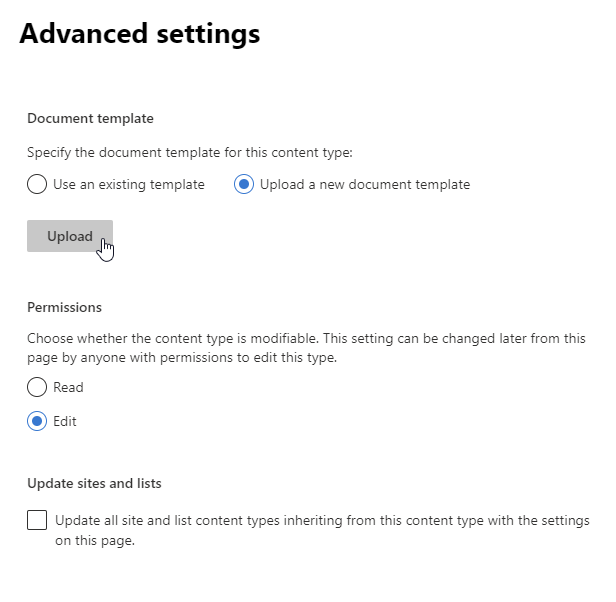
Now you can add your previously created template to your content type. Click on Settings and then on Advanced settings.
Click on upload a new document template and browse to your template. After selecting it, save it.
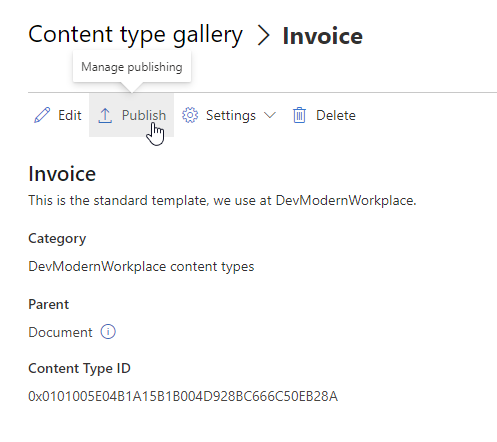
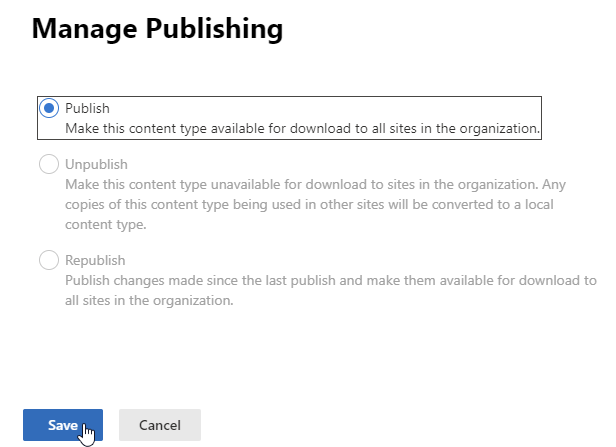
Publish content type
After adding the template, publish your content type.
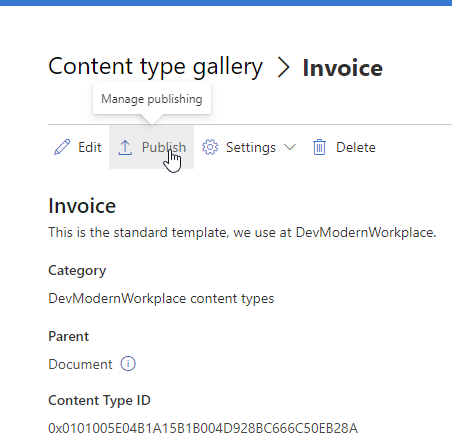
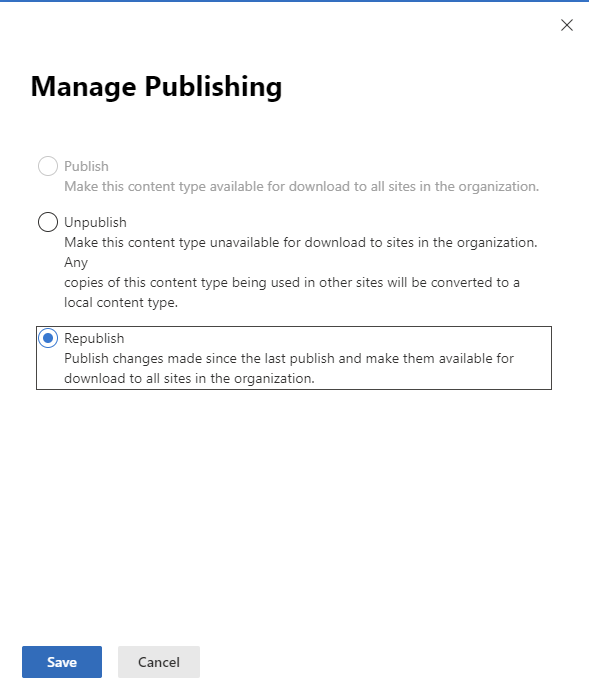
Republish content type
If you already published your content type, click on Publish.
Click on Republish
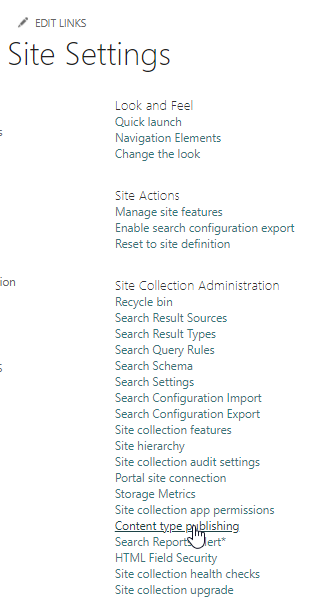
Switch to the site, where you have added the content type and visit the site settings. I am switching back to the sales site.
Click on Content type publishing.
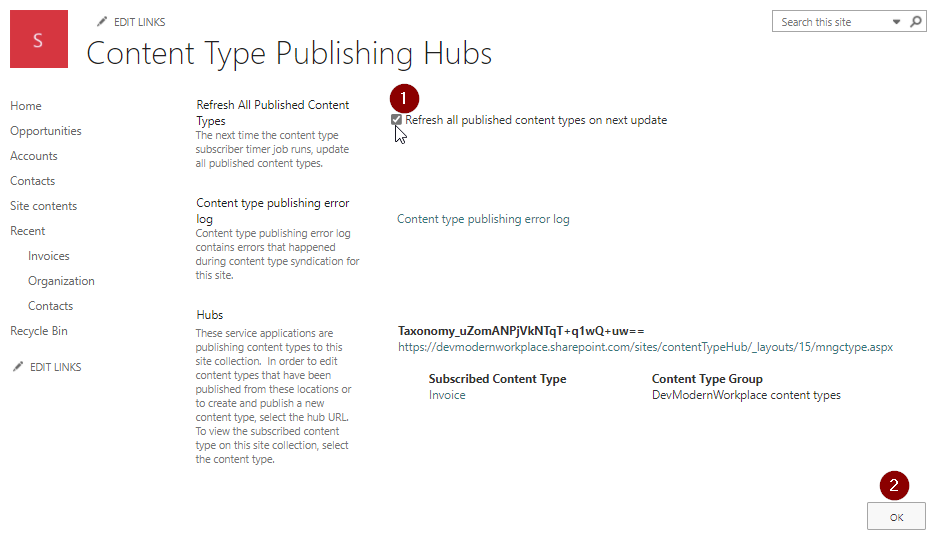
Check Refresh all published content types on next update and click on OK.
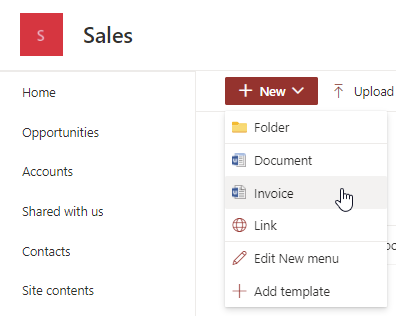
Add content type to your list
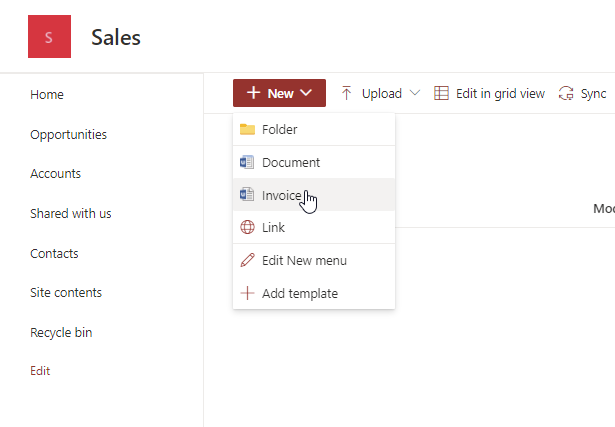
I have added a list invoices to the demo site and as you can see the default content types are configured.
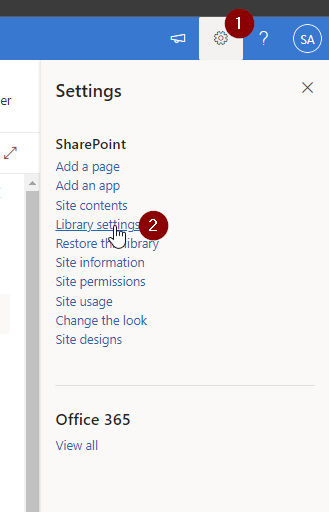
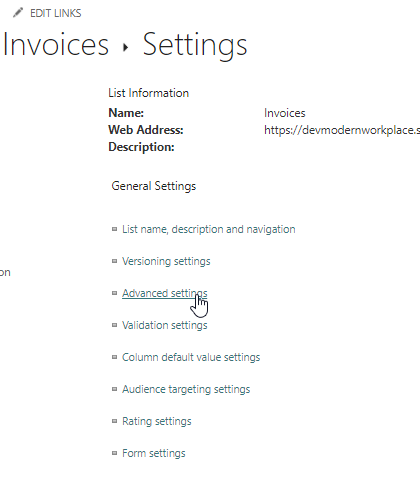
In order to add the invoice template, click on the gear -> Library settings.
Click on Advanced settings
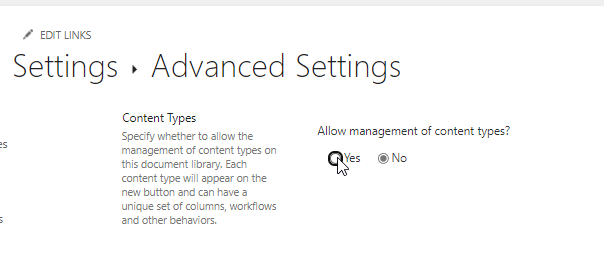
Set Allow management of content types? to Yes, scroll down to “Ok” to save your settings.
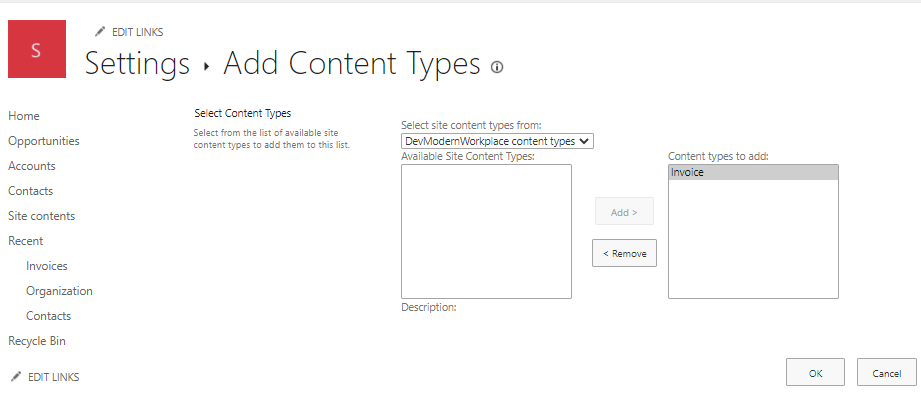
Add your content type by clicking on Add from existing site content types
If you don’t see your content type, ensure that you have published the content type and if you have published it, wait 5-10 minutes.
After confirming with OK, you can see the invoice content type
Bonus: Adding Metadata to your template
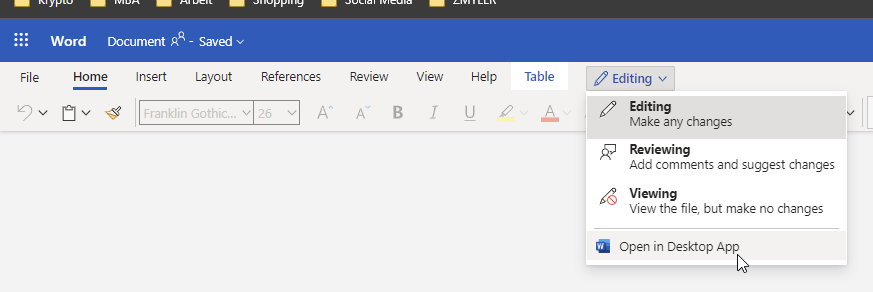
If you want to add metadata to your Word/ Excel template, create a document with your configured content type.
Click on editing -> Open in the Desktop App
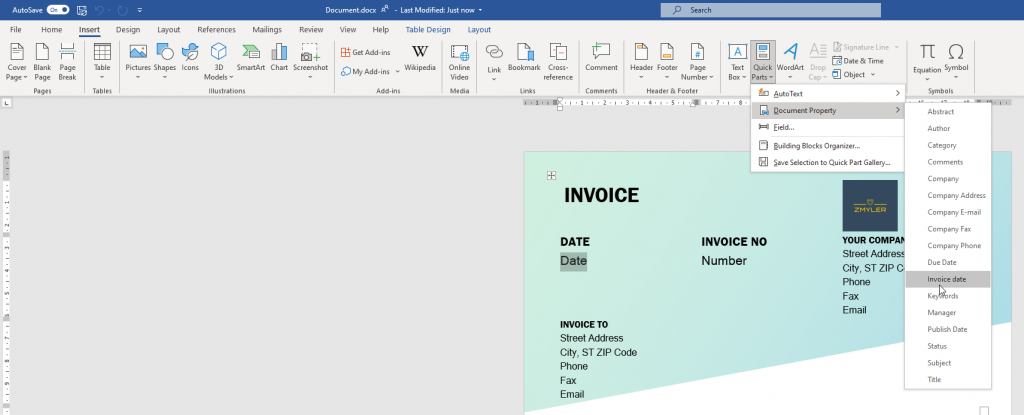
Mark the area, where you want to add the metadata.
Click on tab Insert -> Quick Parts -> Document Property -> “Your Metadata”
Howdy guys, sometimes we create ton of sites just for testing. A clean tenant is a must for an efficient management. Have you ever removed sites by hand? It took me at least 18 seconds to remove ONE site restless by hand. Come on, there MUST be a way to do it faster. In this article I want to show you how you can remove SharePoint sites fastly by using Out-GridView.
Step 1 – Connect to SharePoint Online with PowerShell
In order to remove SharePoint Sites fastly, we connect to our admin Site with PNP PowerShell. Basically we make use of cmdlets handled in this article:
After connecting, I basically make use of Out-GridView -PassThru, to pass my selected sites for deletion. If you are not familiar with Out-GridView check following article. It will help definitelly:
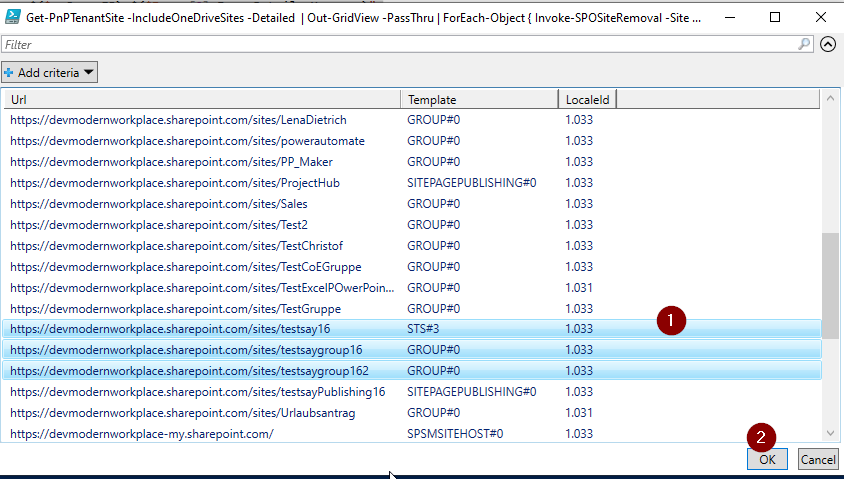
Get-PnPTenantSite -IncludeOneDriveSites -Detailed  | Out-GridView -PassThru | ForEach-Object {

    if ($_.Template -eq "GROUP#0")
    {
        try
        {
            Remove-PnPMicrosoft365Group -Identity $_.GroupID
            Write-Host "Removed M365 Group $($_.GroupID)" -ForegroundColor Green
        }
        catch
        {
            Write-Error "Could not remove M365 Group $($_.GroupID) $($Error[0].ErrorDetails.Message)"
        }

    }
    else
    {
        try
        {
            Remove-PnPTenantSite -Url $_.Url  -Force -ErrorAction Stop
            Write-Host "Removed Site $($_.URL)" -ForegroundColor Green
        }
        catch
        {
            Write-Error "Could not remove Site $($Error[0].ErrorDetails.Message)"
        }
    }
}
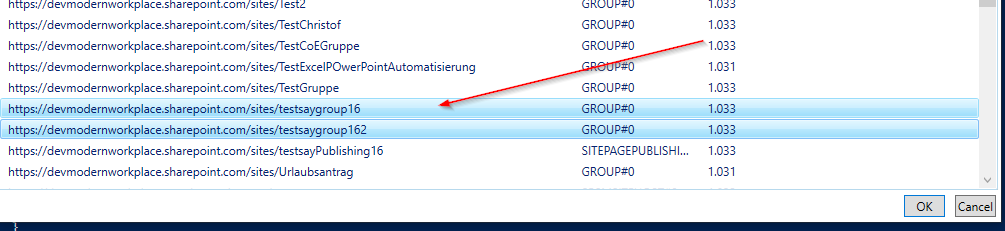
So what will happen now? A popup will show up, where you can select the sites, which you don’t want to use. As you can see, I marked 3 sites. After clicking okay, it will be removed, but you still we see them in the recycle bin – so no need for panic ;).
If you want to remove the sites without residue, you have to make use of following cmdlets. Sites, which belong to the a M365 Group will be put in recycle bin anyways.
Get-PnPTenantSite -IncludeOneDriveSites -Detailed  | Out-GridView -PassThru | ForEach-Object {

    if ($_.Template -eq "GROUP#0")
    {
        try
        {
            Remove-PnPMicrosoft365Group -Identity $_.GroupID
            Write-Host "Removed M365 Group $($_.GroupID)" -ForegroundColor Green
        }
        catch
        {
            Write-Error "Could not remove M365 Group $($_.GroupID) $($Error[0].ErrorDetails.Message)"
        }

    }
    else
    {
        try
        {
            Remove-PnPTenantSite -Url $_.Url  -Force -ErrorAction Stop -SkipRecycleBin
            Write-Host "Removed Site $($_.URL)" -ForegroundColor Green
        }
        catch
        {
            Write-Error "Could not remove Site $($Error[0].ErrorDetails.Message)"
        }
    }
}
Thats it! The three sites I have marked, are deleted now. In my case even restless.
Step 3 – Controll your Action
Controlling this, can be done by following cmdlet:
Rome was not build on a day so isn‘t our taxonomy. Business requirements change frequently, so we have to adapt our systems to support these changes. This article will show you how to change term labels ins SharePoint Online and what to consider.
You can change term labels in SharePoint Online easily. You just have to consider the term set propagation procedure. I‘ve made some interesting experience, which I would share with you.
Problem
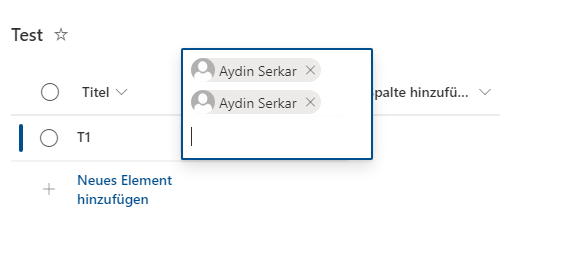
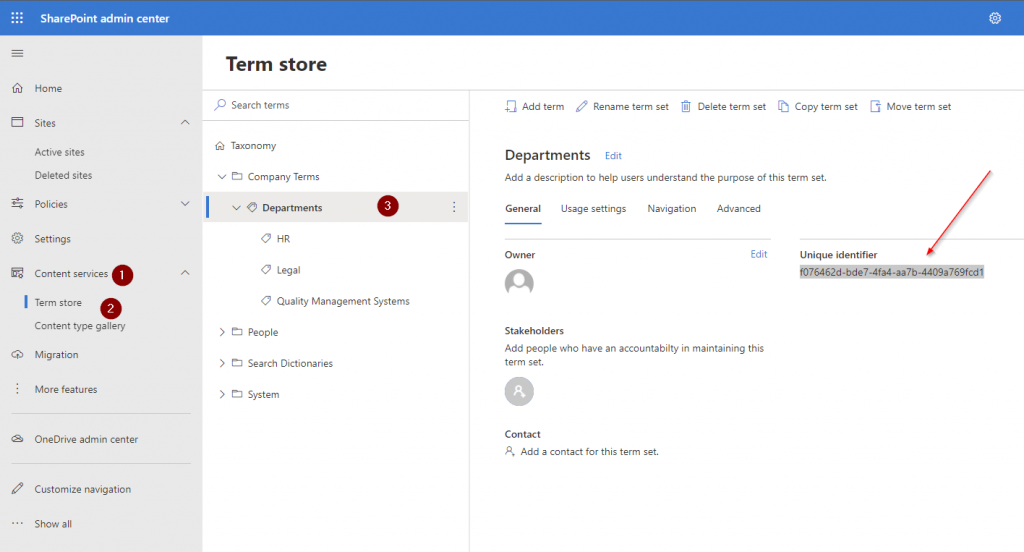
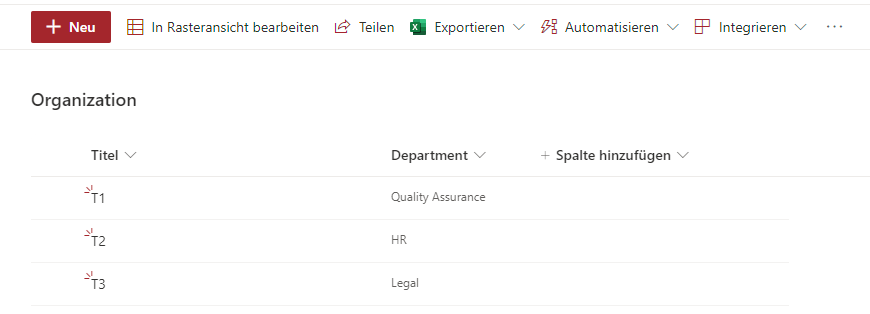
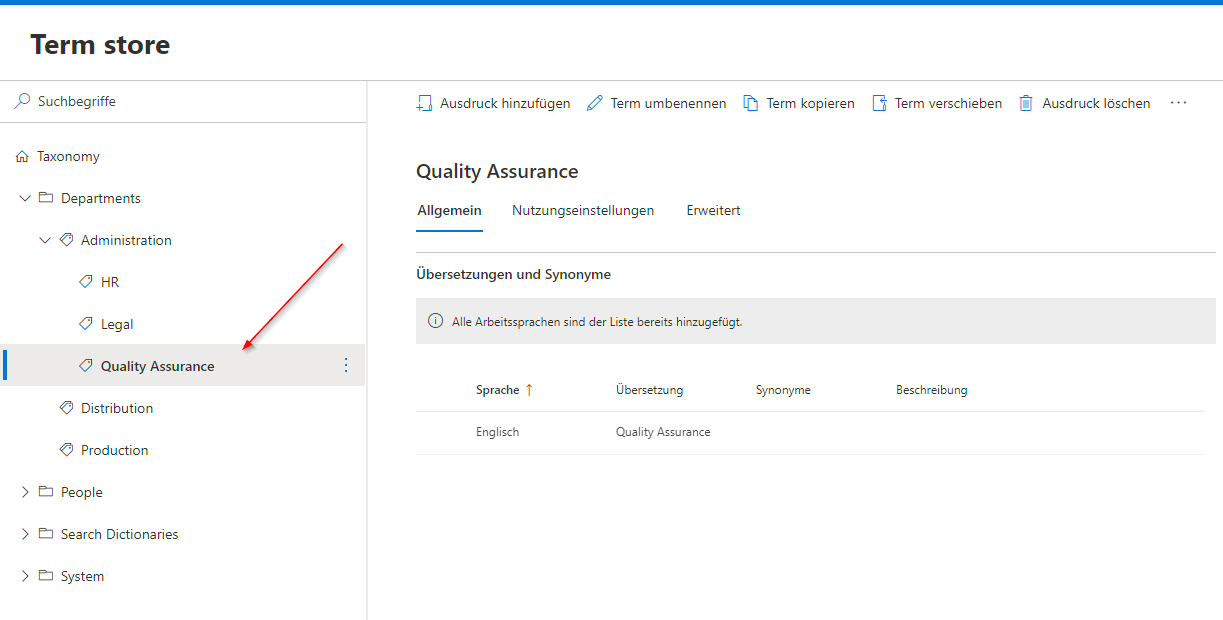
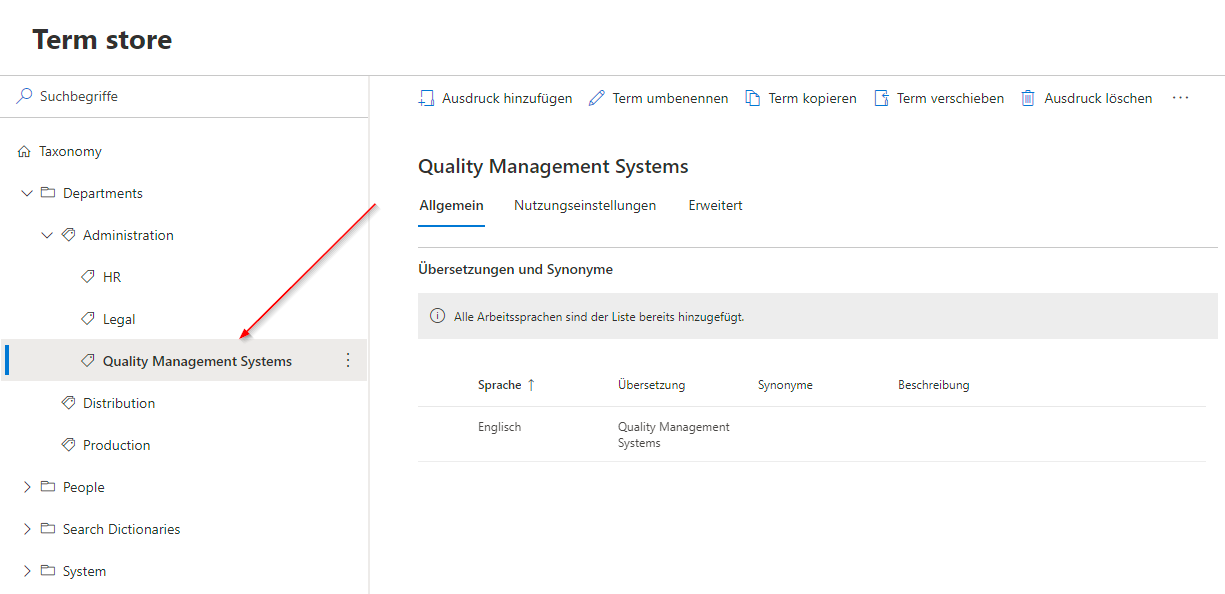
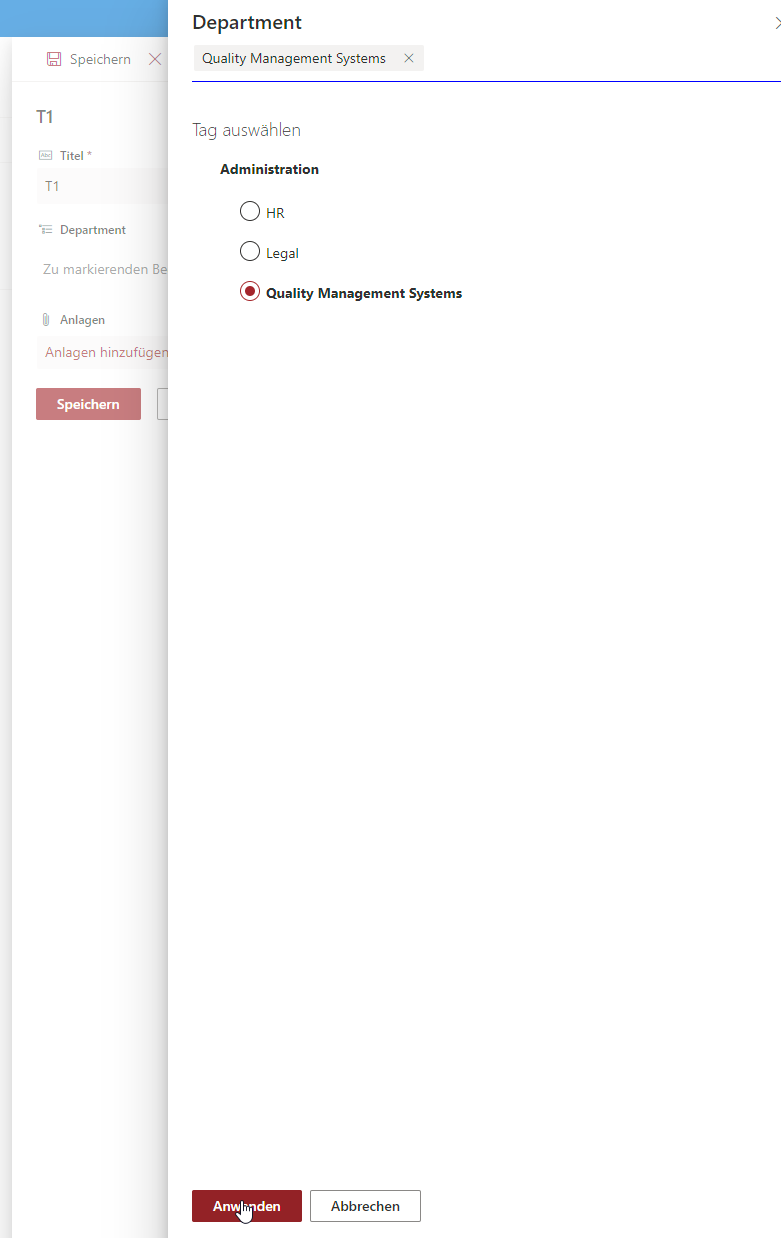
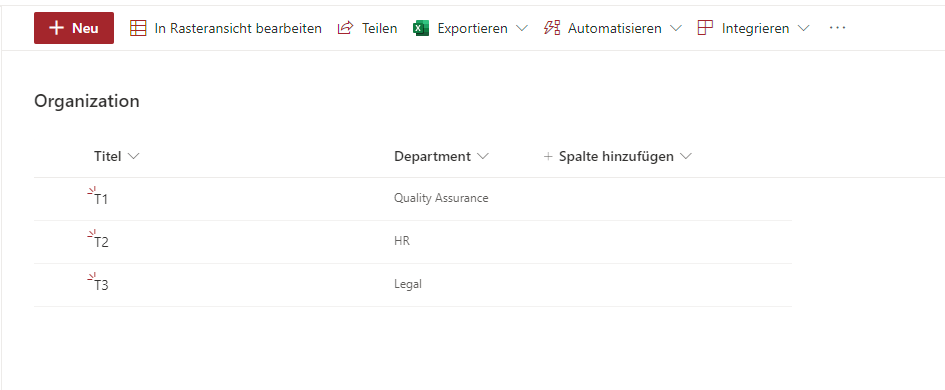
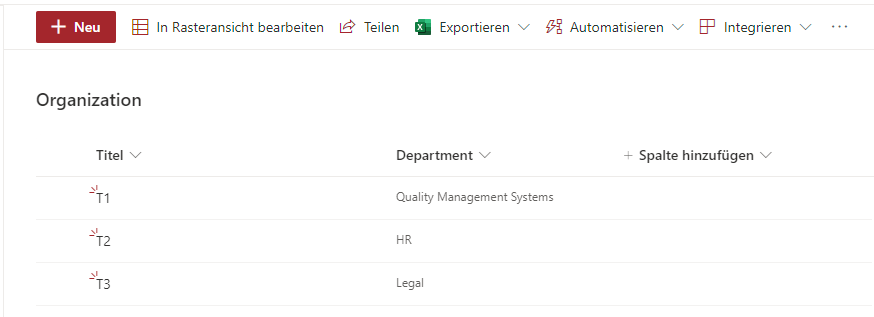
Following situation occurs: the term label of a customer is changing from “Quality Assurance” to “Quality Management Systems”. I changed the term label in the term store, but noticed, that the items and file metadata did not change in the SharePoint List.
I changed the term “Quality Assurance” to “Quality Management Systems”.
As you can see, the term is not updating in the list ‘Organization’
Even when editing the item, the term label stays the old one. Neither my customer, nor did understand, why it did not change.
How terms are propagated to sites
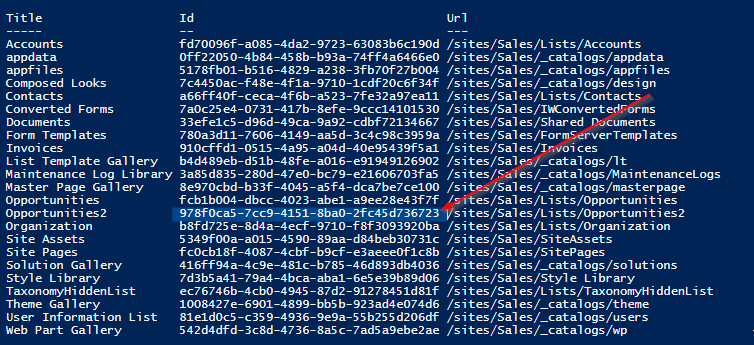
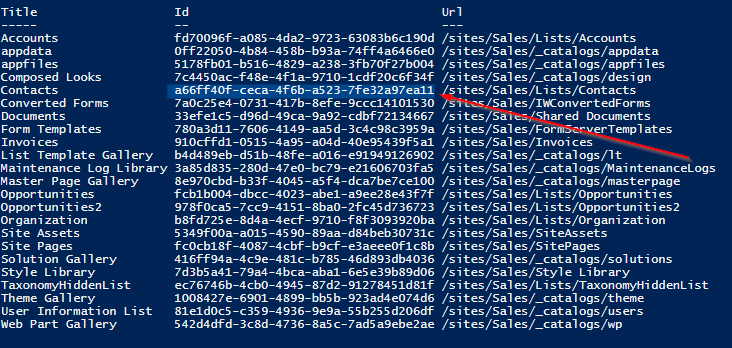
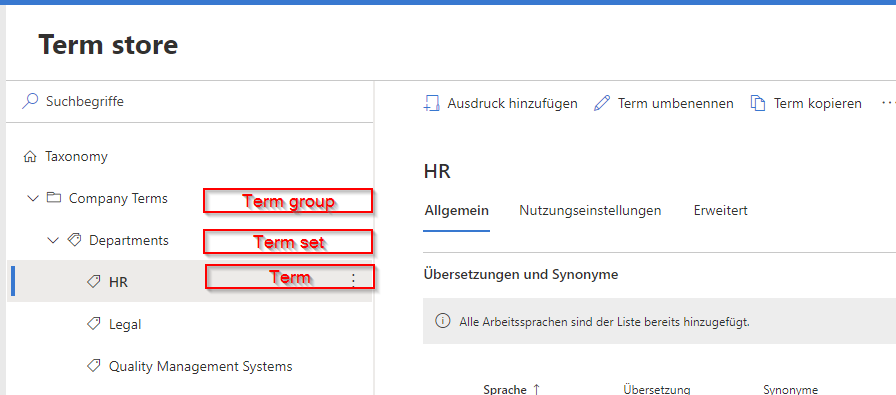
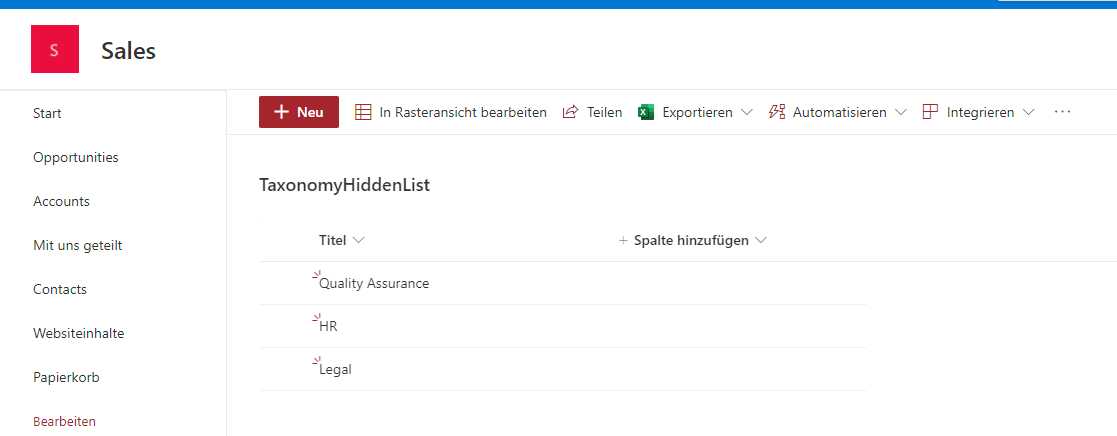
Everytime you using terms by adding a termset to a column, the terms are getting stored in the hidden taxonomy list of a site. You can find the list under following URL:
As you can see, the term is still “Quality Assurance”. The Taxonomy Update Scheduler timer job will update the taxonomy list and also the term within one hour.
If you change one term label, the procedure is like this:
You change the term in the term store
The Taxonomy Update Scheduler timer job will update the taxonomy list and also the term within one hour.
Your items and files are getting are up to date with the newest term label
Workaround
Caution: This workaround should only be used if the change have to be fulfilled urgently.
If you have to change the term label urgently, you can remove the item from the TaxonomyHiddenList.
After removing the item, in the taxonomy hidden list, you can see the change of the term label took effect in the list:
Conclusio
When you change term labels in SharePoint, you have to be patient. The timer job will do it’s work and if not, make use of the workaround.
We all can Imagine the scenario. You create sites in sharepoint and now you want to edit multiple sites afterwards with PowerShell. In order to be safe, we have to check, wether an connection exists and if yes to disconnect the current connection to have a clean processing of the sites. In this article I want to show you how can achieve dealing with existing SharePoint connections. If you don’t know how to connect to SharePoint Online, check the article.
Symptoms – How I tried it first
I tried to check the connection by a normal if query, but as you can see it throws everytime an error, so the script will be halted under normal circumstances. Changing the ErroActionPreference is something you could do for sure, but I would not recommend it, if you want to handle other upcomming potential errors of the API. So as you can see dealing with existing SharePoint connections in terms of checking, wether an connection exists, is not that easy.
if ((Get-PnPConnection) )
{
    Write-Host "Connection found"
}
Get-PnPConnection : The current connection holds no SharePoint context. Please use one of the Connect-PnPOnline commands which uses the -Url argument to connect.
In Zeile:2 Zeichen:6
+ if ((Get-PnPConnection) )
+      ~~~~~~~~~~~~~~~~~
    + CategoryInfo          : NotSpecified: (:) [Get-PnPConnection], InvalidOperationException
    + FullyQualifiedErrorId : System.InvalidOperationException,PnP.PowerShell.Commands.Base.GetPnPConnection
PS H:>>
if ((Get-PnPConnection) -ne $Null )
{
    Write-Host "Connection found"
}
Get-PnPConnection : The current connection holds no SharePoint context. Please use one of the Connect-PnPOnline commands which uses the -Url argument to connect.
In Zeile:2 Zeichen:6
+ if ((Get-PnPConnection) -ne $Null )
+      ~~~~~~~~~~~~~~~~~
    + CategoryInfo          : NotSpecified: (:) [Get-PnPConnection], InvalidOperationException
    + FullyQualifiedErrorId : System.InvalidOperationException,PnP.PowerShell.Commands.Base.GetPnPConnection
PS H:>>
if ((Get-PnPConnection|out-null) -ne $Null )
{
    Write-Host "Connection found"
}
Get-PnPConnection : The current connection holds no SharePoint context. Please use one of the Connect-PnPOnline commands which uses the -Url argument to connect.
In Zeile:2 Zeichen:6
+ if ((Get-PnPConnection|out-null) -ne $Null )
+      ~~~~~~~~~~~~~~~~~
    + CategoryInfo          : NotSpecified: (:) [Get-PnPConnection], InvalidOperationException
    + FullyQualifiedErrorId : System.InvalidOperationException,PnP.PowerShell.Commands.Base.GetPnPConnection
PS H:>>
if ((Get-PnPConnection -ErrorAction SilentlyContinue) -ne $Null )
{
    Write-Host "Connection found"
}
Get-PnPConnection : The current connection holds no SharePoint context. Please use one of the Connect-PnPOnline commands which uses the -Url argument to connect.
In Zeile:2 Zeichen:6
+ if ((Get-PnPConnection -ErrorAction SilentlyContinue) -ne $Null )
+      ~~~~~~~~~~~~~~~~~~~~~~~~~~~~~~~~~~~~~~~~~~~~~~~
    + CategoryInfo          : NotSpecified: (:) [Get-PnPConnection], InvalidOperationException
    + FullyQualifiedErrorId : System.InvalidOperationException,PnP.PowerShell.Commands.Base.GetPnPConnection
Solutions
Try Catch Solution
In order to handle this situation, you have to catchup the error.
The snippet tries to check wether there is an connection and if there is one, it will proceed and disconnect it. After disconnecting it I have set the variable $connection to $null, so I can process it later on.
BONUS 1: Invoke-PNPConnection with Credential object (No MFA enforcement)
A function which handles the whole procedure of cutting of the connection and reconnecting, makes the handling easier. In this case I have added an additional check of the contents of lists, because sometimes you do connect, but experience that the webserver is not ready yet – basically you get an 403 FORBIDDEN message in PowerShell.
NOTE: This will only work If your user has no MFA enforcement. If you have MFA enabled, I have another function for you.
Most of our times, we just need just a bunch of items, to export them or to change their values. This post should help you to show, how to handle filtering for SharePoint items. Besides filtering for SharePoint items with Where-Object, you can also make use of CAML (Collaborative Application Markup Language), which lets you get only the items, you need. It might increase the performance of your queries, when you are dealing with large amounts of data.
Where are the items, which I am looking for?
Preqrequistes
If we want to achieve filtering for SharePoint items, with a CAML query, we have to fulfill following prerequisites:
Permissions to access the list
Installed Module PNP.Powershell. If you don’t know how to, check the post.
Connection to the site via PNP.PowerShell. If you don’t know how to, check the post.
Considerations
You should take care of the case sensitivity of operands and column names
You should take care of the <view> part. Sometimes it is needed, sometimes not – so I would rely on the examples.
Query Schema
A query is structured like this
"<View><Query><Where><LOGICAL OPERATOR><FieldRef Name='INTERNAL NAME OF COLUMN'/><Value Type='VALUE TYPE'>VALUE</Value></LOGICAL OPERATOR></Where></Query></View>"
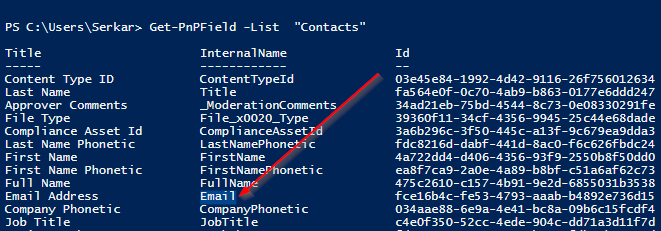
You can find the internal name of columns in two ways:
In order to filter by query paramter, you have to define a filter query, depending on your datatype (string, integer, boolean..) you have to choose a different query value type.
My blog would not keep it’s promise, If you would not find examples, which give you a fast way to adapt the scripts, so here we go!
In my example, I am using my demo opportunities list. I have marked the names of the columns, the value types, the operands and the actual values bold. Mostly I am using the logical operator “eq”, but I think if you got the basic concept of this, you can adapt it to your solution easily and if not, we will find a way together.
Example for boolean
If you want to find items with TRUE values, you have to enter 1. For FALSE values, you have to make use of 0.
Get-PnPListItem : Mindestens ein Feld ist nicht richtig installiert. Wechseln Sie zur Listeneinstellungsseite, um diese Felder zu löschen.
In Zeile:1 Zeichen:1
+ Get-PnPListItem -List "Opportunities" -Query "<View><Query><Where><Gt ...
+ ~~~~~~~~~~~~~~~~~~~~~~~~~~~~~~~~~~~~~~~~~~~~~~~~~~~~~~~~~~~~~~~~~~~~~
    + CategoryInfo          : WriteError: (:) [Get-PnPListItem], ServerException
    + FullyQualifiedErrorId : EXCEPTION,PnP.PowerShell.Commands.Lists.GetListItem
Error message in english
Get-PnPListItem : One or more field types are not installed properly. Go to the list settings page to delete these fields.
In Zeile:1 Zeichen:1
+ Get-PnPListItem -List "Opportunities" -Query "<View><Query><Where><Gt ...
+ ~~~~~~~~~~~~~~~~~~~~~~~~~~~~~~~~~~~~~~~~~~~~~~~~~~~~~~~~~~~~~~~~~~~~~
    + CategoryInfo          : WriteError: (:) [Get-PnPListItem], ServerException
    + FullyQualifiedErrorId : EXCEPTION,PnP.PowerShell.Commands.Lists.GetListItem
Cause
You did not care of the case sensitivity of the column name